EasyManua.ls Logo

Godox X2T-S TTL - User Manual

Godox X2T-S TTL
16 pages
Print Icon
To Next Page IconTo Next Page
Loading...
Instruction Manual
TTL

TTL Wireless Flash Trigger
705-X2TS00-07
Made in China

: 2
: 0755-29609320(8062) : 0755-25723423 : godox@godox.com
godox.com
Add: Building 2, Yaochuan Industrial Zone, Tangwei Community, Fuhai Street, Bao’an District,
Shenzhen, China Tel: +86-755-29609320(8062) Fax: +86-755-25723423 E-mail: godox@godox.com
GODOX Photo Equipment Co., Ltd.
Question and Answer IconNeed help?

Do you have a question about the Godox X2T-S TTL and is the answer not in the manual?

Summary

Warning

Names of Parts

Battery

Setting the Flash Trigger

Output Value Settings

How to adjust power output levels in M mode for individual or all groups.

Flash Exposure Compensation Settings

Adjusting Flash Exposure Compensation (FEC) in TTL mode.

C.Fn: Setting Custom Functions

Detailed overview of various customizable functions and their settings.

Multi Flash Settings (Output Value, Times and Frequency)

Configuring multi-flash output, frequency, and duration.

Shutter Sync Settings

Setting up high-speed sync and second-curtain sync.

Mode Setting

Instructions for switching between TTL, M, and MULTI flash modes.

Using the Flash Trigger

As a Wireless Camera Flash Trigger

Step-by-step guide for using the trigger with camera flashes.

As a Wireless Outdoor Flash Trigger

Instructions for using the trigger with outdoor flashes.

Connect to Smartphone through Bluetooth

Steps to connect the trigger to a smartphone via Bluetooth.

Technical Data

Attentions

Overview

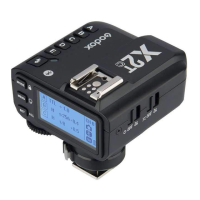
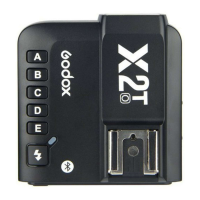
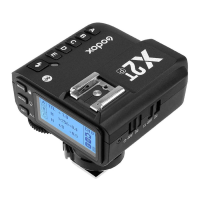
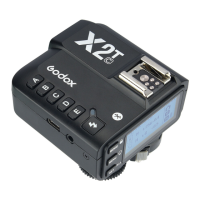
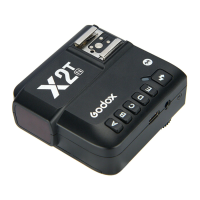
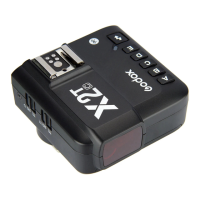
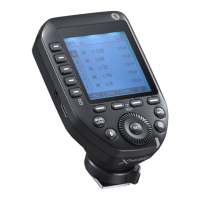
This document describes the Godox X2T-S TTL Wireless Flash Trigger, a device designed for Sony cameras to control Godox flashes with the X system, including camera flashes, outdoor flashes, and studio flashes. It can also control Sony original speedlites when coordinated with an X1R-S receiver. The flash trigger offers multi-channel triggering, stable signal transmission, and sensitive reaction, providing photographers with flexibility and control over their strobist setups. It is compatible with hotshoe-mounted Sony series cameras and cameras with PC sync sockets. The X2T-S supports high-speed synchronization up to 1/8000s, depending on the camera's maximum shutter speed.

Technical Specifications:

  • Model: X2T-S
  • Compatible Cameras: Sony cameras (TTL autoflash), supporting cameras with PC sync sockets.
  • Compatible Smartphones (for sync flash in M mode): iPhone, Huawei, Samsung (refer to compatible smartphone models for details).
  • Power Supply: 2*AA batteries.
  • Wireless Flash Transmission Range (approx.): 0-100m.
  • Built-in Wireless: 2.4G.
  • Modulation Mode: MSK.
  • Channel: 32.
  • Wireless ID: 01-99.
  • Group: 5.
  • Display: Large LCD panel, backlighting ON or OFF.
  • Dimension/Weight: 72x70x58mm/90g.
  • 2.4G Wireless Frequency Range: 2413.0MHz-2463.5MHz.
  • Max. Transmitting Power of 2.4G Wireless: 5dbm.

Flash Exposure Control:

  • TTL Autoflash: Yes
  • Manual Flash: Yes
  • Stroboscopic Flash: Yes
  • High-speed Sync: Yes
  • Flash Exposure Compensation: Yes, ±3 stops in 1/3 stop increments.
  • Flash Exposure Lock: Yes
  • Focus Assist: Yes
  • Beeper: Yes
  • Wireless Shutter: Controls the beeper by the flash trigger. The receiver end can control camera shooting through the 3.5mm sync cord jack.
  • ZOOM Setting: Adjusts the ZOOM value by the transmitter.
  • Firmware Upgrade: Through the Type-C USB port.
  • Memory Function: Settings are stored 2 seconds after the last operation and recovered after a restart.

Usage Features:

  • Power Switch: Slide to ON to power on. Turn off when not in use to save power.
  • Automatically Enter Power Saving Mode: The system enters standby after 60 seconds of inactivity. Press any button or half-press the camera shutter (if attached to a Sony EOS camera) to wake up. This feature can be disabled in C.Fn custom settings (STBY to OFF).
  • AF Assist Beam Switch: Slide to ON to enable AF lighting. The AF assist beam turns on when the camera cannot focus and turns off when it can. AF OPT in the MENU allows setting for MILC (Mirrorless Interchangeable-Lens Camera) or DSLR (Digital Single Lens Reflex Camera).
  • Channel Setting: 32 channels (1-32). Set the transmitter and receiver to the same channel. Access via MENU > CH.
  • Wireless ID Settings: Change wireless channels and IDs (01-99) to avoid interference. Both master and slave units must have matching IDs and channels. Access via MENU > C.Fn ID.
  • Mode Setting:
    • Single Group Mode: After selecting a group, press MODE to cycle through TTL/M/--.
    • Multi-Group Mode: Press MODE to switch to MULTI mode. Select a group, then press MODE to set MULTI mode to ON or OFF.
  • Output Value Settings (M Mode):
    • Select a group, turn the select dial to change power output from Min to 1/1 in 0.3 stop increments. Confirm with SET.
    • Press ALL to adjust power output for all groups simultaneously.
    • Minimum output values can be set from 1/128 0.3 to 2.0(0.1) depending on C.Fn-Min settings and flash model (e.g., AD600 can reach 1/256).
  • Flash Exposure Compensation Settings (TTL Mode): Select a group, turn the select dial to change FEC from -3 to +3 in 0.3 stop increments. Confirm with SET.
  • Multi Flash Settings (Output Value, Times, Frequency):
    • In multi flash mode (no TTL/M icon), three lines display power output, Hz (flash frequency), and Times (flash times).
    • Press SET, turn the select dial to change power output from Min to 1/4 in integer stops.
    • Press SET again, choose Hz, and turn the dial to change flash frequency.
    • Press SET again, choose Times, and turn the dial to change flash times.
    • Short press SET to exit setting status. Short press MODE in the submenu to return to the main menu.
    • Flash times are restricted by output value and frequency, and the actual flash times are also related to the camera's shutter setting.
  • Modeling Lamp Settings: Long press MENU for 2 seconds to control ON/OFF.
  • ZOOM Value Settings: Short press MENU to enter ZOOM menu. Short press SET, turn the select dial to change ZOOM value from AUTO/24 to 200. The flash's ZOOM should be set to Auto (A) mode.
  • Shutter Sync Settings:
    • High-speed Sync: Short press MENU to enter SYNC menu. High-speed sync icon (H) is displayed.
    • Second-curtain Sync: Press MENU or shortcut Fn on Sony camera to enter Flash Mode and choose REAR flash. Set camera shutter.
  • Buzz Settings: Press MENU to enter C.Fn BEEP, press SET to choose ON/OFF.
  • Sync Socket Settings: Press MENU to enter C.Fn SYNC, press SET to choose IN or OUT.
    • IN: Sync socket enables X2T-S to trigger flash.
    • OUT: Sync socket sends trigger signals to other remote control and flash.
  • SHOOT Function Settings: Press MENU to enter C.Fn SHOOT. Press SET to choose one-shoot or multi-shoots.
    • One-shoot: Master unit sends triggering signals to slave unit (M and Multi mode), suitable for single-person photography to save power.
    • Multi-shoots: Master unit sends parameters and triggering signals to slave unit, suitable for multi-person photography (consumes power quickly).
    • APP: Only sends triggering signal when camera is shooting (flash parameters controlled by smartphone APP).
  • C.Fn: Custom Functions: A table lists available and unavailable custom functions, including settings for shutter sync, Bluetooth status, beeper, ZOOM, channel scan, wireless ID, PC sync, delay setting, SHOOT function, and triggering distance.
  • Using as a Wireless Camera Flash Trigger: Mount on camera hotshoe, power on. Set channel, group, mode, and parameters. Turn on camera flash, press wireless setting button (<^Z>), ensure wireless icon ((())) and SLAVE icon are displayed. Set same channel and group. Press camera shutter to trigger.
  • Using as a Wireless Outdoor Flash Trigger: Similar to camera flash trigger. Power on outdoor flash, press wireless setting button (< Z >), ensure wireless icon ((())) is displayed. Long press <GR/CH> to set same channel, short press <GR/CH> to set same group. Press camera shutter to trigger.
  • Using as a Wireless Original Flash Trigger: Mount on camera hotshoe, power on. Attach original flash to X1R-S receiver. Set same channel and group on receiver. Half-press shutter for focus, full-press for shoot. Sony original speedlights must be set to TTL mode.
  • Using as a Wireless Studio Flash Trigger: Mount on camera hotshoe, power on. Connect studio flash to power source. Synchronously press <GR/CH> and <S1/S2> buttons, ensure wireless icon ((())) is displayed. Long press <GR/CH> to set same channel, short press <GR/CH> to set same group. Press camera shutter to trigger. Studio flashes typically require M mode and minimum output of 1/32.
  • Using as a Wireless Shutter Release Trigger: Connect camera remote cable from camera shutter socket to X1R-S shutter release port. Power on camera and receiver. Set channel, group, mode, and parameters. Half-press button for focus, full-press for shoot.
  • Using as a Flash Trigger with 3.5mm Sync Cord Jack: Set transmitter's sync cord jack as an output port (C.Fn settings > PC SYNC to OUT mode). Press shutter normally to control flashes via sync cord jack signal.
  • Connect to Smartphone through Bluetooth:
    • Short press MENU to enter BLUE.T. to open Bluetooth. Bluetooth ID will be displayed.
    • Download "Godox Photo" APP.
    • Open APP, choose the device, connect to the Bluetooth ID, and enter password ("000000").
    • Set slave flash channels and parameters (mode, power, modeling lamp, beep) via the APP.
    • Use the APP for shooting.
    • When connected, the auto sleep of the flash trigger can be set to 30 min.

Maintenance Features:

  • Restore Factory Settings: Hold the MODE button and power the flash trigger on to restore all parameters to factory settings.
  • Firmware Upgrade: Supports firmware upgrade via the Type-C USB port. Update information is released on the official website. A Type-C USB connection line is required (not included). The Godox G3 firmware upgrade software is needed for the process.

Attentions and Caring for Flash Trigger:

  • Troubleshooting Triggering Issues:
    • Ensure batteries are installed, power switch is ON, transmitter and receiver are on the same channel, hotshoe/connection cable is secure, and flash triggers are in the correct mode.
    • If camera shoots but doesn't focus, check if camera/lens focus mode is set to MF; change to AF.
    • If signal disturbance or shooting interference occurs, change to a different channel.
    • If operating distance is limited or flashes are missing, check and replace batteries (1.5V disposable alkaline batteries recommended).
  • Reasons & Solutions for Not Triggering in Godox 2.4G Wireless:
    • 2.4G Signal Disturbance: Adjust CH setting (add 10+ channels) or turn off other 2.4G equipment.
    • Flash Recycle/Overheat Protection: Ensure flash has recycled and is not in overheat protection. Downgrade flash power output. If in TTL mode, try M mode.
    • Close Distance: If flash trigger and flash are too close (< 0.5m), turn on "close distance wireless mode" (C.Fn-DIST to 0-30m).
    • Low Battery: Replace batteries in flash trigger and receiver.
  • General Care:
    • Avoid sudden drops, impacts, or excess stress.
    • Keep dry; the product is not waterproof.
    • Avoid sudden temperature changes to prevent condensation.
    • Keep away from strong magnetic fields.

Godox X2T-S TTL Specifications

General IconGeneral
BrandGodox
ModelX2T-S TTL
CategoryCamera Accessories
LanguageEnglish

Related product manuals