Article No. 28 100-
Version 12.2007
Page 5 of 12
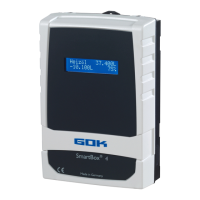
START-UP
After the contents indicator has been installed, it can be started up.
Before programming, you need to ascertain the tank data and enter the values into the right
column Input value of the following table. Then, enter the values for the individual entry steps.
Optionally, the device can also be programmed as explained in the enclosed Quick Guide.
Setting a parameter:
Press ENTER to call the setup mode.
Select the desired setting parameter via PLUS.
Press ENTER to call up the value selection for the parameter.
Set the value with PLUS/MINUS, press ENTER to save.
Quitting the setup
mode:
You can quit the setup mode at any time.
Select “8.Exit“ and press ENTER
➜ to go back to the standard display mode.
Step Input function
Input value
1. Probe
Select probe measuring range (see type label of
the probe) - default value is 250 mbar
______mbar
2. Fluid
(medium)
Select the medium
(also refer to p. 7), e.g.:
- heating oil (default): Heat.oil
- Diesel: Diesel
- select other stored media with + / -
- or enter density value ... kg/m3
For unknown density values, see the Notes on
Programming - p. 7
__________
3. Tank
(tank shape)
Select the tank shape
(also refer to p. 7+8), e.g.:
- linear (default): Linear
- cylindrical horizontal: Cyl.
- cyl. horizontal 50 to 100 m³: Cyl.>50m3
__________
4. Volume
(tank volume)
Enter tank volume (or maximum fill level):
e. g.: 20.000L
Important:
Please see a volume table for the
highest value, if available.
For a 100 m
3
cyl. buried tank, this may for
example be the value 100 600 liters.
_________L
5. Height
(tank height or
max. filling
height)
Enter inner tank height in millimeters:
e. g.: 2.500 mm (max. value = 9.999 mm)
(height without dome)
Important:
Please see a volume table for the
highest value, if available.
For a 100 m
3
cyl. buried tank, this may for
example be the value 288 cm = 2,880 mm.
________mm
Steps 6 + 7 are only required for SmartBox 2 and SmartBox 3
➜ SmartBox 2:
6. Relay1
or
➜ SmartBox 3:
6. Beeper (Acoustic
alarm)
Enter switchpoints as percentage from 01 to 99
(and/or as °C value from -99 to +99) - only for a
probe with temperature measuring function)
deactive ➜ activate with + / - to
active ➜ press Enter to confirm
On: 10% ➜ ON: set with + / - ➜ Enter
Off:12% ➜ OFF: set with + / - ➜ Enter
On ___%
Off ___%
 Loading...