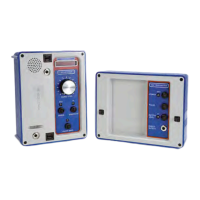
c) The PULSE Switch. This switch controls whether the
signal generated by the transmitter is continuous or
pulsed at a frequency of 5 to 10 times per second.
Pulsing the signal allows it to be easily identified and also
conserves the transmitter's batteries. The transmitter is in
“pulse mode” when the BATT indicator is flashing.
d) The OUTPUT LEVEL Switch. This push-button controls
the intensity of the signal that is generated by the trans-
mitter. Depressing this button so that the “HI” indicator is
lit transmits the maximum amount of signal for any given
signal transfer method. When the “HI” indicator is unlit,
the signal output is reduced.
e) The HI Indicator. As explained above, this LED indicates
the level of signal that is presently being transmitted.
f) The DIRECT OUTPUT Jack. Inserting the plug of the
directconnection cable (hereafter referred to as the
“DCC”) into this jack switches the transmitter into “con-
ductive” mode. In this mode, a line may be energized
directly by physically connecting the red clip of the DCC
to an exposed part of the line.
2. Receiver.
The receiver is used to detect the signal generated by the
transmitter, and therefore to trace the conductive line that the
transmitter is energizing. While locating a line, the operator
may use the receiver in either of two tracing modes: peak
and null. When using peak mode, the operator searches for
a maximum signal; this is the most sensitive mode. In null
mode, the operator looks for places where the signal vanish-
es. A single pushbutton sets the receiver in an auxiliary
detection mode (locate mass) which allows the operator to
Model 902 Pipe & Cable Locator
3