Do you have a question about the Goodman GSAS-11ASC and is the answer not in the manual?
Essential safety rules for installation and operation, including warnings about electrical hazards.
Explains the function of the electronic air cleaner in removing airborne particles.
Outlines the advantages, such as allergy relief and reduced cleaning needs.
Describes the electrostatic precipitation principle used for air cleaning.
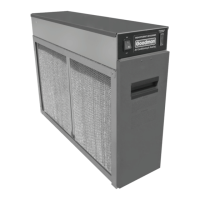
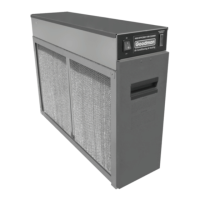
Describes the heavy gauge galvanized steel construction and mounting holes.
Contains power switch, indicator light, safety interlock, high voltage board, and air proving switch.
Automatically cycles the Air Cleaner on/off with the system fan, detecting airflow.
Details the collecting cells, ionizing section, plate section, and prefilters for particle capture.
Remove odors and must be replaced every six months; not washable.
Install in return air duct close to fan compartment for even airflow and system cleaning.
Humidifier placement relative to the Air Cleaner to avoid mineral buildup or service problems.
Install upstream of the cooling coil to clean air before it reaches the evaporator coil.
Steps for removing existing filter, cleaning ductwork, and opening access door.
Ensure prefilters, cells, and carbon filters are replaced and door is closed before powering on.
Run heating/cooling fan continuously and ensure return air grilles are unobstructed for optimal airflow.
Procedures for washing collecting cells and prefilters using DAX Detergent.
Instructions for replacing carbon filters every 3-6 months as they are not washable.
How to test the APS using a multimeter or neon lamp for proper airflow detection.
Step-by-step guide for removing and installing a new APS, including wiring connections.
Procedure to measure high voltage output from the power board using a high voltage meter.
Instructions for disconnecting, removing, and installing a new performance indicator light.
Detailed steps for removing and installing a new power board, including wiring and connections.
Procedure to test the 24V transformer output voltage for specific models.
Steps to replace the 24V transformer, including primary and secondary lead connections.
How to test and adjust the high voltage output from the power board using a meter.
Procedure to test voltage at the collecting cells using a high voltage meter and screwdriver.
Method to set approximate voltage by adjusting the potentiometer without a meter.
How to identify bad contacts within cells or between cells and the high voltage tray.
Steps to safely remove the power box cover and disconnect wiring from the unit.
Instructions for removing the high voltage contact tray and its associated wiring.
Instructions for replacing broken tungsten ionizing wires in the collecting cells.
Covers issues where power and performance lights are off, checking system fan, wiring, and switches.
Addresses scenarios where only the power light is off, indicating a defective power light.
Troubleshoots when power is on but performance light is off, checking cells and power board.
Identifies causes like internal cell contacts, high voltage tray connection, or wet cells.
Covers arcing within cells or at copper contacts, and issues with voltage or particle lodging.
Addresses issues like incorrect cell orientation, fan settings, or low voltage.
Discusses causes like loose ionizing wires, dirty cells, or incorrect airflow/voltage settings.
Explains causes like dry home conditions, heavy lint dust, or gaps around the unit.
Outlines the terms, duration, and limitations of the product warranty.
Lists specific conditions, maintenance, and damages not covered by the warranty.
| Brand | Goodman |
|---|---|
| Model | GSAS-11ASC |
| Category | Air Cleaner |
| Language | English |