Do you have a question about the Google H2D and is the answer not in the manual?
Highlights the advantages of Google Nest Wifi, including strong connectivity and automatic updates.
Lists the essential items needed for setting up the Google Nest Wifi.
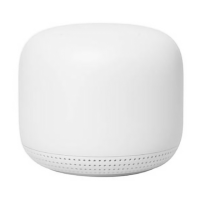
Describes the physical design of the Google Nest Wifi router and its lack of speakers.
Identifies and explains the function of the WAN, LAN, and Power ports on the router's underside.
Notes compatibility for different internet connection types and the need for a VDSL modem for FTTN.
Outlines the first steps, including app download, home setup, and optimal router placement.
Details how to connect the Ethernet cable to the router's WAN port from the NBN connection device or modem.
Explains how to power the router and start the setup process using the Google Home app.
Guides users to initiate device setup in the app and pair the router using a QR code or setup key.
Covers setting the WAN connection type (PPPoE) and entering account credentials.
Instructs on naming the Wifi network and setting a secure password.
Confirms successful connection, options for adding more devices, and resources for further assistance.
This manual describes the Google Nest Wifi system, designed to provide a robust and reliable Wi-Fi connection throughout your home. The system consists of a Google Nest Wifi router and, optionally, Google Nest Points with integrated Google Assistant. The primary function of this system is to blanket your home with a strong and dependable Wi-Fi signal, ensuring seamless internet access for all your devices.
The Google Nest Wifi router serves as the central hub of your home network. It broadcasts your Wi-Fi signal, allowing all your internet-enabled devices to connect wirelessly. The router is designed for ease of use and integrates seamlessly with the Google Home app, which acts as the primary interface for setup and management. Its sleek, minimalist design ensures it blends effortlessly into any home decor, avoiding the cluttered appearance often associated with networking equipment.
One of the key functions of the Google Nest Wifi system is its ability to automatically update. This ensures that your network remains safe and secure against emerging threats, without requiring manual intervention. These automatic updates also bring performance enhancements and new features, keeping your system up-to-date and optimized.
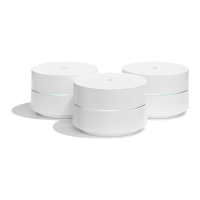
The Google Nest Points extend the Wi-Fi coverage of your network. When strategically placed throughout your home, they create a mesh network, eliminating dead zones and ensuring consistent signal strength in every room. A unique feature of the Google Nest Points is the integrated Google Assistant, which transforms them into smart speakers. This allows you to control your smart home devices, play music, get answers to questions, and manage your schedule using voice commands, all from various locations within your home.
The system is compatible with various NBN (National Broadband Network) connection types, including FTTP (Fibre to the Premises), FTTC (Fibre to the Curb), HFC (Hybrid Fibre Coaxial), and Fixed Wireless. For these connection types, the Ethernet cable from your NBN connection device (or modem/router) connects directly to the WAN port of the Google Nest Wifi router. It's important to note that for FTTN (Fibre to the Node) and FTTB (Fibre to the Building) connections, a VDSL modem is required, as Google Nest Wifi routers are not directly compatible with these types without an intermediary modem.
Setting up your Google Nest Wifi system is designed to be straightforward, primarily guided by the Google Home app. To begin, you will need a Google account and an up-to-date smartphone or tablet (Android 5.0+ or iOS 11.0+). The Google Home app, available on both Android and iOS app stores, is essential for the setup process.
The initial setup involves downloading and opening the Google Home app. If it's your first time using the app, you'll need to set up a "home" within the application. The router should be positioned in an open area, ideally at eye-level or higher, to optimize Wi-Fi performance. Avoid placing it in obscured locations or behind large objects that could interfere with the signal.
Connecting the router involves plugging the power adapter into the Google Nest router. A pulsing white light indicates that the router is powered on and ready for setup. The Ethernet cable from your NBN connection device (or modem/router for FTTN/B) then connects to the WAN port on the underside of the Google Nest Wifi router. The WAN port is specifically for connecting to your internet source, while the LAN port can be used to connect wired devices such as PCs, laptops, TVs, or gaming consoles.
Within the Google Home app, you will be prompted to add a new device. This involves scanning a QR code located on the bottom of the Google Nest Router or manually inputting a setup key. The app will then guide you through configuring your connection type. For most NBN connections, you will select 'WAN' and then 'PPPoE', entering the username and password provided by your internet service provider (ISP).
After configuring the connection, you will be asked to create a secure Wi-Fi network name (SSID) and password. This password will be used to connect all your devices to your new Wi-Fi network. The router will then establish the Wi-Fi network, a process that typically takes only a few minutes.
If you wish to expand your network coverage, you can add Google Nest Points. The Google Home app facilitates this process, allowing you to easily integrate additional points into your existing mesh network. These points not only extend Wi-Fi but also bring the convenience of Google Assistant to more areas of your home.
The system also offers privacy controls. The manual highlights that "Being part of your home means respecting your privacy," indicating that users have control over their privacy settings within the Google Nest Wifi system. This is an important feature for users concerned about data collection and usage in smart home devices.
The Google Nest Wifi system is designed for minimal user maintenance, largely due to its automatic update capabilities. These updates handle security patches, performance improvements, and feature additions in the background, ensuring the system remains optimized without requiring manual intervention.
The physical design of the router and points is smooth and lacks external speakers, contributing to a clean aesthetic and reducing potential dust accumulation in crevices. The cable ports are discreetly located underneath the devices, further enhancing their clean appearance and making cable management simpler.
In case of connectivity issues or the need to reset the device, a reset button is provided on the underside of the router. This allows users to revert the device to its factory settings if necessary, which can be useful for troubleshooting or reconfiguring the network.
For ongoing support, the manual directs users to helpful articles on WAN settings from Google Nest Help and general setup guides for the Google Nest Wifi Router. Additionally, users can reach out to a technical support team via Live Chat or visit a contact us page for assistance. This comprehensive support structure ensures that users can easily find solutions to any problems they might encounter, minimizing the need for complex manual troubleshooting.
The Google Home app itself serves as a central maintenance tool, allowing users to monitor their network status, manage connected devices, and adjust settings as needed. This includes viewing network performance, prioritizing devices, and setting up parental controls, all from a user-friendly interface. The app's intuitive design simplifies network management, making it accessible even for users with limited technical expertise.
| Category | Wireless Router |
|---|---|
| Model | H2D |
| Ports | 2 |
| USB Port | No |
| Security | WPA3 |
| Processor | Quad-core ARM |
| Storage | 4 GB |
| Frequency Band | 2.4 GHz, 5 GHz |