2019 | Condential and Proprietary | Do not distribute
Optional: Install the Nest Cam IQ indoor wall mount
Gather the following tools:
● A drill with 1/16” bit (for wood) or 1/8” bit (optional, for drywall)
● A Phillips screwdriver
● A hammer
● A pencil
● A ladder, if you’re installing the camera up high
● Everything included with the wall mount: mounting plate, wall anchors,
screws, cable clips and nails.
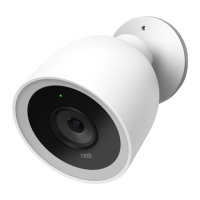
The Nest Cam IQ indoor wall mount lets you securely aach the
camera to a wall, ceiling, or other at suace. It includes a 1/4”-20
tripod extension to screw the camera into.
Hold the wall mount with the at black side against the wall or ceiling. Mark the two screw holes with your
pencil. Then remove the mount for the next step.
If the suace is drywall: Screw the two plastic anchors into the wall or ceiling. The anchors are designed to
be self-drilling. If you prefer, you can drill 1/8” pilot holes and then screw in the anchors.
Position the wall mount over the anchors or pilot holes, with the at black side against the wall. Screw in the
screws. The wall mount should now be securely aached to the wall or ceiling.
Line up the tripod hole on the camera’s base and screw the base into the mount. If installed on a wall, the
power cord should end up facing upward.
Tip: During this step, be sure to rotate the camera’s base, not its head.
Now that the camera is mounted, adjust the image as it appears
in the Nest app.
● Gently swivel the camera head until it’s pointing at the
desirable scene.
Tip: If the wall mount won’t let you point the camera where
you want, you have two options. You can twist the camera’s
base a lile bit to move the camera’s range of motion, while
making sure that the camera is still securely mounted. Or, you
can try unscrewing the wall mount, rotating it 180 degrees,
and screwing it back in to give the camera head a dierent
range of motion when it’s screwed in. Check the video.
● If it’s mounted on the ceiling and the image is upside do
wn,
ip it in the app.
Remember, the height chosen for the mount will directly impact the camera
eld of view. Always check the stream before mounting to ensure you can
capture the right angle.
 Loading...