EasyManua.ls Logo

Govee DreamView G1 User Manual

Govee DreamView G1
2 pages
To Next Page IconTo Next Page
Page #1 background imageLoading...
Page #1 background image
Before Installation Installation Steps
Step 1 Step 1
Step 2
Install the mounting clips as shown in the positioning card. Press each
clip for 10 seconds when installing to ensure they are fully attached.
Insert the strip light, light bars, and the DC power adapter cord into
the corresponding ports of the camera as shown in the image.
Plug the kit into power to check that all parts are functioning properly,
then unplug the kit from power and disconnect its parts from the
camera.
Step 2
Wipe the back panel of the monitor to make sure its surface is dry and
clean.
Light Bars x2
Neon Strip Light
Gaming Camera
Power Adapter
Headphone Linking Cable
Foam Stickers
Straight Mounting Clips x5
Corner Mounting Clips x4
Cable Clip x2
Positioning Card x2
This product is suitable for 24-29 inch monitors.
Keep the back panel of the monitor dry and clean before installing.
The included strip light is only for monitors with a smooth back panel.
Monitors with the following three back panel types are not supported.
Caution
Light Bar Port
Power Port
Audio Port
Power Button
Neon Strip Light Port
Select a positioning card based on the size of the monitor.
Unfold the card, and align it with the back panel to identity the
correct attachment positions for the mounting clips.
Slowly remove the card’s adhesive film and stick it on the back
panel.
01 0302 04
Question and Answer IconNeed help?

Do you have a question about the Govee DreamView G1 and is the answer not in the manual?

Govee DreamView G1 Specifications

General IconGeneral
Product NameGovee DreamView G1
CategoryVideo Gaming Accessories
Voice ControlAmazon Alexa, Google Assistant
Light SourceLED
Power SourceUSB
Lighting TypeRGBIC
Control MethodApp, Remote Control
CompatibilityPC
ConnectionBluetooth
Special FeaturesMusic sync

Summary

Before Installation

Initial Setup and Testing

Insert strip light, light bars, and power cord into camera ports, test functionality, then disconnect.

Prepare Monitor Back Panel

Wipe the back panel of the monitor to ensure its surface is dry and clean before proceeding.

Installation Steps

Positioning and Clip Placement

Select a positioning card based on monitor size and align with the back panel for clip placement.

Secure Mounting Clips

Install mounting clips as shown on the positioning card, pressing each for 10 seconds.

Attach Strip Light

Install the strip light on the mounting clips counterclockwise, pressing lightly to ensure it is fastened.

Position Light Bars

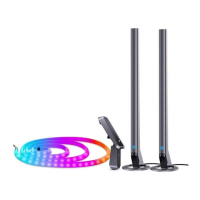
Place light bars 12 inches either side of the monitor, angling lighting surfaces outward to the wall.

Camera and Final Connections

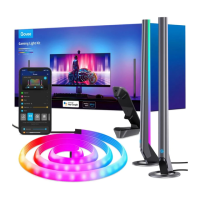
Position camera, connect strip light, bars, power cord, and plug in the kit to enjoy.

Related product manuals