EasyManua.ls Logo

Graco ARGOS 65 - User Manual

Graco ARGOS 65
136 pages
Print Icon
To Next Page IconTo Next Page
Loading...
© 2014 Graco PD270222C 7/14 US
READ THIS MANUAL
Do not install or use this child restraint until
you read and understand the instructions in this
manual. FAILURE TO PROPERLY USE THIS CHILD
RESTRAINT INCREASES THE RISK OF SERIOUS
INJURY OR DEATH IN A SUDDEN STOP OR CRASH.
Child Restraint/Booster Seat
Owner’s Manual
ARGOS
TM
65

Table of Contents

Question and Answer IconNeed help?

Do you have a question about the Graco ARGOS 65 and is the answer not in the manual?

Overview

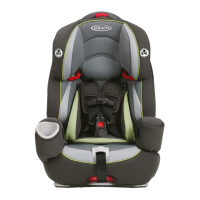
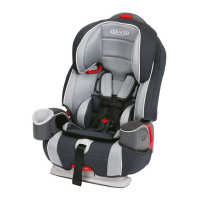
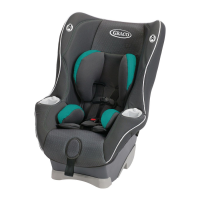
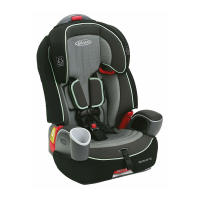
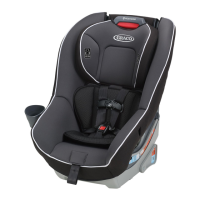
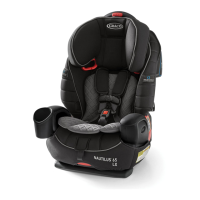
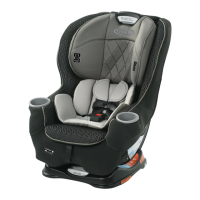
The Graco Argos 65 is a child restraint and booster seat designed for children within specific height and weight limitations, offering multiple modes of use and safety features.

Function Description:

The Graco Argos 65 serves as a versatile child restraint system, transitioning from a built-in harness mode to a high-back booster, and finally to a backless booster. Its primary function is to secure a child safely in a vehicle, reducing the risk of serious injury or death in the event of a sudden stop or crash. The manual emphasizes the importance of proper installation and child securing for optimal safety.

Important Technical Specifications:

Built-in Harness Mode:

  • Weight: 20 to 65 lb (9 to 30 kg)
  • Height: 27 to 49 in. (69 to 125 cm)
  • Age: At least one year old and able to sit upright unassisted.
  • Harness Straps: Must be even with or just above the child’s shoulders.
  • LATCH Usage: Can be used with LATCH for children weighing up to 45 lb (20 kg). For weights above this, the vehicle seat belt must be used.

Without Built-in Harness (High-Back Booster Mode):

  • Weight: 30 to 100 lb (14 to 45 kg)
  • Height: 38 to 57 in. (96 to 145 cm)
  • Age: Approximately 3-10 years of age.
  • Shoulder Belt: MUST lie across the child’s shoulder as shown in the illustrations, and the lap portion of the belt must be positioned low on the child’s hips.
  • Head Support: Child’s ears must be BELOW the top of the head support. If ears are above the head support, the child is too large for the seat.
  • LATCH Usage: LATCH will NOT secure the child in booster seat mode; only the vehicle lap and shoulder belt system should be used.
  • Locking Clip: NOT to be used in booster seat mode.

Without Back Support (Backless Booster Mode):

  • Weight: 40 to 120 lb (18 to 54 kg)
  • Height: 40 to 57 in. (101 to 145 cm)
  • Age: Approximately 4-10 years of age.
  • Shoulder Belt: MUST lie across the child’s shoulder as shown, and the lap portion of the belt must be positioned low on the child’s hips.
  • Head Support: Child’s ears should be below the top of the vehicle seat cushion/head support.
  • LATCH Usage: LATCH will NOT secure the child in booster seat mode; only the vehicle lap and shoulder belt system should be used.
  • Locking Clip: NOT to be used in booster seat mode.

General Safety Information:

  • Certification: Conforms to all applicable Federal Motor Vehicle Safety Standards and is certified for use in motor vehicles. Certified for use in Aircraft ONLY when used with the built-in harness. NOT certified for aircraft use as a booster without the harness.
  • Useful Life: STOP using this child restraint and throw it away 10 years after the date of manufacture.
  • Recall Information: Registration is crucial for recall notifications.
  • Second Hand: Graco advises against loaning or passing along a child restraint.

Usage Features:

Assembly:

  • Adult assembly is required.
  • Ensure harness straps are securely attached.
  • Arms should lock into the gutters with a "CLICK."
  • Elastic loops from the seat pad attach under the seat and through vehicle belt guides.

Vehicle Seat Location:

  • Children are safer when properly restrained in rear vehicle seating positions.
  • The vehicle seat must face forward. Do not use on rear-facing or side-facing vehicle seats.
  • Consult the vehicle owner’s manual for safe seating positions and information on side airbags.
  • NEVER place rear-facing in a vehicle seating location with an active front airbag.

Vehicle Seat Belt Requirements:

  • Many seat belt systems are NOT safe. The vehicle seat belt MUST be designed to hold the child restraint tightly at all times.
  • SAFE systems include Lap Belts (Manually Adjusted or with Automatic Locking Retractor) for built-in harness mode, and Combination Lap/Shoulder Belts (with Locking Latch Plate or Sliding Latch Plate) for both harness and booster modes.
  • UNSAFE systems include Lap Belts with Emergency Locking Retractor (ELR), Combination Lap/Shoulder Belt with Retractor (each strap attached to latch plate), Passive Restraint (Lap or Shoulder Belt Mounted on Door), Passive Restraint (Lap Belt with Motorized Shoulder Belt), and Lap Belts Forward of Seat Crease.

LATCH System:

  • LATCH stands for Lower Anchors and Tethers for CHildren.
  • Consists of a top tether anchor point and two lower anchor points in the vehicle.
  • ONLY use LATCH in a seating position recommended by the vehicle manufacturer.
  • LATCH lower vehicle anchor points are defined as 11 in. (28 cm) from the center of one LATCH anchor to the center of another.
  • NEVER put two LATCH connectors on one vehicle LATCH anchor unless specifically allowed by the vehicle manufacturer.
  • All LATCH seating positions have tether anchors.

Securing Child in Built-in Harness Mode:

  • Loosen harness straps by lifting the harness adjuster lever and pulling straps.
  • Open chest clip and unbuckle harness straps.
  • Check crotch strap position (closest to but not under child).
  • Fasten chest clip at armpit level.
  • Tighten harness straps snugly; no slack should be allowed.
  • Harness straps must be even with or just above the shoulders.
  • Child’s ears must be BELOW top of head support.

Adjusting Head Support/Harness Straps:

  • Squeeze the red adjustment handle on top of the seat and pull the head support up until it snaps into one of the bottom 4 height positions (for harness mode) or 5 height positions (for booster mode).
  • To lower, squeeze the red adjustment handle and push down.
  • Harness straps must be even with or just above the shoulders.

Harness Removal (for Booster Mode):

  • Remove harness straps, crotch strap, body support, and crotch pad.
  • Store these components in a safe place for future use.
  • Ensure the seat back arms lock into the gutters.
  • Tuck the seat pad between the back support and seat area, attaching elastic straps to hooks and through belt guides.

Securing Child in Booster Mode (Without Built-in Harness):

  • Place the booster seat firmly against the back of a forward-facing vehicle seat.
  • Place the child in the booster seat with their back flat against the back of the booster seat.
  • Position the lap/shoulder belt through the shoulder belt guide (not underneath).
  • Fasten the buckle and pull up on the shoulder belt to tighten.
  • The shoulder belt MUST lie across the child’s shoulders in the red zone.
  • If the shoulder belt lies across the child’s neck, head, or face, adjust the head support.
  • The lap portion of the lap/shoulder belt MUST be low and snug on the hips, just touching the thighs.
  • DO NOT allow the child to slide down in the booster seat.
  • Vehicle belts MUST lie flat and not be twisted.
  • NEVER use a vehicle lap-only belt across the front of the child.
  • DO NOT use a shoulder belt loose or positioned under the arm.
  • DO NOT place the shoulder belt behind the child’s back.
  • DO NOT position the vehicle belt over the top of the armrests.
  • The vehicle seat headrest should not create a gap between the vehicle seat and booster seat. The front of the booster seat MUST NOT hang over the front of the vehicle seat.

Shoulder Belt Positioning Clip (for Booster Mode):

  • Used if the shoulder belt lies outside the red zone.
  • Insert the loop end of the strap through the slot on the rear of the seat.
  • Pass the clip and strap through the loop end and pull up.
  • Slide the vehicle shoulder belt onto the clip and pull the free end of the strap down to tighten the clip against the child’s shoulder.
  • The lap portion MUST pass through the vehicle belt guide and be positioned low on the hips.

Using the Tether:

  • Check that the tether is securely attached to the child restraint.
  • Fasten the tether clip to the anchor point.
  • Tighten the adjustment belt to remove any slack.
  • To loosen, push the button while pulling on the belt.

Storing LATCH and Tether:

  • Extend LATCH to its maximum length.
  • Locate storage bars on the back of the child restraint.
  • Fasten the ends of the tether and lower anchors onto their respective storage bars.

Airplane Use:

  • Certified for use in Aircraft ONLY when used with the built-in harness.
  • Install the car seat on an airplane in the same way as in an automobile with a lap belt.
  • Verify that the airplane seat belt holds the child restraint securely.

Accessories (on certain models ONLY):

  • Body Support and Harness Covers are provided.
  • NEVER allow body support to bunch or fold behind the child.
  • Harness covers should not interfere with the chest clip placement at armpit level.
  • Body support is not to be used by children over 35 lb.

Recline Foot:

  • The child restraint has 3 recline positions.
  • To recline, pull the recline handle out and tilt the seat back to extend the foot.
  • To set to an upright position, pull the recline handle out and tilt the seat forward to retract the foot.

Maintenance Features:

Care and Maintenance:

  • Vehicle Seat Protection: Use a child restraint mat, towel, or thin blanket to protect upholstery.
  • Metal and Plastic Parts: Clean with mild soap and cool water. No bleach or detergents.
  • Harness Straps and LATCH Straps: Spot clean with a damp sponge. DO NOT immerse in water, as this may weaken the straps.
  • Buckle/Harness Adjuster: If sticking or not remaining tight, check for foreign objects. Remove objects with tweezers and/or clean with a cotton swab. If the harness cannot remain tight, do not use the child restraint and contact Graco for a replacement.

Buckle Cleaning Process:

  • Turn the restraint over, push the retainer through the crotch strap slot.
  • Place the buckle in a cup of warm water and gently agitate, pressing the red button several times.
  • DO NOT SUBMERGE THE HARNESS WEBBING.
  • DO NOT USE SOAPS or LUBRICANTS or household detergents.
  • Shake out excess water and allow to air dry. Harness webbing must be dry before use.
  • Re-attach the buckle into the same slot.

Removing Head Support and Seat Covers:

  • Head Support Cover: Clean with a damp sponge using mild soap and cool water.
    • Remove harness and crotch straps.
    • Remove elastic loops from the head support.
    • Machine wash cover in cold water on a delicate cycle and drip-dry. DO NOT USE BLEACH.
  • Seat Cover: Clean with a damp sponge using mild soap and cool water.
    • Remove harness and crotch straps.
    • Remove elastic loops from the seat.
    • Machine wash cover in cold water on a delicate cycle and drip-dry. DO NOT USE BLEACH.

Replacement Parts, Warranty, and Owner's Manual Storage:

  • Contact Graco for parts, accessories, or warranty information.
  • The Owner’s Manual can be stored on the bottom of the seat inside the slot in the footrest.

Graco ARGOS 65 Specifications

General IconGeneral
BrandGraco
ModelARGOS 65
CategoryCar Seat
LanguageEnglish

Related product manuals