EasyManua.ls Logo

Graco SnugRide Click Connect Base User Manual

Graco SnugRide Click Connect Base
20 pages
To Next Page IconTo Next Page
To Previous Page IconTo Previous Page
Page #4 background image
4
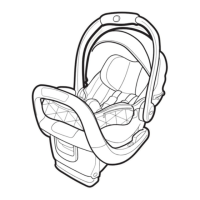
5. To create a secure installation, while
pushing down on the base, pull the free
end of the lap belt or the shoulder portion
of the lap/shoulder belt to tighten
.
6. Close lock-off over lap belt AND free end of the
lap/shoulder belt .
NEVER allow any object other than the vehicle
belts to go under or interfere with the lock-off.
If any other part of the vehicle belt interferes
with the lock-off choose another seating location.
MAKE SURE that you push the top of the
lock-off all the way down.
7. Check that belt does not move by pulling
and pushing hard on base with hands near the
vehicle belt path. If belt loosens or lengthens,
repeat procedure. If it does not stay tight, try
another seating position or contact Graco at
1-800-345-4109.
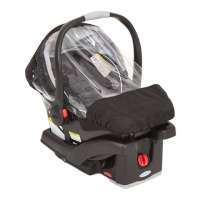
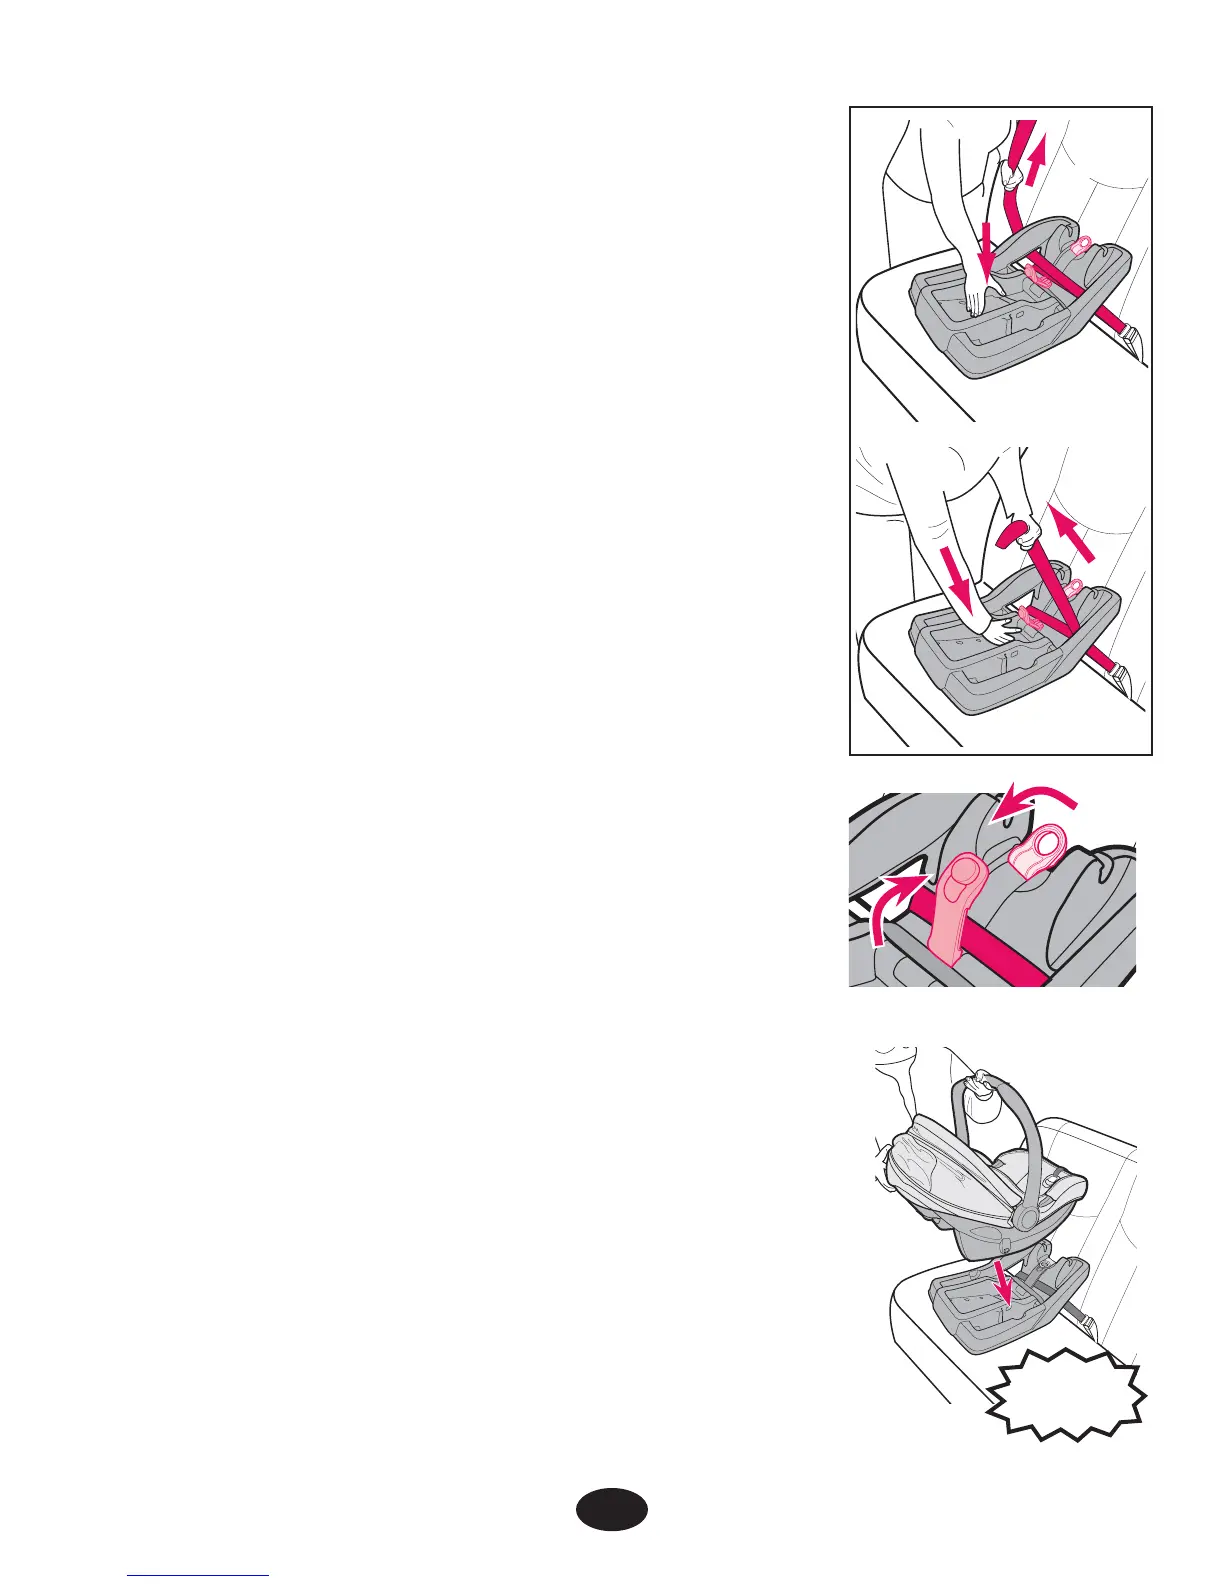
8. Push the infant restraint down into the base and
make sure that you hear a “click”
. Pull up on
the infant restraint to be sure it is latched
securely into the base.
If the infant restraint does not securely latch
into the base, the infant restraint provides NO
protection for your child. DO NOT use the
infant restraint/base if the infant restraint
does not securely latch into the base.
9. Test infant restraint for secure installation as
described in infant restraint “Final Safety
Check” page 9.
CLICK!
Question and Answer IconNeed help?

Do you have a question about the Graco SnugRide Click Connect Base and is the answer not in the manual?

Graco SnugRide Click Connect Base Specifications

General IconGeneral
TypeInfant Car Seat Base
Product TypeCar Seat Base
CompatibilityGraco SnugRide Click Connect infant car seats
Installation MethodLATCH or seat belt
LATCH SystemYes
Seat Belt InstallationYes
Level IndicatorYes
WeightVaries by model
DimensionsVaries by model
Safety FeaturesEPS energy-absorbing foam
AdjustabilityMultiple recline positions
Safety StandardsMeets or exceeds U.S. Safety Standards
Weight LimitFor use with infants up to 35 lbs
Height LimitUp to 32 inches
Base Weight8 lbs

Summary

Important Safety Information

Front Air Bag Hazard

Do not place the infant restraint in a vehicle seating location with a front air bag due to risk of serious injury or death.

Instruction Manuals and Compatibility

Read all instructions and ensure base is compatible with your specific infant restraint model.

Customer Support

Contact Graco at 1-800-345-4109 for questions or missing instructions.

Installing the Base Using Vehicle Belt

Vehicle Seat Preparation

Ensure the vehicle is on level ground and the seat allows adequate space for the restraint.

Securing the Base with Seat Belt

Route the vehicle belt through the base, use the lock-off, buckle the belt, and ensure it is not twisted.

Tightening and Attaching Infant Restraint

Push down on base, pull belt to tighten, close lock-off, then push restraint into base until it clicks.

Using LATCH to Install Base

LATCH System Preparation

Check vehicle owner's manual for LATCH locations. Extend LATCH to maximum length and ensure vehicle is level.

Connecting and Tightening LATCH

Attach LATCH connectors to anchors, tighten by pushing down on base, and verify secure installation.

Removing LATCH Connectors

Release LATCH belt by pushing the button, then press the release hinge to detach the connector.

Reclining the Infant Restraint/Base

Using the Level Indicator

Ensure vehicle is level. View the indicator from the side to confirm correct recline based on infant's age.

Adjusting the Recline Foot

Turn the knob to lower or raise the foot. Use a towel if needed to achieve the correct blue indication.

Final Safety Check

Performing the Check

Push down on restraint. Twist and pull to check for movement. Restraint should not move more than 1 inch.

Storing LATCH

Replacement Parts and Contact Information

Related product manuals