Provisioning via Handset Web GUI :
• Connect the computer to the same network as
WP820.
• Make sure the WP820 is booted up and powered
correctly.
• You may check WP820 IP address via a subscribed
WP820 on its LCD menu Settings → Network
Status. Please see [WP820 Network Status]
• Open the Web browser on your computer and
enter the WP820 IP address in the address bar of
the browser.
• Enter the administrator’s username and password
to access the Web Conguration Menu. The
default administrator username and password
are “admin”; the default end-user username is
“user“ and the password is “123”. - If ‘Disable web
UI access’ parameter is enabled under Advanced
settings → System security; web UI access will be
disabled.
Provisioning via Handset Web GUI – Cont’d:
• Once logged in Navigate to Maintenance >
Upgrade > Cong File > Congure via Network
• Uncheck Use Grandstream GAPS to display the
options to enter bootstrap URL Cong Update
Via - HTTP Cong Server Path
polydms.digitalbusiness.telstra.com/dms/
bootstrap/
• Note: The setup wizard will always appear
on a new/fresh factory reset device until it is
completed or cancelled from the handset LCD no
matter what is being congured in the background
or web UI. This is by design.
• The device will show the Congure welcome
screen after every reboot ie: Step 5, Step 7 and
Step 8.
• You can also select the Roaming mode in the next
screen after Step 4.
5. Provisioning through DHCP enabled
Router / Modem
Grandstream handsets support DHCP,HTTPS, HTTP
provisioning, and CDP.
As shipped, they support DHCP-based provisioning
(DHCP option 66, 160, 159, or 150 point to a
provisioning server). The DHCP “Option To
Use”parameter has 66,160,159,150,60,43,125
as default values.
Where your network DHCP has been set up as
expected, provisioning anew WP820 handset will be
as simple as connecting to Wi-Fi.
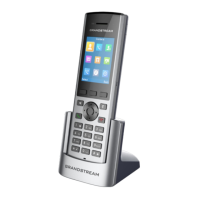
Turn on theGrandstreamhandset using the
OnHook/Power key (see Description diagram,
item17).
There will be a short delay while the handset
collects its conguration from the TIPT Platform.
You will then be able toenter your credentials.
The basic steps for provisioning Grandstream
handsets are:
1. Press “Congure” soft key from the Welcome
screen.
2. Select the language from the options on the next
screen. By default, English (United States) is the
selected option.
3. Select the time-zone from the options on the
next screen. Use the up arrow to navigate to the
Australian standard time zone.
4. Select theFind and Select the appropriate Wi-Fi
network. Enter the WI-Fi Password.
5. The handset restarts, connects to the Wi-Fi
network with the DHCP option congured, and
downloads the bootstrap le. If the device has
any rmware other than that accredited for use
with TIPT, there will be a short delay while the
correct rmware is downloaded.
TIPT – Grandstream WP820 Installation Guide - 2023
3
6. There is a download indicator on the top right
corner suggesting the rmware download in
progress. After ~5 minutes, the device will
download rmware and display the following
message Firmware downloaded successfully.
Installing in ** seconds. You can press
install soft key to start the installation or wait
for the device to auto upgrade after ** seconds.
7. Once the rmware installation is completed
the device will restart. The device will display
the installed rmware version followed by the
credential input page. Enter your credentials and
press Save.
8. The device will download it’s TIPT conguration
and restart.
9. The device will boot-up to the Welcome screen.
Press Cancel to go to the home screen to view
the registered lines.
10. Select the Wi-Fi network to connect the handset.
Enter the Wi password and press Connect.
6. Provisioning through NO-DHCP enabled
Router / Modem
Provisioning via Handset :
• If the device is connected to a Wi- router with no
DHCP options congured, then the bootstrap URL
must be populated manually using the handset
keypad.
• Navigate to Settings > Advanced Settings >
System Upgrade > Cong > Cong modify
• Set the Upgrade mode – http Cong server
path - polydms.digitalbusiness.telstra.com/dms/
bootstrap/
• Then Save and follow from Step 5 from the
Provisioning through DHCP Enabled Router /
Modem.

 Loading...