6
IndexContents
Cutting Plotter Controller
OPS664
Distance........... Input the horizontal distance (X) and the vertical distance (Y) between
registration marks.
Check the distances when creating registration marks.
Note: If ROBO Master-Pro was used to launch the Controller, the distance
settings are made automatically.
Horizontal distance (X)
between registration marks
Origin
Vertical distance (Y)
between registration marks
Settings............ Displays a window for setting the number of registration marks, the
mark length, and other parameters that need to be set for registration
mark reading.
Note: For further details on the [Registration Mark Settings] window, refer to
Section 2.5, "Registration Mark Settings".
Read Marks ..... Used when the Search Marks function has not been enabled.
Move the pen to the rst registration mark position and then click the
[Read Marks] button to start registration mark reading.
Help ................. Click this button to display a Quick Help menu for simple explanations
of the Controller's various functions.
About... ..........Displays the version information of the Controller currently in use.
Option.............. Click this button to display the optional Controller function(s) for setting.
Advanced......... Displays the [Advanced Settings] window to enable advanced settings
to be specied for the plotter.
Note: For further details, refer to Section 2.6, "Advanced Settings".
Note: This parameter is not displayed when the plotter is a Craft ROBO Pro 2
model.
Cut... .............. This button is only displayed when the Controller is launched via the
Print menu.
Cutting starts when the Controller is closed. When Search Marks has
been specied, the registration marks are read rst. When they have
been read successfully, cutting starts.
Cancel ............. This button is only displayed when the Controller is launched via the
Print menu.
If this button is clicked, the Controller is closed without any cutting
being performed.
Close ............... This button is only displayed when the Controller is launched via the
Start menu.
Click this button to close the Controller.
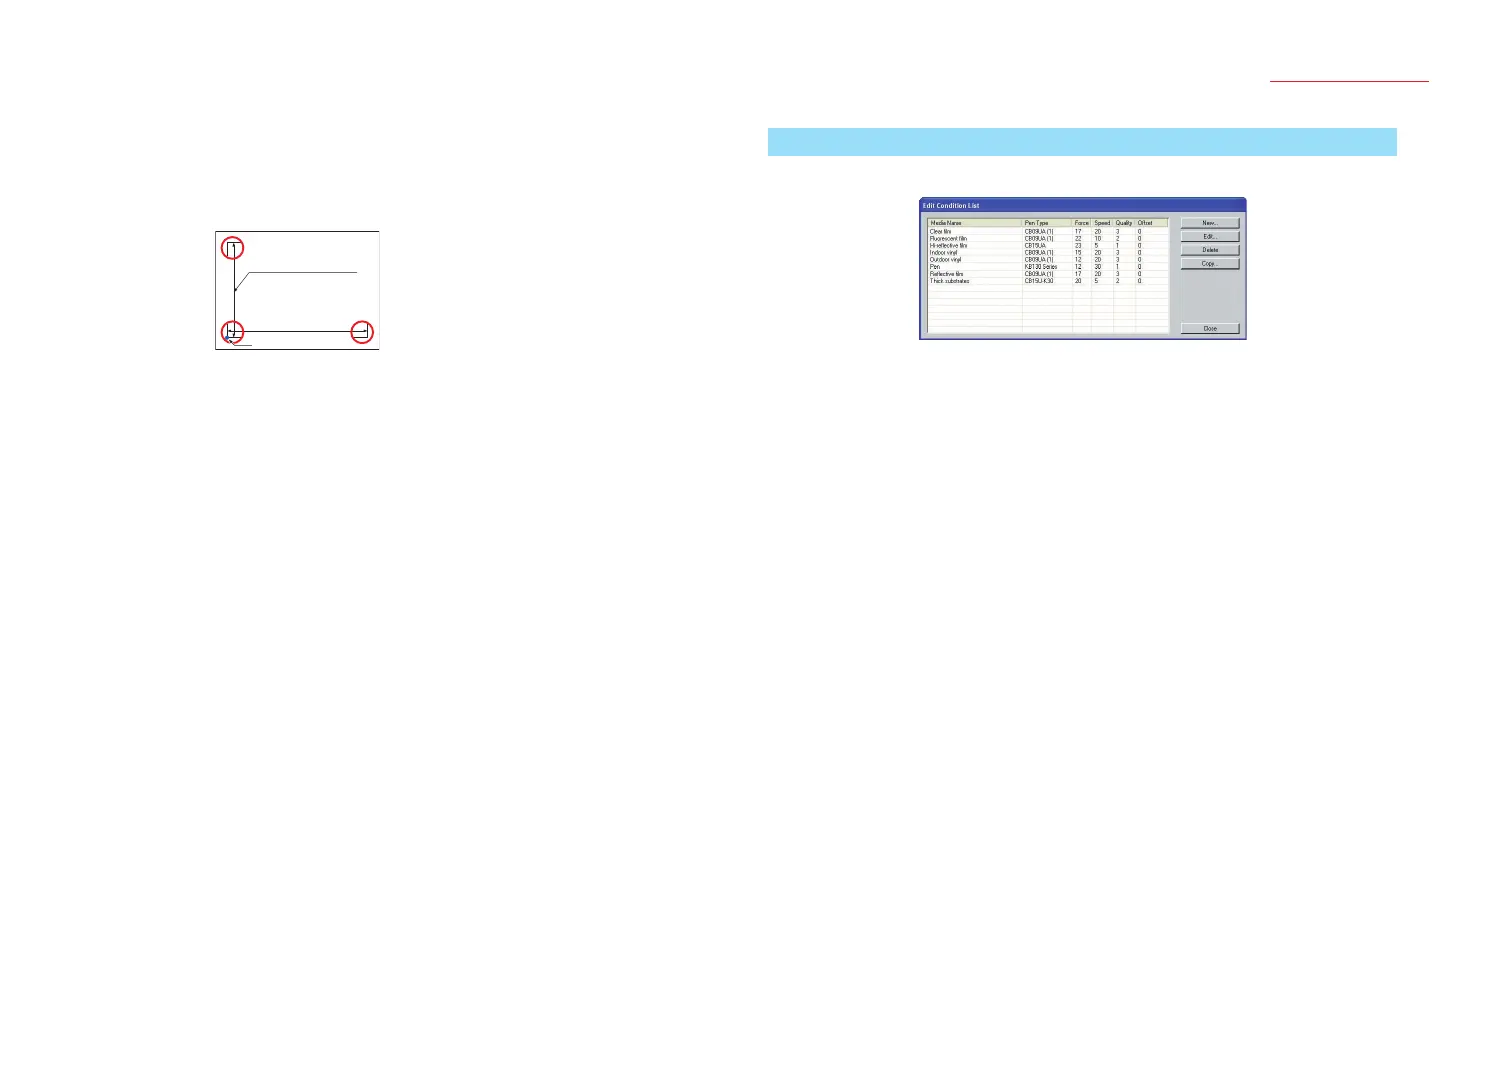
2.3 Edit Condition List
Use this list to manage the cutting conditions les.
List Display ...... Media names and the cutting conditions saved for each media name
are displayed in list format.
The settings les initially displayed in the list after setup are provided
as an approximate guide for your reference only. The settings displayed
here are not guaranteed to be the optimal settings. Determine the
optimal settings by using a function such as the test cutting function,
and then modify or add to the existing cutting conditions in the list.
Note: The actual optimal settings differ with the make, type, and purpose of use
of the media used. The hardness of olen-based media changes according
to the temperature. The settings also change due to abrasion of the cutter
blade and other changing conditions.
New ................. Displays the [Edit cutting conditions] window. Click [OK] to exit the
[Edit cutting conditions] window.
A new settings le is then created.
Note: You cannot use an existing media name from the list to create a new settings
le.
Note: For further details on the [Edit cutting conditions] window, see Section 2.4,
"Cutting Conditions".
Edit .................. Clicking this button after selecting a settings le from the list opens the
[Edit cutting conditions] window, using the settings for the le selected.
Note: For further details on the [Edit cutting conditions] window, see Section 2.4,
"Cutting Conditions".
Delete .............. Deletes the settings le selected from the list.
Copy ................ Clicking this button after selecting a settings le from the list opens the
[Edit cutting conditions] window, using the settings for the le selected.
Change the media name in the [Edit cutting conditions] window and
save it. A new settings le is then created.
Note: For further details on the [Edit cutting conditions] window, see Section 2.4,
"Cutting Conditions".
 Loading...