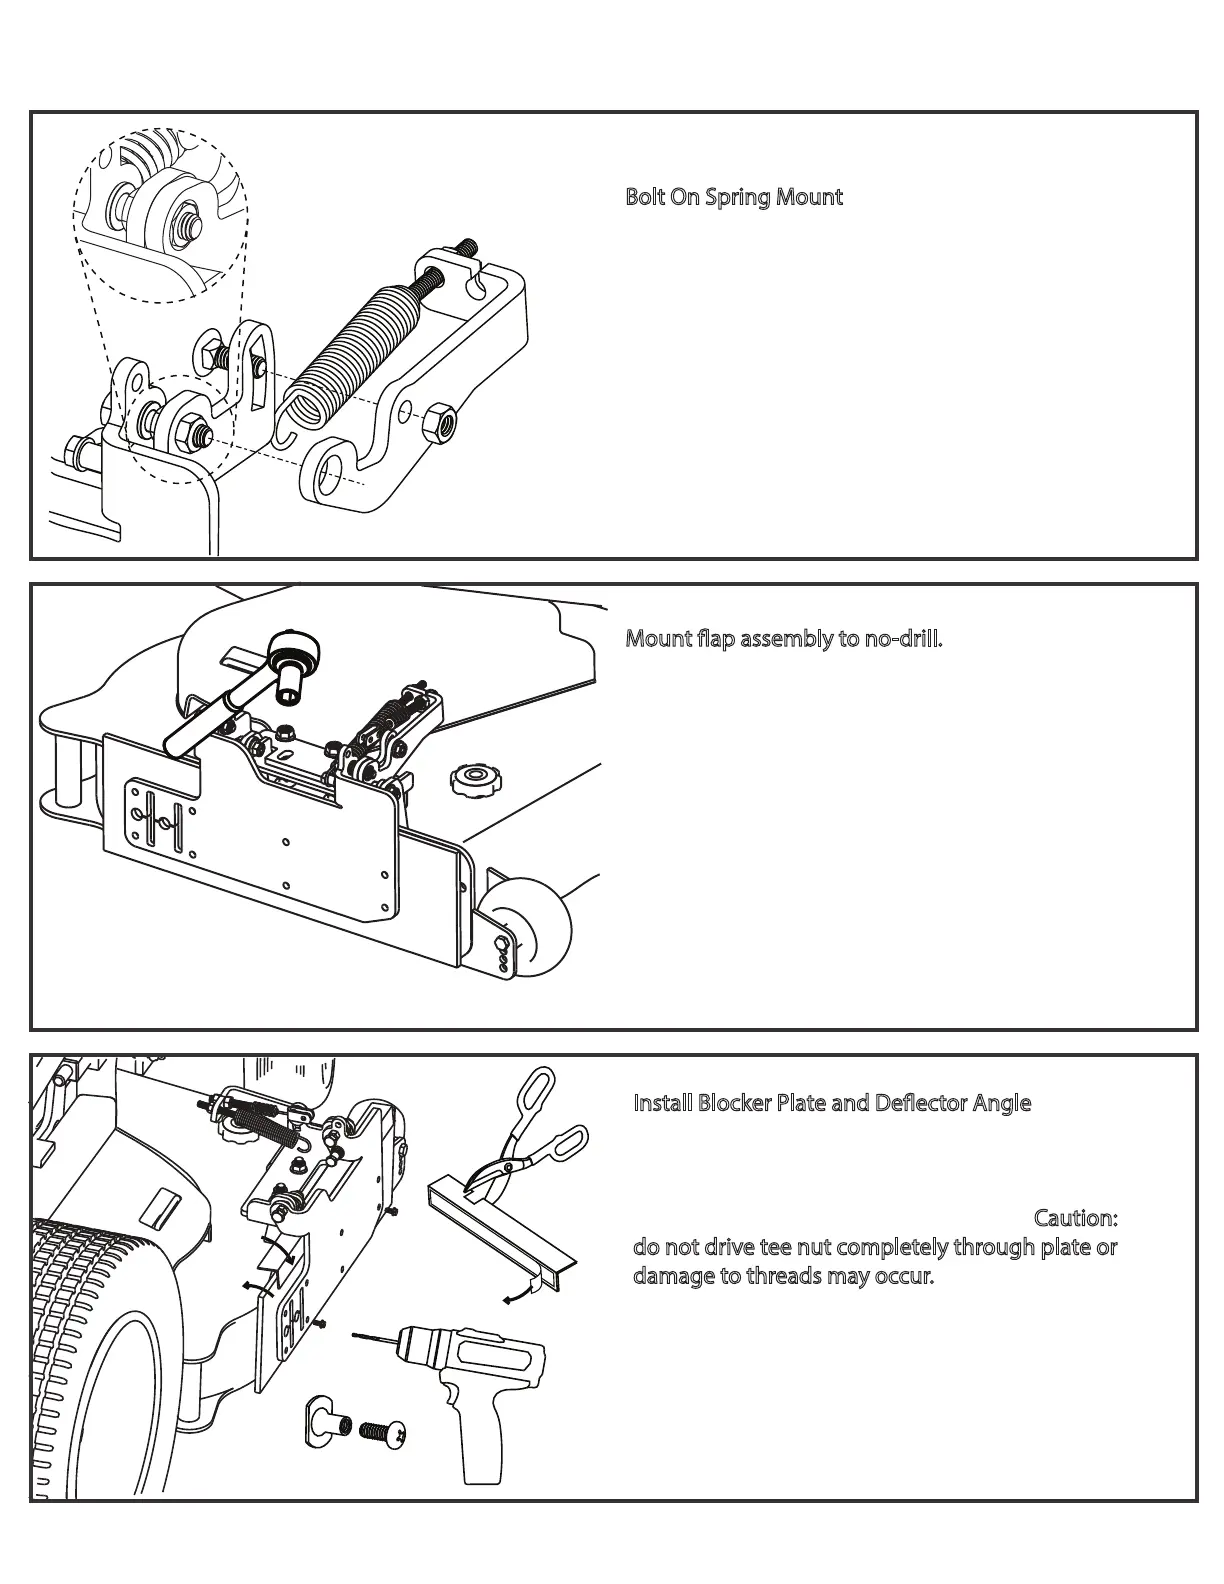
Mount ap assembly to no-drill.
A) Use 3/8-16 x 1” carriage bolts provided.
B) Make sure the ap is ush with opening and tighten
bolts.
STEP 5
Install Blocker Plate and Deector Angle
A) Reposition blocker plate to deck and clamp it to the
hinge plate. Drill two 1/4” holes in blocker plate.
Start tee nut into holes from back side. Start
screws into tee nuts. Do not tighten yet. Caution:
do not drive tee nut completely through plate or
damage to threads may occur.
B) Slide deector angle between blocker plate and
hinge plate with red tape against hinge plate.
C) Check deector angle for interference when ap is
closed, trim or notch with tin snips if needed.
D) Peel tape and apply angle to hinge plate, leave 1/16”
minimum gap between bottom of angle and top of
deck/ap mount.
STEP 6
STEP 4
GrassFlap 412T Assembly Instructions
GrassFlap.com Phone: (502)594-3546 4
A
B
Bolt On Spring Mount
A) Place spring mount on ap so large hole on spring
mount ts over nut on pivot bolt (do not loosen pivot
bolt nut).
B) Install spring mount as shown using 5/16-18 x 3/4”
carriage bolt provided through slot and snug.
 Loading...