EN - 26
Installation
(Figure 10)
1. Install mower blades, washers, and bolts
on spindle shafts.
2. Tighten bolts to 115 – 160 lbf-ft
(156 – 217 N•m).
Right Mower Blade
(992219)
IMPORTANT: This blade counter rotates and
is sharpened on the opposite side. Be sure to
keep this blade mounted in this position. The
5/16" bolts provide a positive lock to keep
blade from loosening while in use and MUST
be installed.
Removal
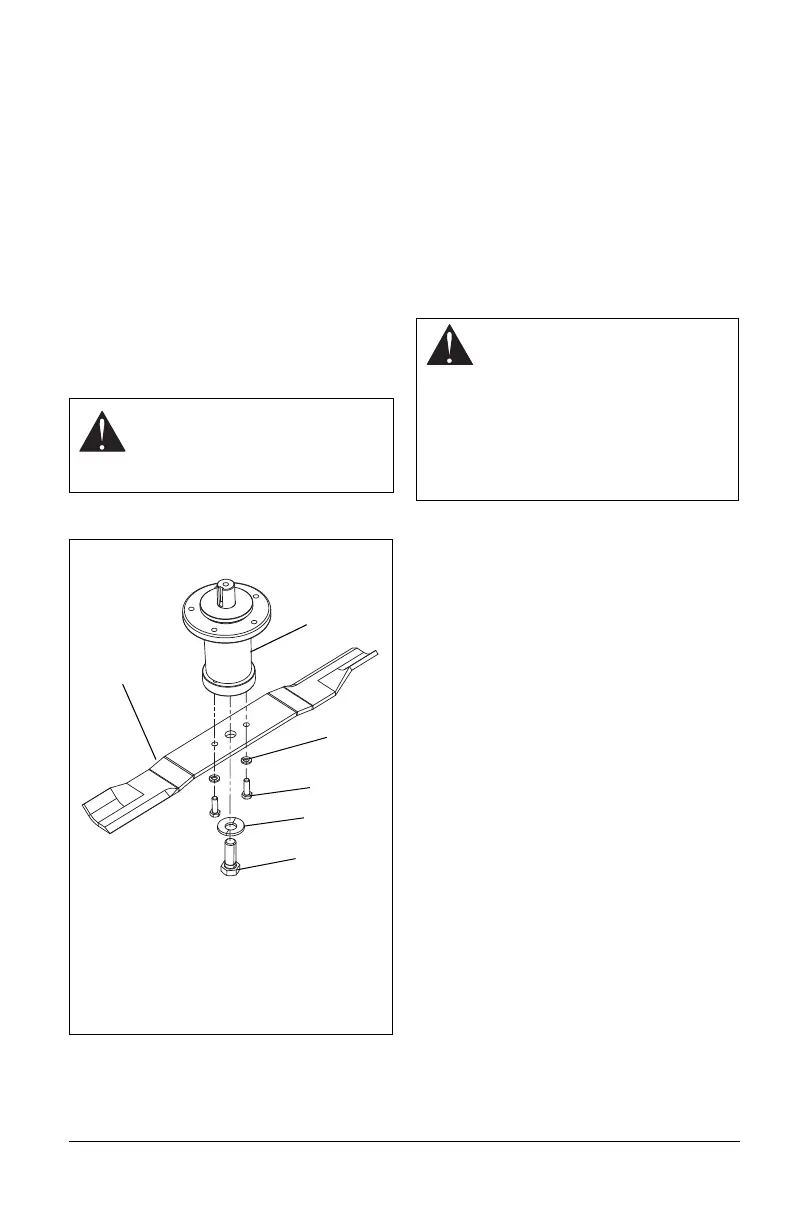
(Figure 11)
1. Block mower blades to prevent rotation.
2. Remove bolts, washers, and mower
blade from spindle shaft.
Installation
(Figure 11)
1. Install mower blade, washers, and bolts
on spindle shafts.
2. Tighten 5/16" bolts to 13 – 17 lbf-ft
(18 – 23 N•m) tighten center bolt to
115 – 160 lbf-ft (156 – 217 N•m).
SHARPENING MOWER BLADE
(Figure 12)
NOTICE: If mower is used under sandy soil
conditions, replace mower blades when air
lifts become eroded through at ends.
1. Remove mower blade from unit. Discard
mower blade if (Figure 12):
• More than 1/2" (1.27 cm) of metal is
removed.
• Air lifts become eroded.
• Blade is bent or broken.
CAUTION: Mower blades are
sharp and can cut you. Wrap
mower blades or wear gloves, and
use extra caution when servicing.
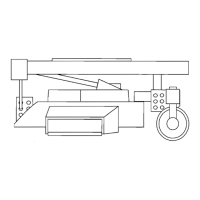
Figure 11
1
1. Mower Blade
2. Spindle Shaft
3. Lock Washers
4. Washer
5. 5/16 Bolts
6. Spindle Shaft Bolt
2
4
6
3
5
Right Blade (992219)
CAUTION: DO NOT sharpen
mower blades while on unit. An
unbalanced mower blade will
cause excessive vibration and
eventual damage to unit. Check
mower blade balance before
reinstalling blades.
NEVER weld or straighten bent
blades.