Page 2 of 2
DN082417 © 2017 Gray Manufacturing Company, Inc. 670-90373 Rev. B
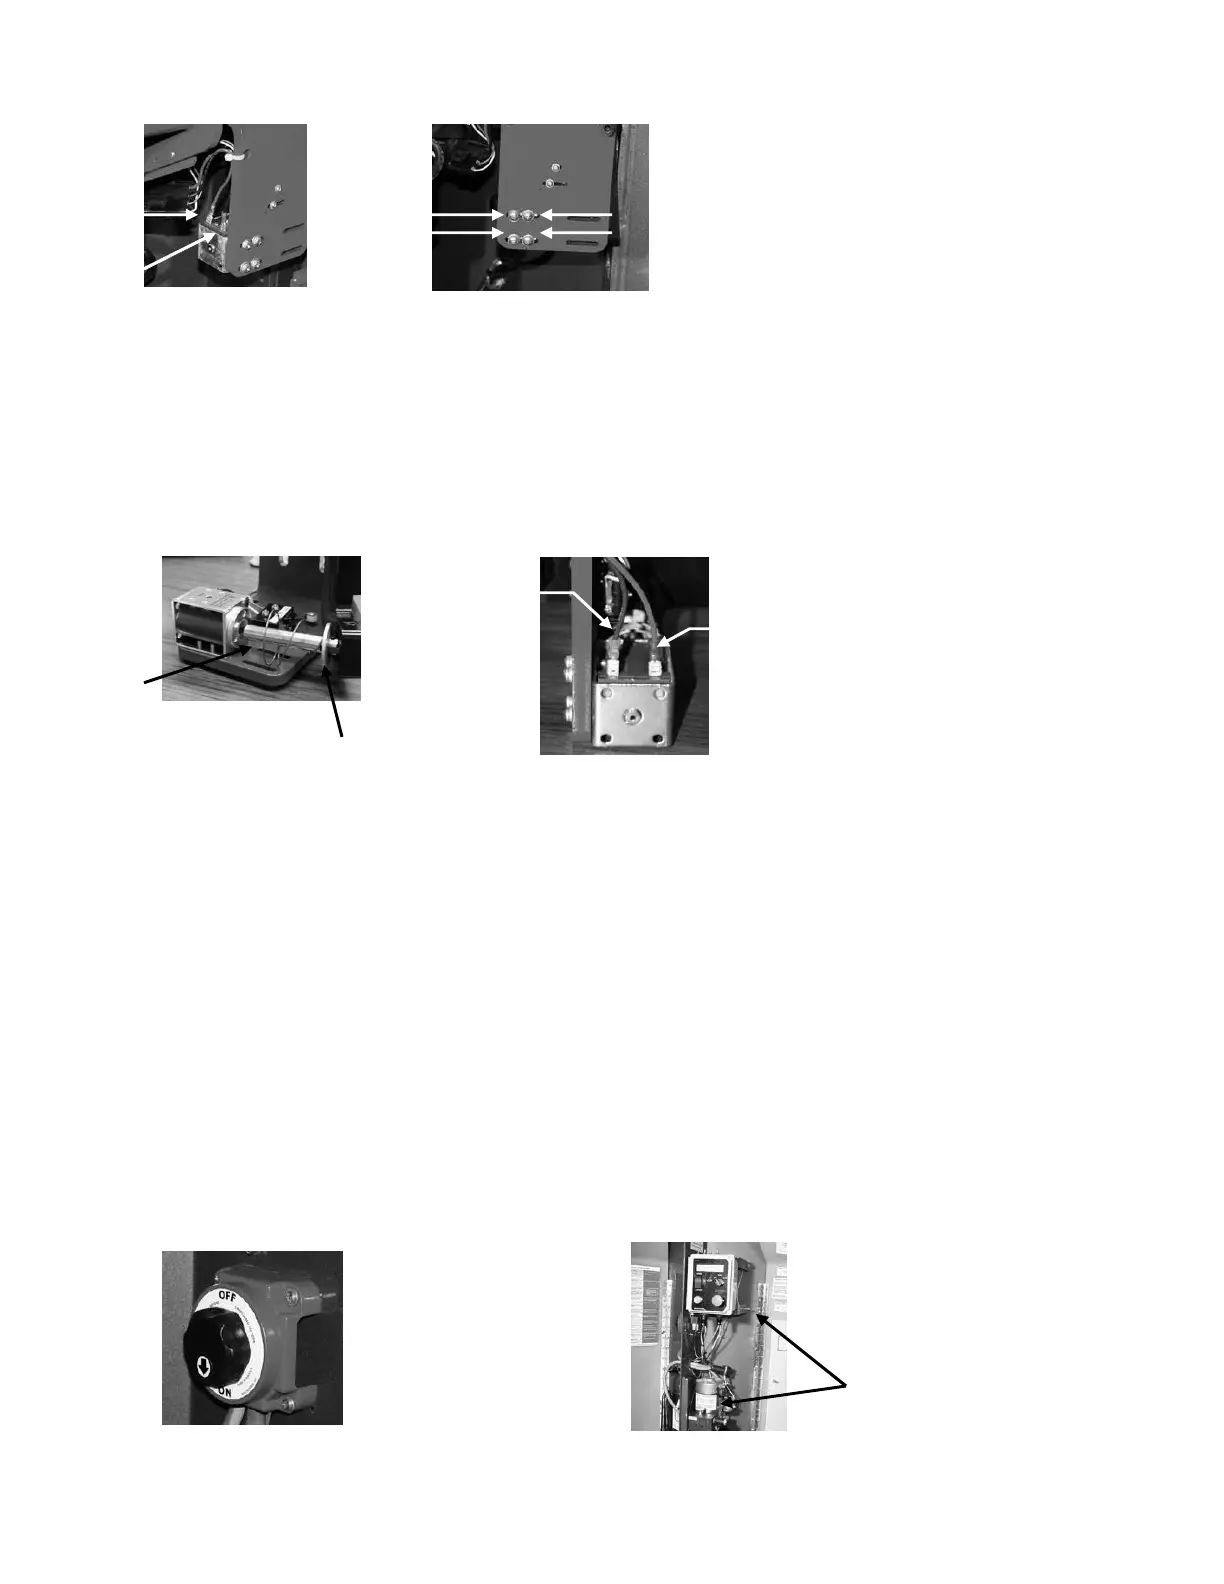
4. Remove the red and black wire leads connected to the down stop solenoid. See Figure 4
Figure 4 Figure 5
5. Remove the 4 screws and washers from the front of the down stop bracket. Remove the down stop
solenoid. There will be a spring and washer over the plunger that is connected to the down stop. Note the
orientation of these parts and be sure to re-use them during installation of the new solenoid. See Figure 5.
6. The washer and spring needs to be inserted on the plunger. Put the washer on first and follow up with the
spring. The spring should be inserted so the narrow side touches the washer with the wider side
contacting the solenoid. Push the plunger into the solenoid. See Figure 6
Figure 6
Figure 7
7. Attach the new solenoid using the same screws and washers until they are snug. Orient the solenoid
terminal up. Use the same slots when re-attaching. Manually retract down stop unit it bottoms out the
plunger in the solenoid. Slide the solenoid forward until down stop is flush or slightly protruding from
edge of the down stop bracket.
8. Connect the red and black wire leads to the solenoid. See Figure 7
9. Check the solenoid by depressing the down stop back and forth to ensure that the plunger moves
freely. If the down stop does not move freely, slightly loosen four solenoid screws and re-align
solenoid with plunger until free movement, then retighten.
10. Open the left hand cover and turn the Master Power Switch to the ON position. See Figure 8
11. Close the front cover and lower the lift using the manual override toggle and opening the needle valve
counter clockwise. See Figure 9. Make sure to close the needle valve by turning it clockwise. The lifts
will not work properly without this valve being closed.
Figure 8 Figure 9
 Loading...