48
26 27 28
29 30
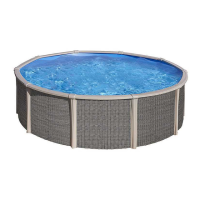
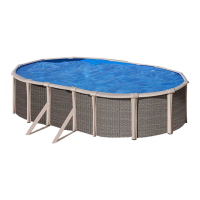
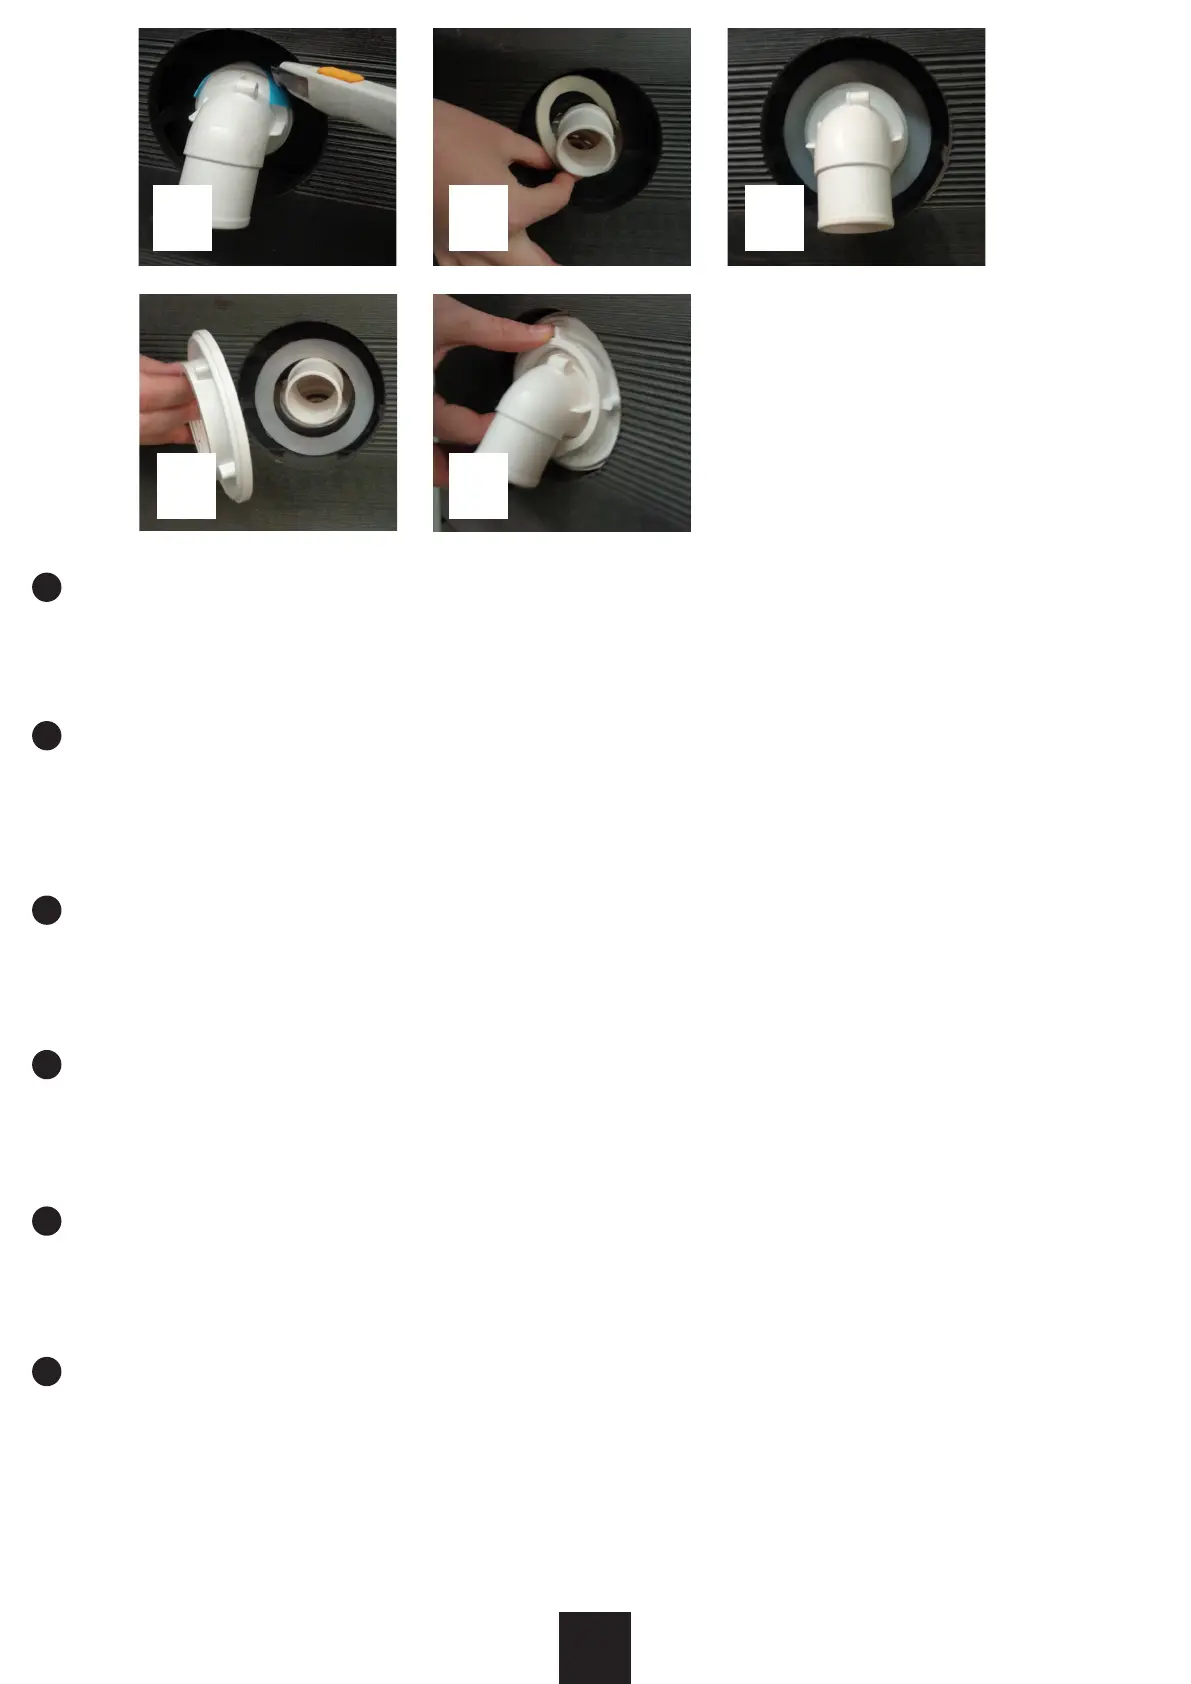
Insert the nozzle from the inside of the pool through the cut already made with a friction ring (F) and a gasket (J) once the are placed. This way, the gasket (J)
is in contact with the liner. Cut the piece of the liner that is visible from the outside (Picture 26). The other gasket (J) is put into place from the outside, place
it at the very back in contact with the liner (Photo 27). Place the other friction ring (F)l (Photo 28) and tighten rmly with the nut (T). (Photo 29)
To properly insert the nut from the exterior, the person located inside the pool holding the return valve, should slightly move backwards to x the nut with the
composite form the exterior. (photo 29 - 30)
Zainstaluj dyszę po wewnętrznej stronie basenu poprzez nacięcie wykonane wcześniej za pomocą pierścienia łożyskowego (F) i uszczelkę (J), założone
uprzednio na dyszy. W ten sposób uszczelka (J) styka się z linerem. Obetnij widoczny z zewnątrz fragment linera (zdjęcie nr 26). Drugą uszczelkę (J) zakładamy
od zewnętrznej strony, z tyłu, tak aby stykała się z linerem (zdjęcie nr 27). Załóż drugi pierścień łożyskowy (F)l (zdjęcie nr 28) i mocno dokręć nakrętkę (T).
(Zdjęcie nr 29)
Aby prawidłowo założyć nakrętkę od strony zewnętrznej, osoba znajdująca się wewnątrz basenu, trzymająca zawór zwrotny, powinna lekko przesunąć się do
tyłu, aby przymocować nakrętkę z kompozytem od strony zewnętrznej. (Zdjęcia nr 29 - 30)
Insert the nozzle from the inside of the pool through the cut already made with a friction ring (F) and a gasket (J) once the are placed. This way, the gasket (J)
is in contact with the liner. Cut the piece of the liner that is visible from the outside (Picture 26). The other gasket (J) is put into place from the outside, place
it at the very back in contact with the liner (Photo 27). Place the other friction ring (F)l (Photo 28) and tighten rmly with the nut (T). (Photo 29)
To properly insert the nut from the exterior, the person located inside the pool holding the return valve, should slightly move backwards to x the nut with the
composite form the exterior. (photo 29 - 30)
Introducei duza din interiorul bazinului prin tăietura deja realizată cu un inel de frecare (F) și o garnitură (J) odată ce sunt așezate. În acest fel, garnitura (J)
este în contact cu căptușeala. Tăiai bucata căptușelii care este vizibilă din exterior (Figura 26). Cealaltă garnitură (J) este pusă din exterior, așezai-o chiar în
spate, în contact cu căptușeala (Foto 27). Așezai celălalt inel de frecare (F) l (Foto 28) și strângei-l ferm cu piulia (T). (Foto 29)
Pentru a introduce piulia în mod corespunzător din exterior, persoana aată în interiorul bazinului care ine supapa de retur trebuie să se miște ușor înapoi
pentru a xa piulia cu compozitul din exterior. (foto 29 - 30)
För in munstycket från insidan av poolen genom det snitt som redan gjorts med en friktionsring (F) och en packning (J) när den har placerats. På
detta sätt är packningen (J) i kontakt med linern. Klipp delen av linern som syns från utsidan (Bild 26). Den andra packningen (J) placeras på plats
från utsidan, placera den längst bak i kontakt med linern (Foto 27). Placera den andra friktionsringen (F) l (Foto 28) och dra åt ordentligt med muttern
(T). (Foto 29)
För att sätta in muttern ordentligt från utsidan, ska personen som sitter inne i poolen som håller returventilen ytta något bakåt för att fästa
muttern med kompositen från utsidan. (foto 29 - 30)
PL
EN
CS
SK
RO
SV
 Loading...