49
31 32
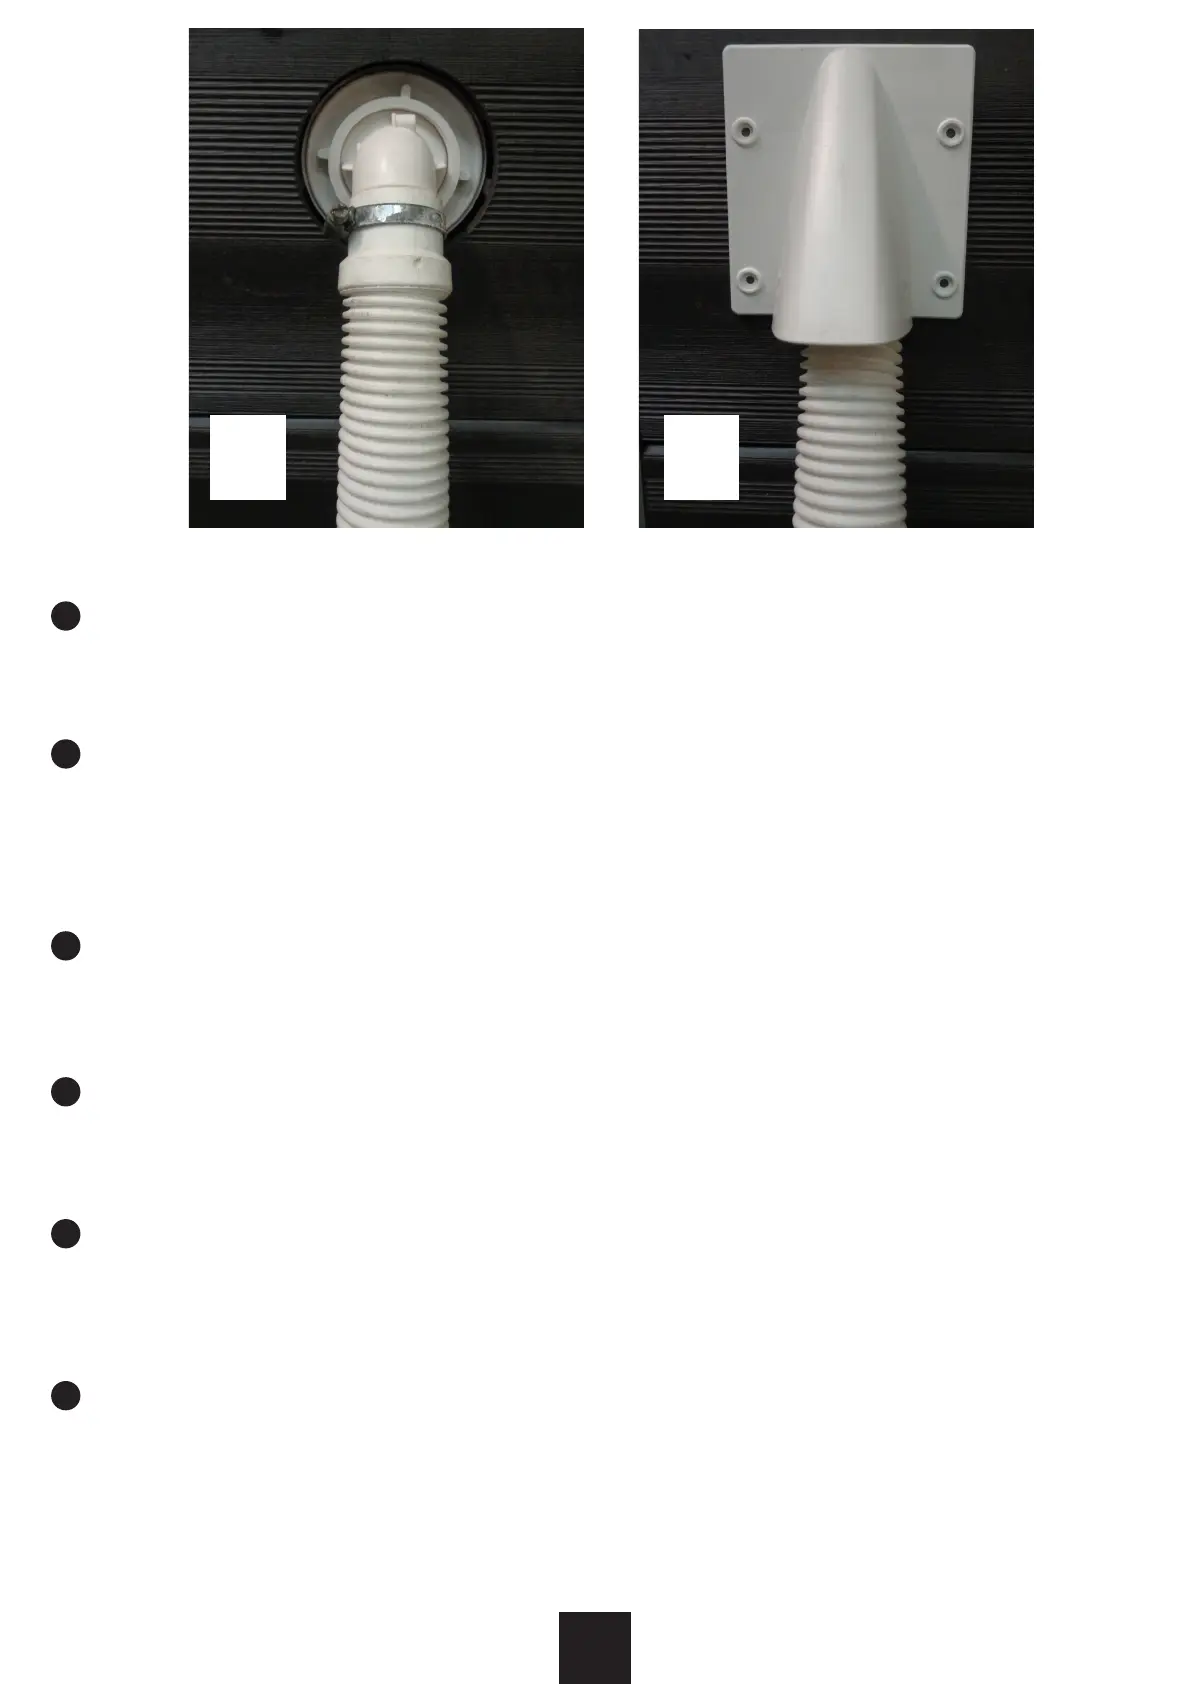
Insert the return hose (M) which goes from the outlet of the treatment unit to the return valve (V), and secure it with the clamp (A)
(photo 31). When the ltering is working, the safety cover must be installed as seen in photo 32. Use the screws included in the kit.
Tip: You can use a 2 mm drill bit to make a guide on the panel, this way it is easier to screw it. It is advisable that it is attached once the
ltration has begun. This way you can correct any problems you have with the ltration without needing to remove the trim.
Włóż wąż zwrotny (M), który biegnie od wylotu ltra do zaworu zwrotnego (V) i zabezpiecz go obejmą zaciskową (A) (zdjęcie nr 31).
Gdy ltrowanie jest już w toku, należy zamontować pokrywę zabezpieczającą, tak jak pokazano na zdjęciu nr 32. Użyj do tego śrub
znajdujących się w zestawie.
Wskazówka: Możesz użyć wiertła 2 mm, aby wykonać otwór w panelu – w ten sposób łatwiej będzie ją przykręcić. Panel należy
zamocować po rozpoczęciu ltracji. W ten sposób można skorygować ewentualne problemy z ltracją bez konieczności demontażu
listwy wykończeniowej.
Insert the return hose (M) which goes from the outlet of the treatment unit to the return valve (V), and secure it with the clamp (A)
(photo 31). When the ltering is working, the safety cover must be installed as seen in photo 32. Use the screws included in the kit.
Tip: You can use a 2 mm drill bit to make a guide on the panel, this way it is easier to screw it. It is advisable that it is attached once the
ltration has begun. This way you can correct any problems you have with the ltration without needing to remove the trim.
Introducei furtunul de retur (M) care merge de la ieșirea unităii de tratament la supapa de retur (V) și xai-l cu clema (A) (foto 31).
Când ltrarea funcionează, capacul de sigurană trebuie instalat așa cum se vede în fotograa 32. Folosii șuruburile incluse în kit.
Sfat: Putei utiliza un burghiu de 2 mm pentru a face un ghidaj pe panou, astfel este mai ușor să îl înșurubai. Este recomandabil să
e atașat odată ce ltrarea a început. În acest fel, putei corecta orice probleme pe care le avei cu ltrarea fără a nevoie să scoatei
ornamentul.
Sätt i returslangen (M) som går från behandlingsenhetens utlopp till returventilen (V) och fäst den med klämman (A) (foto 31). När
ltreringen fungerar måste säkerhetsskyddet installeras som ses på foto 32. Använd skruvarna som ingår i kitten .
Dricks: Du kan använda en 2 mm borr för att skapa en guide på panelen, på det sättet är det lättare att skruva fast den. Det
rekommenderas att det fästs när ltreringen har börjat. På så sätt kan du korrigera eventuella problem med ltreringen utan att du
behöver ta bort trimmen.
PL
EN
CS
SK
RO
SV
 Loading...