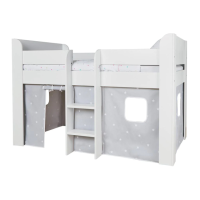
EasyManua.ls Logo

Great Little Trading Phoenix User Manual

Default Icon
15 pages
To Next Page IconTo Next Page
Page #1 background imageLoading...
Page #1 background image
1
Phoenix Bunk Bed
09/01/2018
V3
easy - medium - hard
A few important pointers before you start:
It might be worth checking on our website that there are no updates
or revisions to these instructions (if we have had helpful feedback from
other customers we pass it on via the product web page). Simply check
Please read the instructions right through before you start, and check that
all the hardware into piles makes it easier to be sure that everything is
present and correct.
Make sure you have the right tools. Allen keys are provided if required,
you need at the beginning of the instructions.
It’s a good idea to build the unit in the room where you are going to be
using it, to avoid the need to move it after it’s been assembled.
Do not throw away any packing materials until assembly is complete, just
in case you accidentally discard smaller parts and hardware.
Thank you for shopping with GLTC, we hope you enjoy having this
product in your home.
We know assembling furniture, toys or accessories is not everyone’s
favourite way to spend their time, so we’ve tried to make assembling this
item as quick and painless as possible.
Hopefully our efforts will have been worthwhile and you’ll sail through
the whole process. But if it all feels a bit too much like hard work, then
we do have an assembly company we can recommend: the Flatpack
Construction Company offers a nationwide service and can be contacted
on 0843 289 4951 or
Good luck!
two-person job
Question and Answer IconNeed help?

Do you have a question about the Great Little Trading Phoenix and is the answer not in the manual?

Great Little Trading Phoenix Specifications

General IconGeneral
BrandGreat Little Trading
ModelPhoenix
CategoryIndoor Furnishing
LanguageEnglish

Summary

Important Pointers Before Assembly

Safety Warnings

Age Suitability and Fall Risk

Specifies age restrictions for upper and lower bunks due to fall injury risks.

Mattress Size Recommendations

Details recommended mattress dimensions for both upper and lower bunks.

General Safety Precautions

Covers essential safety rules regarding parts, strangulation, placement, and assembly.

Wall Clearance and Placement

Advises on safe spacing between the bed and walls for all configurations.

Customer Service

Product Care

Customer Feedback and Improvement

Hardware Checklist

Component Checklist

Step 1: Assemble Lower Bunk Bed Ends

Step 2: Attach Upper Bunk Bed Ends

Step 3: Assemble Upper Bunk Bed Ends

Step 4: Install Long Safety Rail

Step 5: Attach First Upper Bunk Side Rail

Step 6: Attach Second Upper Bunk Side Rail

Step 7: Secure Long Safety Rail and Add Caps

Step 8: Connect Upper and Lower Bunk Beds

Step 9: Lock Upper Bunk to Lower Bunk

Step 10: Assemble Ladder

Step 11: Position Ladder

Step 12: Secure Ladder Hooks and Cover Holes

Step 13: Install Threaded Rods

Step 14: Attach Short Safety Rail

Step 15: Secure Short Safety Rail and Add Caps

Step 16: Install Webbed Slats

Step 17: Cap Unused Holes

Convert to Single Beds: Step 1

Convert to Single Beds: Step 2

Convert to Single Beds: Step 3

Convert to Single Beds: Step 4

Convert to Single Beds: Step 5

Related product manuals