25
determine where to mount the battery, module and switch
would be to connect all the wires and see how much distance
between them is required.
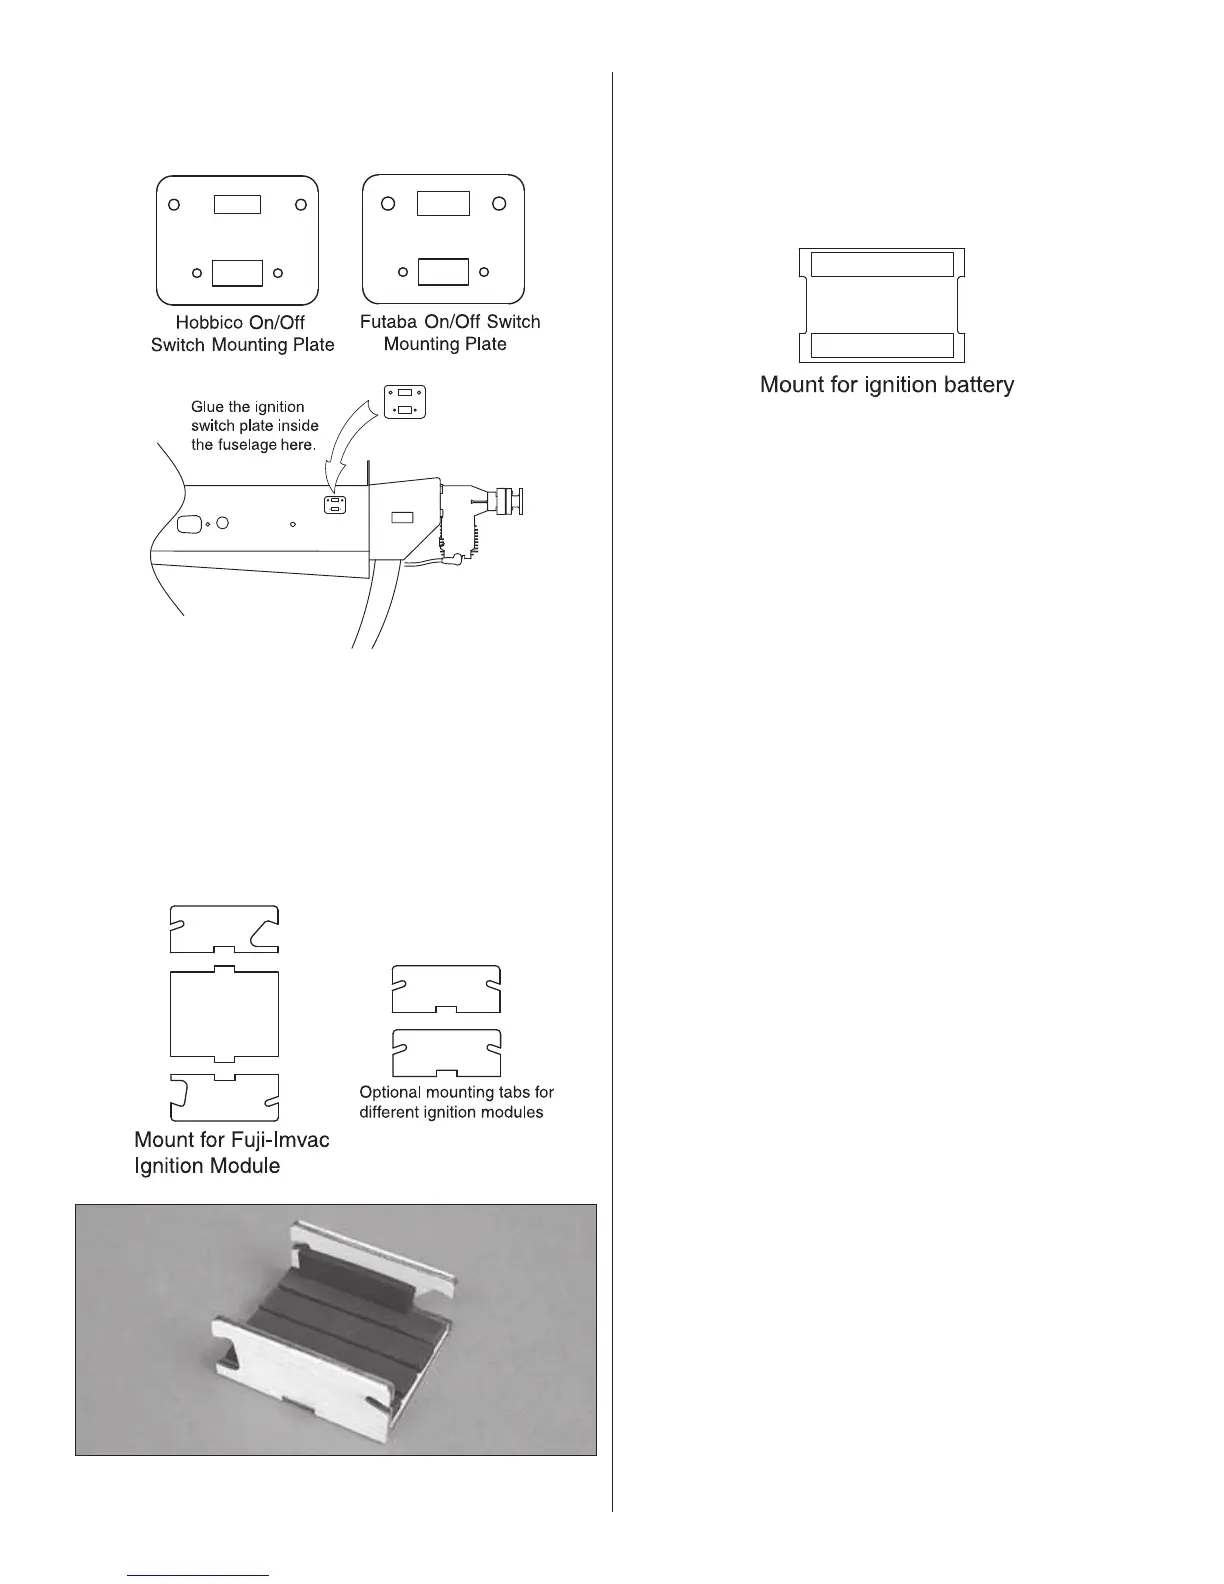
❏ 2. Glue one of the plywood switch mounting plates for the
engine ignition switch inside the fuselage. Choose the type of
mount for the on/off switch you will be using–there is one
switch mounting plate for a heavy-duty Futaba switch and
one for a heavy-duty Hobbico Pro switch. Both switch plates
also have a mounting port for an Ernst charge receptacle
for charging and checking the voltage of the ignition battery.
If using a different type of on/off switch, modify one of the
switch mounting plates as necessary.
❏ 3. If using the Fuji-Imvac BT-43EI-2 engine, glue together
the plywood ignition module mount as shown. (There is an
alternate set of mounting tab sides that don’t have the cut-
outs should you decide to remove the mounting tabs from
the Fuji-Imvac module or if you are using a different module.)
If using an ignition module that doesn’t fi t the mount, make
your own mount or use small screw hooks (not provided) to
mount the ignition module with rubber bands.
❏ 4. Make the ignition battery mount by gluing the plywood
strips to one side of the mounting plate.
❏ 5. Fuelproof the battery mount and the ignition mount with
epoxy or fuelproof paint. After the paint dries, apply strips of
1/8" [3mm] foam tape (GPMQ4424) to the mount to cushion
the module.
❏ 6. Use more Velcro strips to mount your ignition battery
to the battery mount with 1/4" [6mm] R/C foam rubber in
between. Securely glue the ignition mount and the battery
mount into position (where shown in the photo).
❏ 7. Mount the ignition on/off switch and a charge receptacle
to the switch mounting plate.
❏ 8. Connect the wires from the ignition module to the
connector plug exiting from the engine, to the spark plug,
and to the on/off switch connector. Connect the ground wire
to a bolt on the engine. Connect the ignition battery to the on/
off switch. Make sure none of the wiring contacts anything
that could melt it (especially the muffl er).
Go to “Final Assembly” on page 28.












 To Next Page