Do you have a question about the GREAT PLANES SPITFIRE and is the answer not in the manual?
Details the model's wingspan, weight, dimensions, and required components.
Outlines the product warranty terms and provides contact information for support.
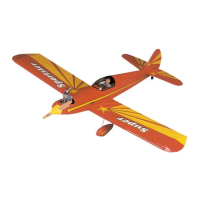
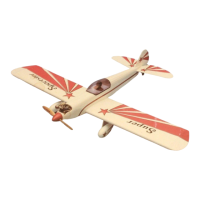
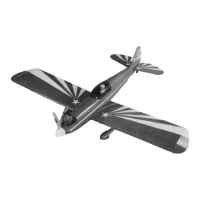
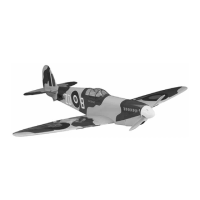
Welcomes the user and describes the model's suitability for sport or combat flying.
Explains the importance of AMA membership for liability protection and provides contact details.
Lists critical safety guidelines for assembling and operating the model.
Specifies the minimum required radio system, channels, and servos for the model.
Suggests suitable glow engines and brushless motors for the aircraft.
Lists necessary hardware, accessories, adhesives, and building supplies.
Lists helpful but not essential tools for building the model.
Recommends a specific propeller size for the recommended engines.
Provides tips on using a building stand and important assembly techniques.
Explains how to obtain spare parts for the model and contact information.
Defines frequently used acronyms and terms found in the manual.
Provides a conversion chart for measurements between inches and millimeters.
Guides users on checking the kit for completeness and part quality before building.
Lists all parts included in the kit with corresponding identification numbers.
Initial steps for preparing the model and control surfaces for assembly.
Instructions for attaching the ailerons to the wing panels using hinges.
Describes mounting servos in the wing and preparing for pushrod installation.
Attaching servo extensions and securing wire connections.
Installing servos into the wing bays and securing them properly.
Modifying servo arms and centering servos for control linkage.
Marking, drilling, and attaching control horns to the ailerons.
Assembling and connecting pushrods between control horns and servo arms.
Laminating and fitting the plywood wing joiners for strength.
Epoxying the two wing panels together using the wing joiner.
Aligning and preparing the plate for securing the wing to the fuselage.
Positioning and marking the horizontal stabilizer onto the fuselage.
Temporarily attaching the wing to aid in stabilizer alignment.
Trimming film to prepare for wing bolt plate attachment.
Fitting and epoxying the vertical fin onto the fuselage.
Gluing the stabilizer and attaching elevators with joiner wire and hinges.
Attaching the rudder to the vertical fin using CA hinges.
Routing pushrods from servos to control horns on elevators and rudder.
Installing servos into the fuselage and reinforcing mounting holes.
Assembling the fuel tank with stopper and fitting it into the fuselage.
Connecting pushrods to servo arms and securing them with connectors and set screws.
Attaching fuel lines to the metal tubes in the fuel tank.
Installing the engine mount to the firewall and attaching the engine.
Mounting the throttle servo in its designated bay.
Adding stringers to secure the fuel tank and provide mounting for trays.
Setting up the receiver tray, receiver, and battery pack.
Installing the throttle pushrod tube and pushrod for the servo.
Cutting the cooling hole in the fuselage for the brushless motor.
Gluing together the six pieces of the brushless motor mount adapter.
Attaching the motor to the mount adapter and the aluminum motor mount.
Making battery straps and gluing battery and radio trays into the fuselage.
Assembling and installing the ESC tray into the fuselage.
Epoxying the ESC tray and feeding ESC connections through the fuselage.
Detailed instructions for creating bullet connector adapters for the motor.
Verifying the motor spins clockwise and reversing leads if necessary.
Marking, drilling, and attaching the cowl to the fuselage.
Positioning the receiver antenna for optimal signal reception.
Connecting remaining servos and securing the battery pack to the tray.
Gluing the canopy and mounting the propeller and spinner onto the motor shaft.
Removing covering from the landing gear slots on the underside of the wing.
Attaching wheels, collars, straps, and the tail skid for landing gear.
Verifying that control surfaces move correctly with transmitter inputs.
Instructions for accurately applying the model's decorative decals.
Adjusting control surface travel for optimal flight performance.
Identifying the recommended balance point on the wing.
Procedures for checking and adjusting the C.G. for stability and flight.
Ensuring the model is balanced side-to-side for stable flight.
Instructions for marking the model with owner information for identification.
Guidance on charging transmitter and receiver batteries.
The importance of propeller balance for reducing vibration.
Performing essential radio system checks before the first flight.
Safety rules specific to operating model engines and motors.
Warnings and guidelines for safe handling and charging of LiPo batteries.
Key excerpts from the Academy of Model Aeronautics Safety Code.
Rules for operating the model's radio control system safely.
A comprehensive checklist of essential tasks before flying the model.
Guidance on adjusting fuel mixture for optimal engine performance.
Step-by-step instructions for successfully taking off with the model.
Tips for general flight characteristics, trims, and adjustments.
Instructions for initiating and executing safe landing approaches.
Details and benefits of the recommended RimFire brushless out-runner motor.
Information on the economical O.S. .25 FX glow engine.
Features of the 3200mAh Power Series LiPo battery pack.
Space for recording construction dates, purchase location, and finished weight.
A log to record details of each flight for performance tracking.
| Brand | GREAT PLANES |
|---|---|
| Model | SPITFIRE |
| Category | Toy |
| Language | English |