Cassette Type FCU
9
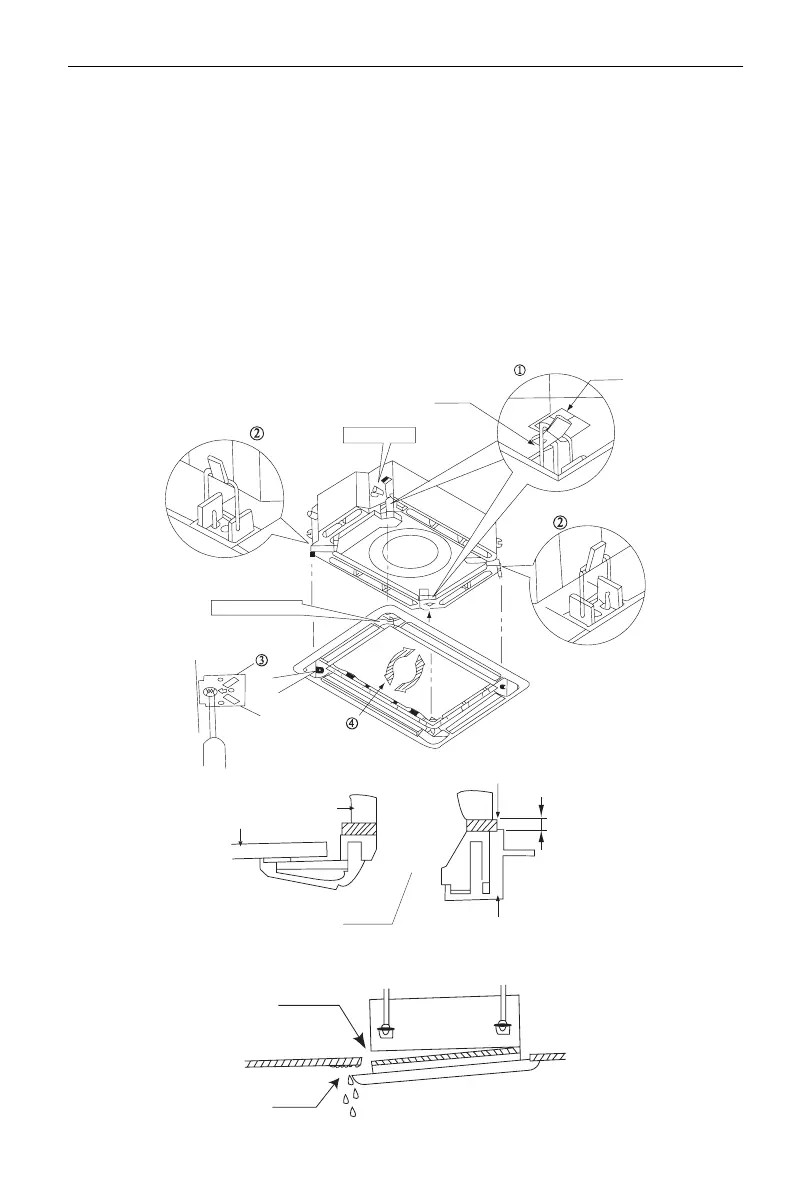
2.5 Installation of the Front Panel
2.5.1 Instalaltion Steps
As shown in the gure below, align the pipe outlet direction at the front panel to the pipe connector of
the unit. Then, do installation of the front panel as stated below.
(1) Temporarily place the front panel to the unit. In this case, put two buckles to the hookers in the opposite
direction of the air deector motor at the front panel.
(2) Temporarily place the other two buckles to the hookers at the main unit.
(3) Tighten four screws under the buckles in about 15mm (the front panel will rise up.)
(4) As shown in the gure below, adjust the front panel to make it meet the ceiling perfectly.
(5) Tighten screws until thickness of stufng material between the front panel and the unit goes within
5~8mm.
Pipe outlet
Hooker
Swing flap moto
r
Buckle
Unit
Air outlet
Decorative panel
5~8mm
Stuffing material
Ceiling
2.5.2 Precautions for Installation
(1) Incorrect tightness would lead to condition as shown in the gure below.
Air leak
Air leak
Water drop
Water drop
 Loading...