GMV-N56G/A3A-K, GMV-N63G/A3A-K, GMV-N71G/A3A-K, GMV-N56G/A2A-K,
GMV-N63G/A2A-K, GMV-N71G/A2A-K, GMV-N56G/A4A-K, GMV-N63G/A4A-K,
GMV-N71G/A4A-K, GMV-N56G/A8A-K, GMV-N63G/A8A-K, GMV-N71G/A8A-K
GMV-N56G/C9A-K, GMV-N63G/C9A-K, GMV-N71G/C9A-K, GMV-N56G/E3A-K,
GMV-N63G/E3A-K, GMV-N71G/E3A-K, GMV-N56G/B3A-K, GMV-N63G/B3A-K,
GMV-N71G/B3A-K, GMV-N56G/A3A-D, GMV-N63G/A3A-D, GMV-N71G/A3A-D
GMV-N56G/A2A-D, GMV-N63G/A2A-D, GMV-N71G/A2A-D, GMV-N56G/A4A-D,
GMV-N63G/A4A-D, GMV-N71G/A4A-D, GMV-N56G/A8A-D, GMV-N63G/A8A-D,
GMV-N71G/A8A-D, GMV-N56G/C9A-D, GMV-N63G/C9A-D, GMV-N71G/C9A-D
GMV-N56G/E3A-D, GMV-N63G/E3A-D, GMV-N71G/E3A-D, GMV-N56G/B3A-D,
GMV-N63G/B3A-D, GMV-N71G/B3A-D, GMV-ND56G/A3A-T, GMV-ND63G/A3A-T,
GMV-ND71G/A3A-T, GMV-ND56G/A8A-T, GMV-ND63G/A8A-T, GMV-ND71G/A8A-T
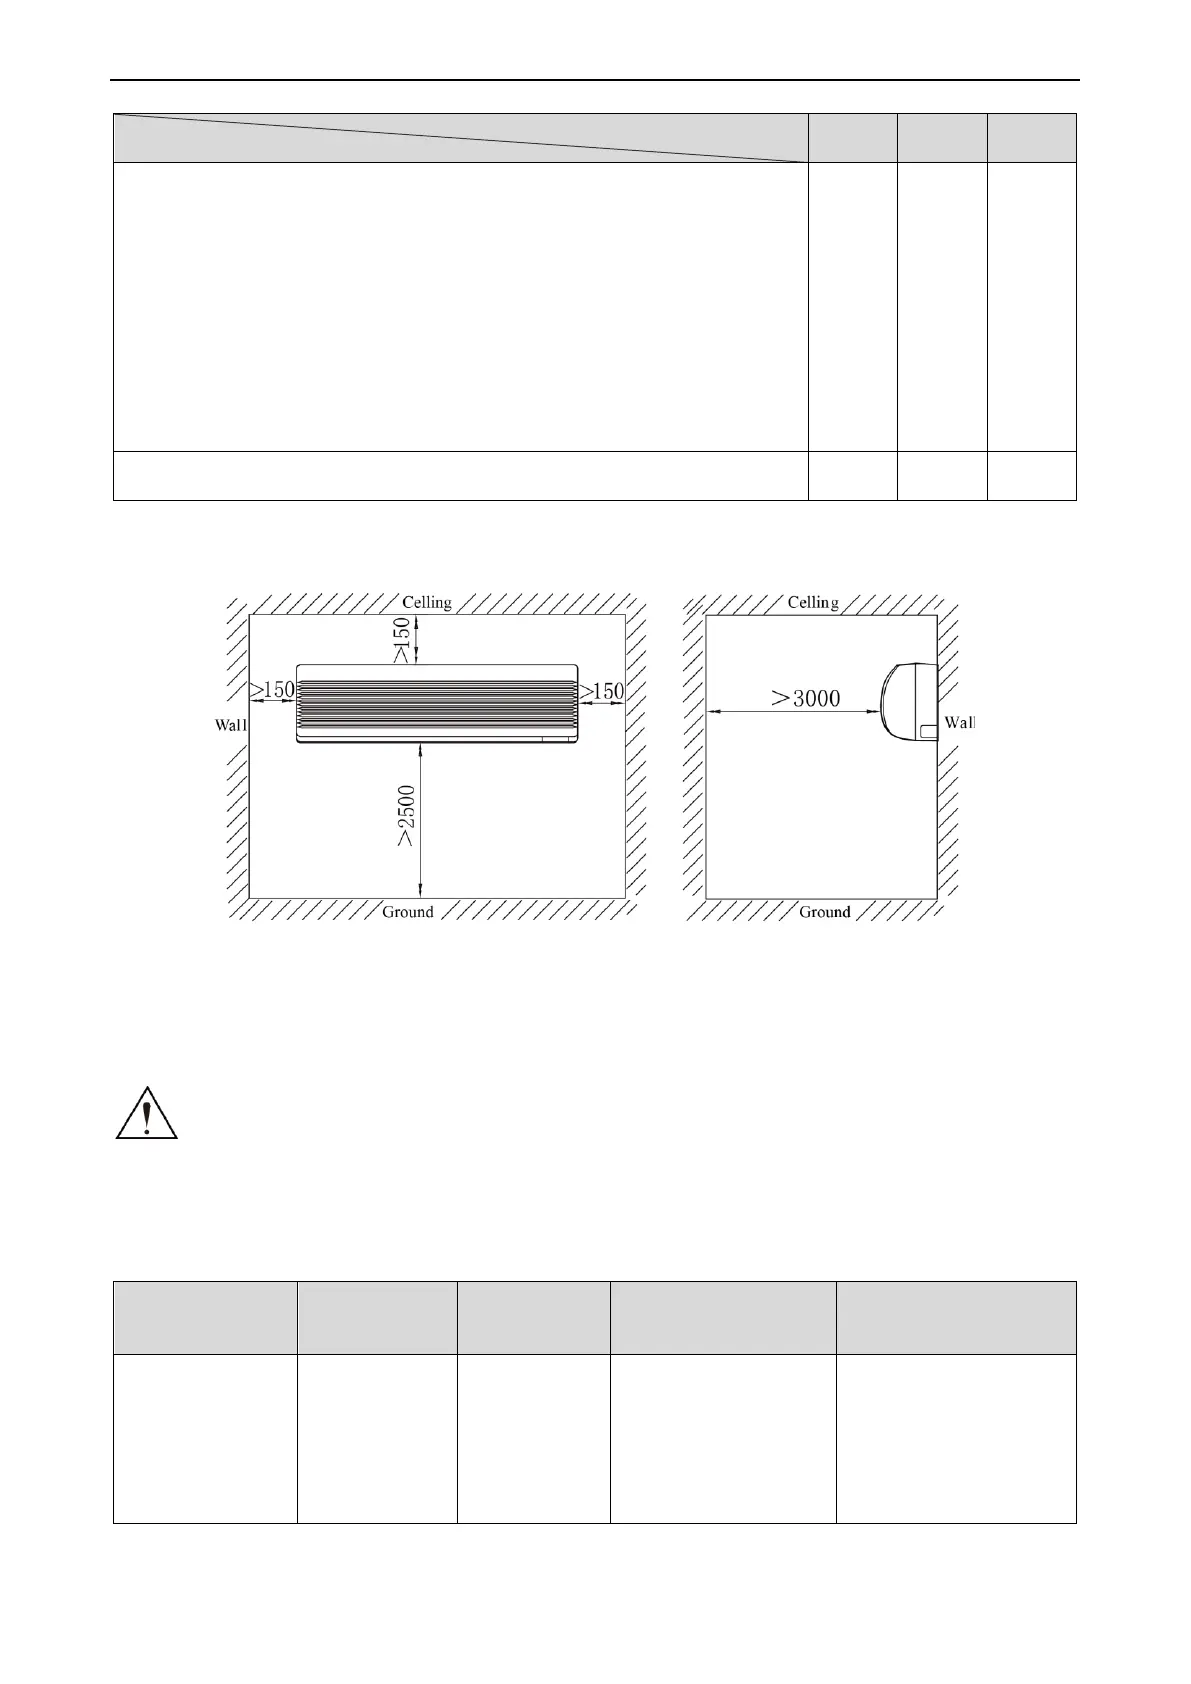
3.11.2 Installation space
Unit:mm
3.11.3 Installation notice
Connect the ends of the connection pipe with two leading pipes, and then tighten the joint nuts tightly.
Connect the connect pipe with the two relative leading pipe, tie the nut on tie –in of the connect pipe
tightly.
Notes:
① Be careful in bending the connection pipes, or you would damage the pipes.
② If the tightening torque for the flare nut is too great, leakage would happen.
3.11.4 Selection of air switch and power cord
 Loading...