EasyManua.ls Logo

Gree GPH12AO-K5NNA1A - User Manual

Gree GPH12AO-K5NNA1A
29 pages
Print Icon
To Next Page IconTo Next Page
Loading...
Change for life
Thank you for choosing our product.
Please read this Owner’s Manual carefully before operation and
retain it for future reference.
If you have lost the Owner's Manual, please contact the local agent
or visit www.gree.com or send an email to global@gree.com.cn for
the electronic version.
GPH12AO-K5NNA1A
GPC12AO-K5NNA1A
Model:
Owner's Manual
Original Instructions
Local air conditioner
Question and Answer IconNeed help?

Do you have a question about the Gree GPH12AO-K5NNA1A and is the answer not in the manual?

Summary

Safety Information

Explanation of Symbols

Details the meaning of warning, caution, and notice symbols indicating potential hazards.

Exception Clauses

Lists reasons for which the manufacturer bears no responsibility for personal injury or property loss.

Refrigerant Information

R290 Refrigerant Properties

Details about R290 refrigerant, its characteristics, and environmental benefits.

Refrigerant Handling Warnings

Crucial safety precautions for R290, including flammability and storage.

General Safety Precautions

Appliance Usage and Electrical Safety

Covers safe operation, handling of power cords, plugs, grounding, and water exposure.

Operational Environment and Safety

Safe Operating Environment

Specifies the required temperature range, indoor use, and placement for optimal operation.

Installation and Placement Guidelines

Advice on air inlet/outlet clearance, smooth surfaces, and avoiding inclination.

Component Identification

External Parts Overview

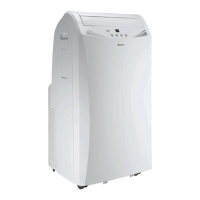
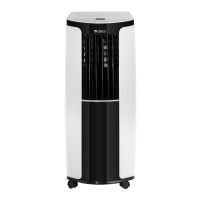
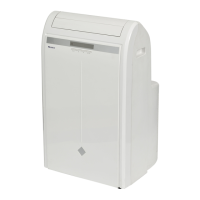
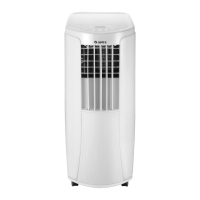
Identifies key external components of the air conditioner unit with numbered labels.

Remote Controller Identification

Shows and labels the buttons and display elements of the remote controller.

Control Panel Operation

Control Panel Layout

Details the buttons, indicators, and display on the main control panel.

Button Functions

Explains the operation of ON/OFF, +/- buttons, Fan speed, and Mode selection.

Remote Control Operation

Using the Remote Controller

Basic instructions on aiming, signal reception, and effective distance for remote control use.

Remote Control Buttons and Icons

Identifies icons on the display screen and lists functions of remote control buttons.

Detailed Remote Control Functions

Mode and Fan Speed Control

Explains operation for various modes (Auto, Cool, Dry, Fan, Heat) and fan speed adjustments.

Timer and Sleep Mode

Instructions for setting timers and activating the sleep mode for comfort.

Advanced Remote Features and Maintenance

WiFi and Combination Button Functions

Details WiFi activation, temperature display switching, and light control via button combinations.

Remote Control Battery Replacement

Step-by-step guide on how to safely replace batteries in the remote controller.

Cleaning and Maintenance

Cleaning Procedures

Instructions for cleaning the outer case, grille, and the air filter, including frequency.

Heat Discharge Pipe and Seasonal Checks

Guidance on cleaning the heat discharge pipe and performing pre-season and post-season checks.

Troubleshooting Common Malfunctions

Phenomenon and Cause Analysis

Lists common issues like no air blow, poor cooling, or strange sounds with their potential causes.

Malfunction Error Codes

Provides troubleshooting steps for specific error codes (F1, F2, F4, F0, E8, H3, H8).

Installation Precautions and Location

General Installation Safety

Covers governing codes, power cord usage, and general safety during installation and maintenance.

Ideal Installation Location

Specifies criteria for choosing a suitable location, avoiding heat sources, chemicals, and ensuring proper airflow.

Installation Preparation and Tools

Accessory and Optional Kit List

Lists all included accessories and optional installation kits available for the unit.

Required Installation Tools

Identifies the necessary tools for performing the installation process.

Power Cord and Drainage Setup

Installing Power Cord Hooks

Step-by-step guide to attach and wind the power cord securely.

Continuous Drainage Setup

Instructions for setting up continuous drainage using the middle hole option.

Water Drainage and Heat Pipe Installation

Collected Water Removal

Details two methods for removing collected condensation water from the unit.

Heat Discharge Pipe Guidelines

Recommendations for optimal heat discharge pipe length and installation for efficiency.

Heat Discharge Pipe Installation Methods

Standard Heat Discharge Pipe Installation

Illustrates correct and incorrect methods for connecting the heat discharge pipe.

Window Installation (Double Hung)

Instructions for installing the heat discharge pipe through a double-hung window.

Window and Immovable Window Installation

Sliding Sash Window Installation

Guides on installing the unit in a sliding sash window, including panel adjustments.

Immovable Window Installation Options

Details methods for installing in windows that cannot be opened (Optional 3 & 4).

Sliding Sash and Immovable Window Setup

Sliding Window Panel Assembly

Steps for fitting window panels and adjustment panels in sliding sash windows.

Immovable Window Installation Details

Specific instructions for installing in immovable windows using joints and panels.

Window Panel Adjustments and Sealing

Window Panel Fitment

Instructions for fitting window panels and adjustment/extension panels for various window widths.

Window Sealing and Bracket Attachment

Methods for sealing the window and attaching necessary brackets for secure installation.

Window Installation Variations

Installation in Standard Window

Detailed steps for connecting joints and adapters for window installation.

Installation in Immovable Window

Procedures for installing in immovable windows, including cutting holes and connecting joints.

Heat Discharge Pipe Disassembly

Disassembly from Double;Sash Windows

Instructions for removing the heat discharge pipe from double and sash window installations.

Disassembly from Standard;Immovable Windows

Steps for removing the pipe from standard and immovable window setups.

Operation Test and Schematics

Operation Test Procedure

Steps to perform a basic operation test after installation to ensure functionality.

Electrical Schematic Diagrams

Provides wiring diagrams for both GPH12AO-K5NNA1A and GPC12AO-K5NNA1A models.

Specialist Maintenance Requirements

Technician Qualification and Safety Prep

Outlines required certifications, safety checks, and preparation before working with refrigerants.

Work Area Safety and Refrigerant Checks

Details safety measures for the work area, including fire extinguishers and ignition source control.

Specialist Maintenance Procedures

Electrical and Component Safety Checks

Covers safety checks for electrical devices, sealed components, and cabling during repairs.

Flammable Refrigerant Handling

Guidelines for detecting flammable refrigerant leaks and acceptable leak detection methods.

Refrigerant System Servicing and Decommissioning

Refrigerant System Charging

Requirements and procedures for safely charging the refrigeration system with refrigerant.

System Decommissioning and Labelling

Steps for safely decommissioning the unit, recovering refrigerant, and proper labelling.

Refrigerant Recovery Best Practices

Refrigerant Recovery Equipment and Procedures

Details the use of recovery cylinders, equipment, weighing scales, and hoses.

Compressor Oil and Refrigerant Handling

Procedures for handling compressor oils and ensuring safe evacuation before transfer.

Overview

This document is an owner's manual for a GREE local air conditioner, specifically models GPH12AO-K5NNA1A and GPC12AO-K5NNA1A. It provides comprehensive instructions for operation, maintenance, and installation, emphasizing safety precautions and proper usage.

The air conditioner's primary function is to provide cooling, heating (for Cool&Heat models), dehumidification, and fan-only operation for indoor spaces. It is designed for household use and is not intended for commercial or industrial applications. The unit operates within a temperature range of 16°C (61°F) to 35°C (95°F).

Usage Features:

The air conditioner can be controlled via a control panel on the unit itself or through a remote controller.

Control Panel:

The control panel features several buttons and indicators:

  • ON/OFF button: Powers the unit on or off.
  • +/- buttons: Adjust the set temperature in Cool or Heat mode (16°C to 30°C / 61°F to 86°F). These buttons are inactive in Auto, Dry, or Fan modes. They also adjust timer settings.
  • Fan button: Cycles through fan speeds: low, medium, high, and auto fan.
  • Mode button: Cycles through operation modes: Cool, Dry, Fan, and Heat (for Cool&Heat units).
    • Cool Mode: Displays set temperature, cooling mode indicator is bright.
    • Dry Mode: Drying mode indicator is bright, dual-8 nixie tube does not display.
    • Fan Mode: Fan indicator is bright, dual-8 nixie tube does not display.
    • Heat Mode (Cool&Heat Unit only): Displays set temperature, heating mode indicator is bright.
  • Timer button: Enters timer setting mode. Allows adjustment of timer settings in 0.5-hour increments up to 10 hours, and 1-hour increments beyond 10 hours. The timer can be set for both ON and OFF operations.
  • Swing button: Activates or deactivates the automatic up and down swing of the horizontal louver.
  • WiFi indicator: Illuminates when the WiFi function is active.
  • Dual-8 nixie tube: Displays set temperature in Cool and Heat modes.

Remote Controller:

The remote controller offers similar functionalities to the control panel, along with additional features:

  • ON/OFF, Fan, Mode, +/-, Swing, Sleep, Timer, Health, and WiFi buttons.
  • Sleep button: Activates or deactivates Sleep operation mode, available in Cool and Heat modes to maintain a comfortable temperature.
  • Timer button: Sets timer ON or OFF. Adjustments are made using the +/- buttons.
  • Health button: (Not applicable for all models) Activates or deactivates health and scavenging functions.
  • WiFi button: Toggles the WiFi function on or off. Holding it for 5 seconds turns off WiFi.
  • Combination Buttons:
    • Temperature display switchover: Pressing "-" and "Mode" simultaneously in OFF status switches between °C and °F.
    • Light function: Holding "+" and "FAN" simultaneously toggles the lamp on or off.

The remote controller should be pointed towards the unit's signal receiver, with an effective distance of no more than 8 meters and no obstructions. It is powered by two AAA 1.5V dry batteries, which should be replaced when needed and removed during long periods of non-use.

Safety Precautions:

The manual stresses several critical safety warnings:

  • The appliance can be used by children aged 8 and above and persons with reduced physical, sensory, or mental capabilities under supervision. Children should not play with the appliance.
  • Ensure power specifications match the nameplate before operation.
  • Always turn off and unplug the unit before cleaning or maintenance.
  • Do not pull or drag the power cord, or insert/pull out the plug with wet hands.
  • Use grounded power and ensure reliable grounding.
  • Damaged supply cords must be replaced by the manufacturer or a qualified person.
  • Disconnect power immediately if abnormal conditions (e.g., burned smell) occur.
  • Turn off and unplug the unit when unattended.
  • Avoid splashing water on the unit to prevent short circuits or damage.
  • If a drainage hose is used, ensure ambient temperature is above 0°C to prevent water leakage.
  • Do not operate heating equipment near the unit.
  • Do not operate the unit in bathrooms or laundry rooms.
  • Keep the unit away from fire sources, inflammable, and explosive objects.
  • Maintain at least 30cm (12 inches) of reserved space around the unit.
  • Do not operate in humid environments.
  • Keep air inlet and outlet clean and unobstructed.
  • Close doors and windows during operation for better cooling.
  • Place the unit on a smooth, flat surface to avoid noise and vibration.
  • Do not incline or turn over the unit.
  • Avoid direct sunlight.
  • Do not put or hang dripping objects above the unit.
  • Do not repair or disassemble the unit yourself.
  • Do not insert objects into the air conditioner or air duct.
  • Do not use an extension cord.
  • The refrigerant used is R290, which is flammable. The appliance must be installed, operated, and stored in a room with a floor area larger than 11m², away from ignition sources, and in a well-ventilated area.

Maintenance Features:

Regular cleaning and maintenance are crucial for optimal performance and longevity.

Cleaning the Outer Case and Grille:

  • Wipe the outer case with a soft towel. For stubborn dirt or grease, use a neutral abluent.
  • Clean the grille with a cleaner or soft brush.

Cleaning the Filter:

  • Remove the filter by pressing the clasp and lifting it upwards.
  • Clean the filter with water or a cleaner. For very dirty filters, use warm water (40°C / 104°F) with a neutral abluent.
  • Dry the filter in a shady place.
  • Reinstall the filter once clean and dry.
  • The filter should be cleaned approximately every three months, or more frequently in dusty environments. Do not dry the filter with fire or a hair dryer to prevent deformation or fire.

Cleaning the Heat Discharge Pipe:

  • Remove the heat discharge pipe from the air conditioner, clean and dry it, then reinstall it.

Pre-season Check:

  • Verify that air inlets and outlets are not blocked.
  • Check the plug and socket for good condition.
  • Ensure the filter is clean.
  • Confirm batteries are installed in the remote controller.
  • Check that joints, window bracket, and heat discharge pipe are tightly installed.
  • Inspect the heat discharge pipe for any damage.

Post-season Check (Long-term Storage):

  • Disconnect power supply.
  • Clean the filter and outer case.
  • Remove dust and sundries from the unit.
  • Eliminate accumulated water from the chassis (refer to the "Drainage way" section).
  • Check the window bracket for damage; contact the dealer if damaged.
  • Ensure no accumulated water remains in the chassis and the heat discharge pipe is disassembled.
  • Unplug the unit and wrap the power cord.
  • Clean and pack the air conditioner to protect it from dust.

Malfunction Analysis:

The manual includes a troubleshooting guide for common issues such as the unit not operating, poor cooling/heating, remote controller not receiving signals, unusual sounds, and off-flavors. It advises users to check basic conditions (e.g., power, plug, filter cleanliness, door/window closure) before contacting a dealer or qualified professional. Specific error codes (F1, F2, F4, F0, E8, H3, H8) are listed with their corresponding troubleshooting steps, emphasizing professional service for persistent issues.

Installation Notice:

Installation must comply with governing codes and ordinances, using qualified power supply circuits and proper grounding. The unit should not be installed near strong heat sources, flammable gases, high-frequency devices, or in corrosive environments. Adequate space (at least 30cm) around the unit is required, and air inlets/outlets must be unobstructed. The length of the heat discharge pipe should be as short and flat as possible (less than 1m) to ensure cooling efficiency. Detailed instructions are provided for installing the heat discharge pipe in various window types (double-hung sash, sliding sash, immovable windows) using specific accessories like window adapters, panels, and sponges.

Specialist's Manual:

This section outlines requirements for maintenance and repair, emphasizing that only specialists with current valid certificates should work on refrigerant circuits, especially with flammable refrigerants like R290. It details safety preparation work, including checking for refrigerant presence, ensuring ventilation, and having fire extinguishing equipment readily available. Procedures for repairing sealed components, cabling checks, leak detection methods (electronic detectors, leak detection fluids), and proper removal and evacuation of refrigerant are also described. Labelling requirements for decommissioned or refrigerant-containing equipment are included.

Gree GPH12AO-K5NNA1A Specifications

General IconGeneral
Cooling Capacity12000 BTU/h
Heating Capacity12000 BTU/h
Weight (Indoor Unit)10 kg
Power Supply220-240V, 50Hz
Operating Temperature (Cooling)18°C to 43°C

Related product manuals