G36p
Oxygen Analyzer
Vers i o n 2.11 – Revision January 2021 – Part 01381 25
5 Configuration & Commissioning
Before starting the analyzer for the first time after completing the installa-
tion,
please check and confirm that all electrical connections are installed ac-
cording to the instruction.
After switching the power on, the analyzer readings shall be stable before starting cali-
bration. It normally takes about five minutes to warm up. During the heating up of the
sensor, the Main Menu will display the oxygen content of 0.0. After several minutes,
when the sensor has reached its operation temperature, the Main Menu starts displaying
the actual oxygen content.
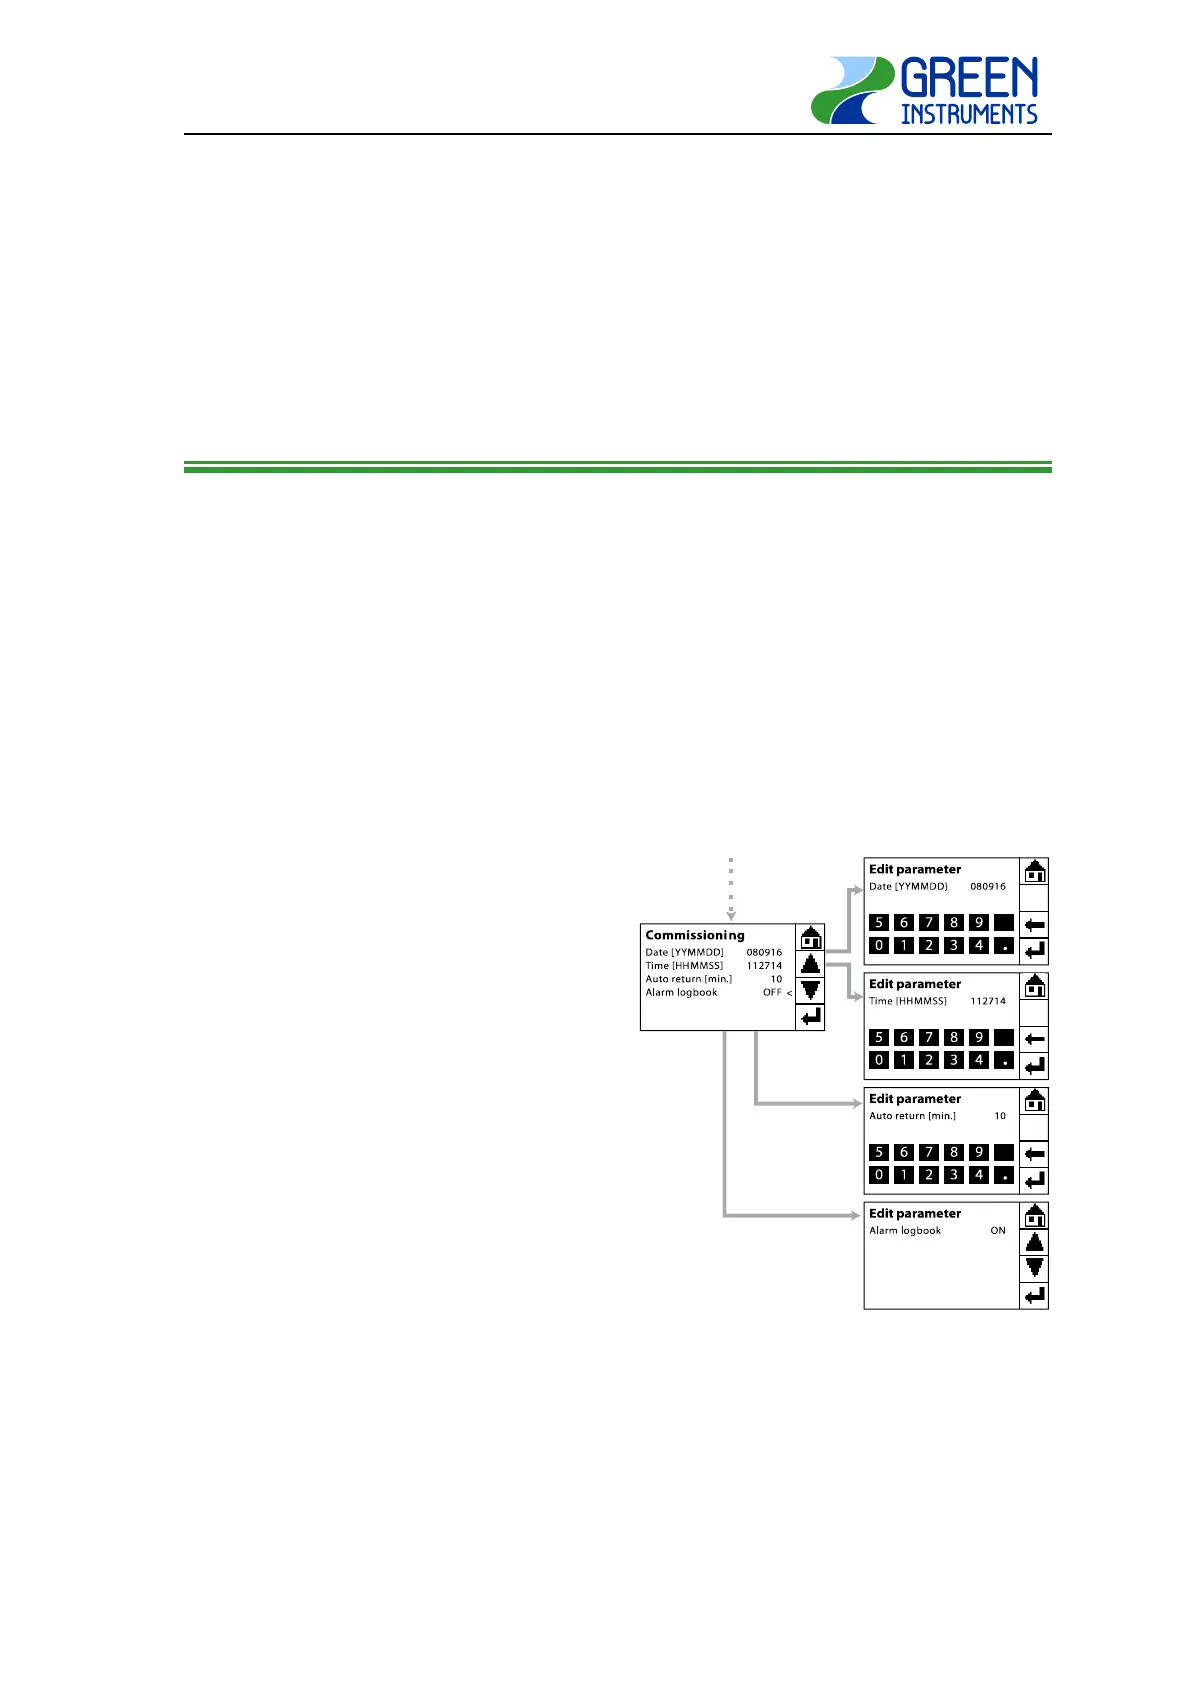
5.1 Setting of Basic Display Parameters
The route for setting the basic display parameters is Tools menu\Commissioning.
& Time: The logbook and trend graph
lendar and cloc
k as reference. The
date and time are per default set to follow
the Coordinated Universa
l Time (UTC). The
current time is displayed in the Graph Menu.
Date
and Time can be set upon your re-
ent. However, it is recommended not
to change date and time to
o often as it will
be difficult to keep track on the historical
data.
Auto return [min.]: Sets the timeout peri-
od. If there is no action taken during that
period, the system automatically reverts to
the Main Menu from anywhere in the func-
tional menus (except for the Graph Menu).
Default set
ting for auto return is 10
minutes. Minimum setting is 1 minute.
Figure 5-1: Basic display settings
Alarm logbook: ON/OFF mode is set here. When the Alarm logbook is ON, the alarm
logbook starts to record all of the alarms. The last 12 alarms are shown in Tools
menu\Alarm Logs. If the Alarm logbook is OFF, no alarms are saved.