Please read the instructions fully
before attempting installation.
IMPORTANT
This unit should be installed to current
IEE wiring regulations if in doubt
consult a qualified electrician.
• Timer must not be mounted on a
flammable surface.
• Ensure that the timer does not come
into contact with any combustible
materials such as towels or bedding.
• Ensure at least a 300mm air space
is allowed around the timer.
I
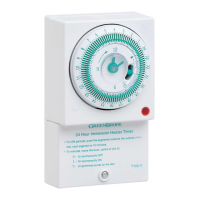
NSTALLATION/OPERATING
INSTRUCTIONS FOR 24 HOUR
MECHANICAL IMMERSION
HEATER TIMER - T102-C
WIRING THE TIMER
Drill two 6mm holes 97mm vertically
apart in the wall. Insert plastic anchor
(supplied) into holes and fit one No.6
screw to top hole leaving a gap under
the screw head of approximately 4.75mm.
Place the keyhole slot over the screw and
slide the timer down; if the timer is loose
remove it, tighten the screw and refit the
timer. Continue to do this until the timer
fits securely against the wall. Remove
terminal cover “D” by undoing screw
“C”. lnsert the second No.6 screw into
slot “B ” and tighten. Your timer is now
ready for wiring.
FIXING THE TIMER
TO THE WALL
Prepare cables for connection to the
timer, (see Diagram A).
The maximum size cable that can be
used with this timer is 2.5mm. If flat
twin and earth cable is used the bare
earth cable must be fitted with
green/yellow sleeving before fitting
t
he earth terminal.
Fit the bare wire ends into the correct
terminals (see diagram B). You must
ensure that there are no loose strands
left out of the terminals.
Firmly tighten all the screws.
Using the cable clamps and screws
provided and ensuring the cable
clamp is fitted the correct way round,
tightly secure the cable into position.
Ensure the correct cable cut-outs have
been removed in terminal cover “D”
and refit terminal cover “D ” and
tighten screw “C”.
N.B. Check all terminal screws are tight.
Your kingshield timer should be wired
from a fused spur. We recommend a
PowerBreaker H92 RCD model.
Switch off the mains and isolate
the supply by removing the appropriate
fuse before starting the installation.
B
C
Red or Brown
Black or Blue
Green or yellow
Diagram A
D
Diagram B
From mains
L = Red or Brown
N = Black or Blue
= Green or Yellow
To appliance