From behind, slide shelf through
gap in back panel of potting bench.
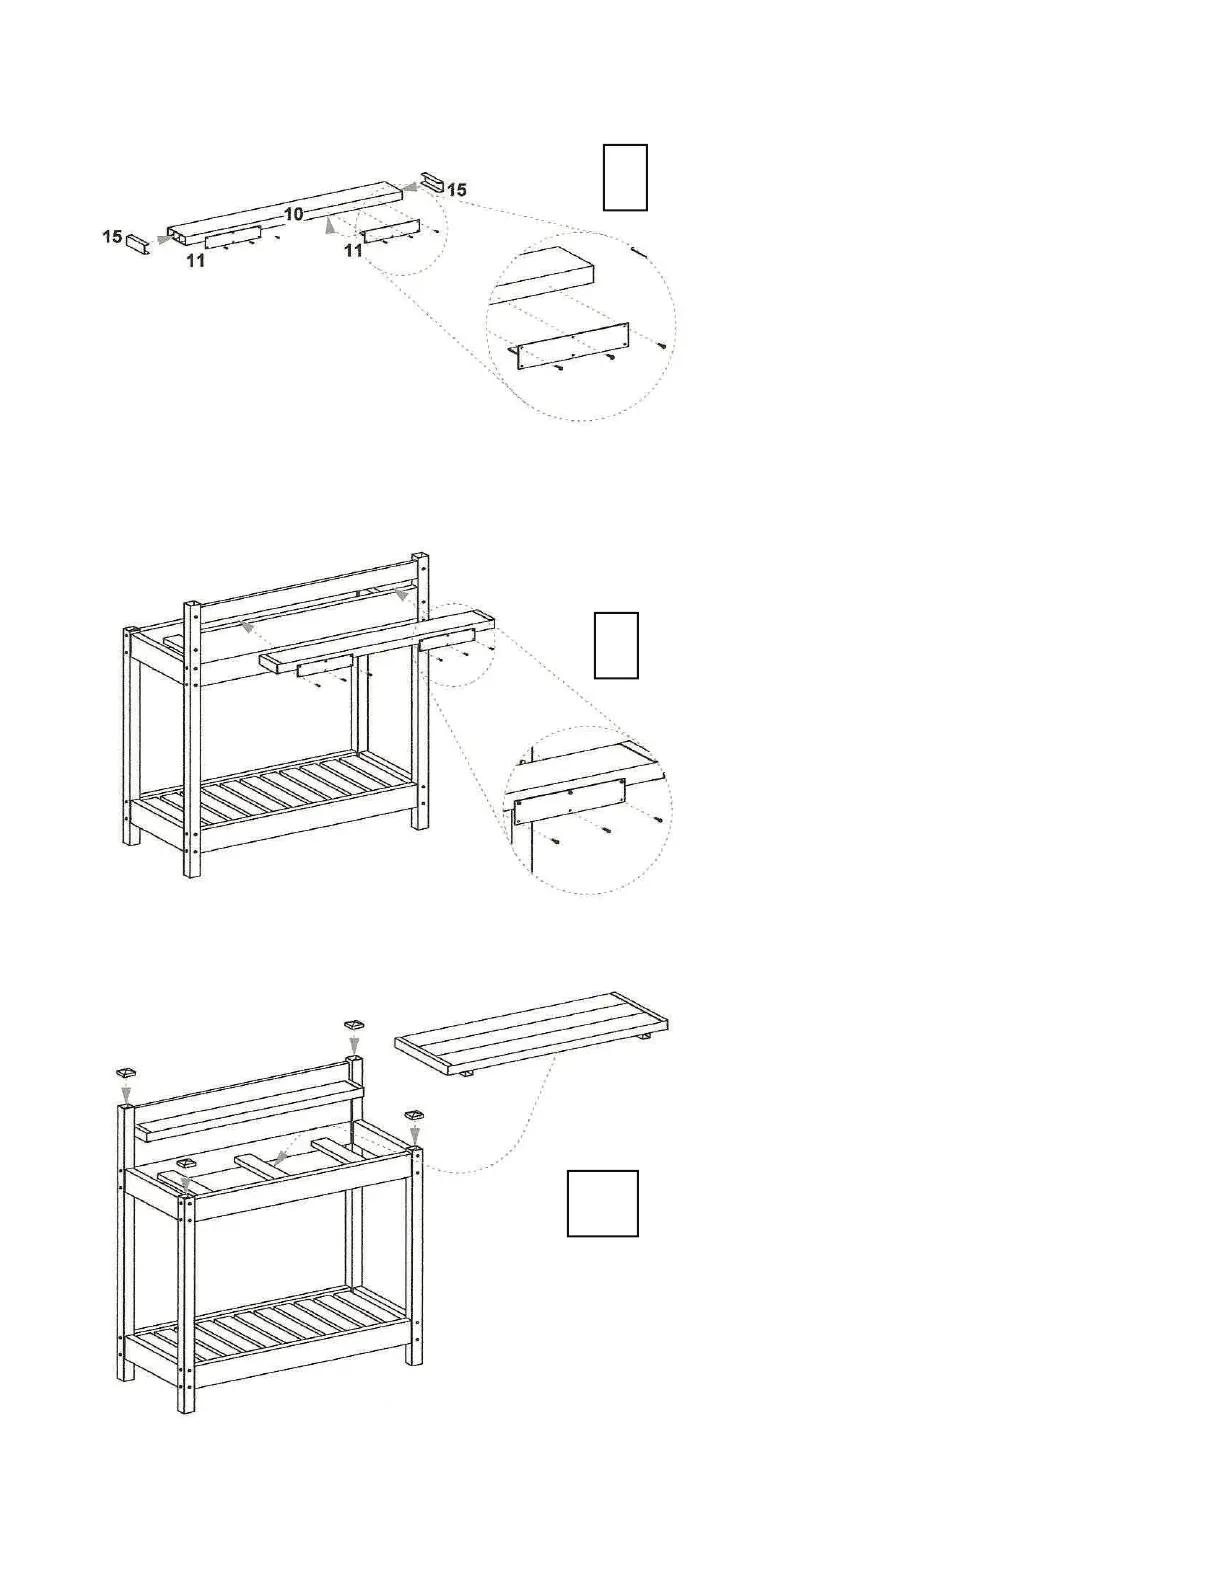
Using six ¾” kappet screws, fasten
wide end of brackets to
1½” x 5½” x 46½” back rail. Snap
kappet screw caps over screw
heads.
Lay out the 1½” x 5½” x 42½” shelf
rail and two 10¾” shelf suppport
brackets. Using a tape measure,
mark shelf rail 6” in from each end.
Using three ¾” kappet screws,
fasten narrow end of each bracket
to shelf rail 6” from end of shelf rail.
Shelf rail should sit on part of
bracket without screw holes. Apply
glue to inner edges of 5½” shelf
end cap (part 15). Slide end cap
onto ends of shelf rail.
8
9
Apply PVC glue to inner edges of
four 2” sq. post caps and place on
top of each post. Set table top
assembly into working area of
potting bench. The table top is
designed to be removed for easy
and quick cleaning.
10