Do you have a question about the Greentrees Hydroponics MULTI FLOW HYDROPONIC SYSTEM and is the answer not in the manual?
Details on unpacking parts, identifying controller assembly components, and preparing the reservoir.
Guides on connecting tubing sections, tube wraps, and pumps to the fill/drain tube mount.
Instructions for installing elbows and water level switches for proper system operation.
Guidance on connecting pots with tubing and tee fittings, and using end caps for unused outlets.
Steps for filling the reservoir with water, adding nutrients, and adjusting pH.
Instructions on priming pumps, setting the timer for watering cycles, and understanding cycle timing.
Identifies common errors like siphon issues caused by improper mount securing.
Answers common user questions regarding watering frequency, reservoir levels, nutrient addition, and pH.
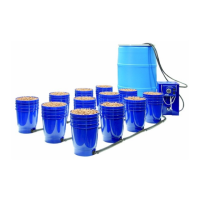
The Multi Flow Hydroponic System is an "ebb and flow" or "fill and drain" type hydroponic system designed for efficient plant cultivation. This system operates by filling the pots from the bottom with nutrient solution and then draining it back out, ensuring that the roots in each pot are evenly moistened. This method is recognized as one of the simplest and most reliable for hydroponic gardening.
A key feature of the Multi Flow system is its innovative design that overcomes limitations of traditional tray-based ebb and flow systems. While conventional systems often require significant spacing between larger plants, leading to a lot of empty space and increased water usage, the Multi Flow system utilizes individual pots connected at the base. This allows for flexible spacing of pots as needed, without increasing water consumption. The pots themselves are composed of two parts: a base and an insert. The inserts can be easily removed without disconnecting the tubing, offering a significant advantage for managing plants at different growth stages. For instance, new plants can be placed closer together, and as they grow and begin to crowd, their inserts can be simply lifted out and moved to bases that are spaced farther apart.
The system's controller assembly is central to its operation, housing a timer and two pumps: one for filling and one for draining. The fill pump is placed in the reservoir, while the drain pump is located within the controller. The controller also includes water level switches, which are adjustable to accommodate different pot sizes, ensuring optimal fill depth. For the Multi Flow Pots, the water level switch mount should be set to 11-1/2 inches from the base of the controller to ensure the lower pot fills to about ½ inch from the top.
Assembly of the system involves several straightforward steps. Connectors are inserted into grommets at the base of the controller, with a small amount of lubricant like water or dish soap recommended to ease installation. Tubing sections are cut and connected to the Fill/Drain Tube Mount, which is then secured to the reservoir lid. The Fill/Drain Tube Mount has siphon breaks on its bottom side that must remain unobstructed to prevent siphoning issues. The fill pump is connected to the Fill/Drain Tube Set and placed into the reservoir, with its power cord routed to the controller. The drain pump is connected to an elbow inside the controller. The pots are laid out in rows and connected using tubing and tee fittings, with elbows used for the ends of rows. Unused outlets in the controller's base are plugged with barbed fitting end caps. It is crucial that the connecting tubes lie as flat as possible and are not kinked, as kinks or high spots can reduce nutrient flow.
For media, expanded clay media such as Hydrocorn or Hydroton is recommended. Before use, the media should be washed to remove fine debris that could clog the system. This is done by filling the upper pots with media and running water over them.
Once assembled, the system is ready for planting and operation. Cuttings can be placed in pots filled halfway with media, then topped off. The reservoir is filled with water to about two inches from the top. It is recommended to adjust the pH of the water to 6.3 before adding nutrients, as hydroponic nutrients are most soluble at this pH. Adjusting the pH beforehand helps the nutrient dissolve better, and a post-nutrient addition pH check is also advised as nutrients can alter pH.
Priming the pumps is an important initial step. If a pump is started for the first time or has run dry, its impeller chamber may be full of air. Jiggling the pump or tube while it's submerged can help release the air and initiate pumping. The pump inlet should always remain submerged to prevent air intake.
The system's timer allows for setting watering times. Pins on the dial are pushed out to activate the system for 15-minute fill cycles, after which the system drains automatically. For larger systems like the 48-pot setup, 30 minutes may be needed for complete filling, requiring two adjacent pins to be pushed out. Multiple watering cycles per day can be set by pushing out pins at desired times.
Maintenance is crucial for optimal performance. The reservoir should be topped off frequently, as nutrient concentration can increase if the water level drops below two-thirds full. Topping off should occur after the system has drained for at least 30 minutes to prevent overflow. It is also recommended to drain the system and replace the nutrient solution every two weeks. This involves filling the reservoir halfway with water, letting it fill the pots, draining it back out, and discarding the water. Scrubbing the reservoir and pots is generally not necessary. Nutrient should be added every time the reservoir is filled, using half-strength nutrient for topping off between full changes. pH should be checked regularly, ideally daily for high-water usage plants and weekly for low-water usage plants, to maintain it close to 6.3. Hydroton media can be reused multiple times after cleaning by soaking in a 0.5% hydrogen peroxide solution overnight and rinsing thoroughly.
The Multi Flow system is designed for durability, but certain modifications can void the warranty. For example, modifying the system to operate as a top-feed drip, which increases drain pump operation, or replacing the drain pump with a larger, higher-current model, can reduce the life of electrical components. Barriers in the controller's bottom keep the drain pump away from water level switches, as the pump's magnetic field can interfere with them. Removing these barriers also voids the warranty.
The system can support plants up to about 5 feet tall without additional support, and even taller with trellises. The controller is designed to leave about 1-2 inches of water after draining, which is normal and prevents the pump from running dry. The reservoir, controller, and pots should all be placed on a flat, level surface. While different plant types can be grown in the same system, they should have similar nutrient and watering needs. If some pots do not fill completely or drain properly, it usually indicates an obstruction such as a rock, a kink in the tube, a rubber stopper, or overgrown roots.
The Multi Flow Hydroponic System offers a reliable and flexible solution for hydroponic gardening, designed to simplify plant management and optimize growth by addressing common challenges of traditional systems.
| Material | Plastic |
|---|---|
| Pump Included | Yes |
| Pump Type | Submersible |
| Tubing Included | Yes |
| System Type | Ebb & Flow |
| Usage | Vegetables/Herbs/Fruits |