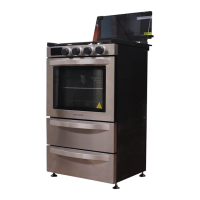
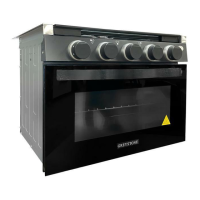
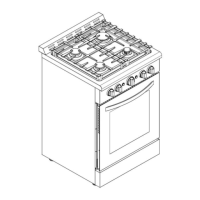
The GREYSTONE 21-inch Gas Range (Models: DK213-21AS / DK213-21CS) is a cooking appliance designed for recreational vehicles, offering both top surface cooking and oven baking capabilities. This manual provides essential information for safe use, installation, operation, and maintenance of the appliance.
Safety Precautions and Warnings
The manual emphasizes several critical safety precautions. Users are warned never to operate the top surface cooking section unattended, as failure to follow this could lead to fire, explosion, burns, property damage, personal injury, or death. In case of an oil/grease fire, users are instructed to keep away from the appliance, call the fire department, and never attempt to extinguish it with water.
A significant warning highlights the risk of the range tipping over, which can cause death or serious burns, especially to children or adults. To prevent this, the anti-tip device must be properly installed and engaged with the structure and the range. It must be re-engaged if the range is moved.
The appliance should not be used as a space heater, as this can cause carbon monoxide poisoning and overheating. The rear vent on the countertop should never be covered, nor should an entire rack be covered with materials like aluminum foil, as this blocks airflow, potentially leading to carbon monoxide poisoning, explosions, or fires.
Users are advised against storing or using gasoline or other flammable vapors or liquids near the appliance. In the event of a gas smell, the user should immediately turn off the gas supply, call their gas supplier, and if unable to reach them, call the fire department. They should not try to light any appliance or touch any electrical switch. Installation and service must be performed by a qualified installer or service agency.
The manual uses safety alert symbols: "WARNING" indicates hazards that could result in severe personal injury or death, while "CAUTION" indicates hazards that could result in minor personal injury.
Technical Specifications
The GREYSTONE 21-inch Gas Range operates on propane gas and requires a 12V DC power input of less than 2 Amps.
- Burner BTU/HR:
- Left and Right Burner: 6500 BTU
- Front Burner: 8000 BTU
- Oven: 7100 BTU
- Inlet Pressure: 10" WC Min to 13.8" WC Max
- Inner Volume of the Oven: 51L
The appliance conforms to ANSI Z21.57-2010 Recreational Vehicle Cooking Gas Appliances, ANSI Z21.57a-2012 Addenda to Recreational Vehicle Cooking Gas Appliances, and CAN1-1.16-M79 (reaffirmed 2016) Propane Cooking Appliance For Recreational Vehicles.
Installation Requirements
Installation must comply with local codes or, in their absence, with the National Fuel Gas Code, ANSI Z223.1/NFPA 54 (US) or the Natural Gas and Propane Installation Code, CSA B149.1 (Canada). Electrical grounding must conform to local codes or, in their absence, the National Electrical Code, NFPA 70 (US) or the Canadian Electric Code, CSA C22.1-02 (Canada).
Minimum clearances for combustible construction are specified:
- 0” between the adjacent combustible construction and the back of the appliance.
- 7.25" (18.4 cm) horizontal clearance between the appliance and combustible construction extending from the cooking surface to 18 in (457 mm) above the cooking surface.
- The minimum horizontal distance between overhead cabinets must not be less than the width of the appliance.
- The maximum depth of cabinets installed above top surface cooking sections is 13 in (330 mm).
- Any openings in the wall behind the appliance and in the floor under the appliance must be sealed.
The appliance must be isolated from the gas supply piping system by closing its individual manual shutoff valve during pressure testing of the system at test pressures equal to or less than 1/2 psi (3.5 kPa). The maximum gas supply pressure is 1/2 PSI, and the gas supply pressure for checking the regulator setting should be at least 11 in wc (2740Pa).
Usage Features
The control panel includes an Oven button, LED Cinema Display, Stove button, Temp "+/-" buttons, Time "+/-" buttons, LR knob, FM knob, RR knob, and Oven knob.
Oven Burner Operation:
- Press the "Oven" button to turn on the oven light and the blue backlight of the oven knob, and open the oven main valve.
- Press and turn the oven knob counterclockwise to start the oven burner. Release when the knob backlight turns red.
- Use the "Temp" buttons to set the desired temperature (range: 122°F~490°F). The LED will flash for 5 seconds before entering baking status. Long pressing the buttons allows for quick adjustment.
- Press and hold both "Temp" buttons for 5 seconds to display the actual oven temperature.
Cooks-top Burner Operation:
- Ensure all knobs are in the OFF position and the main gas valve is open.
- Rotate the appropriate burner knob counterclockwise to "HI" position and press for 5 seconds until the burner ignites.
- Adjust the flame by pushing and rotating the burner control knob. The top cover must be open when the main burner is in operation. Flame size should not extend beyond the edge of the cooking utensil.
Lamp Control:
- "Oven" button: Controls the oven lamp and the backlight of the oven ignition knob. Blue backlight for off, red for ignition.
- "Stove" button: Controls the backlight of the stove knob. Blue for off, red for ignition.
Timer Setting:
- Press the "Oven" button; the lit icon will blink.
- Use the "Time" buttons to set the timing (range: 0-99 minutes). Long pressing allows for quick adjustment.
- When the set time is up, the air source is cut off, the flame extinguishes, and a buzzer sounds. The valve body must be reset to the closed state for normal ignition next use.
Electronic Ignition:
The product uses pulse ignition. Press the corresponding knob and turn it anticlockwise to ignite.
Turning OFF:
To turn off the oven or burner flame, push and turn the control knob clockwise to the OFF position. Always turn off the tank valve when traveling or refueling the gas tank.
Flame Quality:
Gas burners should burn blue. Yellow tips (over 1 inch) indicate insufficient air for combustion, suggesting the air shutter (Venturi) may need adjustment. Carbon or soot deposits can also affect cooking evenness.
- Soft blue flames: Normal for natural gas.
- Yellow tips on outer cones: Normal for LP gas.
- Yellow flames: Abnormal for any gas; call for service.
Maintenance Features
Cleaning Instructions:
- Ensure all control knobs are in the OFF position and the range is cooled before cleaning.
- Use an oven cleaner specifically designed for ovens, following its instructions.
- Clean spills immediately, as they can cause discoloration or staining of the range or stainless steel.
- Exercise caution around burners to avoid damaging the metal igniter electrode.
- Allow porcelain surfaces to cool before cleaning to prevent cracking or burns.
- Use a mild soapy water solution for cleaning porcelain, stainless steel, painted surfaces, burner grates, and plastic items.
- Exhaust fan ventilation hoods and grease filters should be kept clean to prevent grease accumulation and ignition.
DO NOT'S of Sanitation and Upkeep:
- Do not use oven cleaners on any surface other than the oven.
- Do not use bleach or rust removers.
- Do not use steel wool; use non-abrasive pads (soft side of a sponge or washcloth).
- Do not use abrasive, gritty, or acid-type cleaners.
- Do not block combustion air ventilation.
- Do not store flammable liquids, vapors (like gasoline), or other combustible equipment near the range.
- Do not use metallic or wire brushes to clean components, as bristles can get stuck in burner ports, leading to explosions or fires.
- Do not allow acidic foods (vinegar, citrus juices, tomatoes) to remain on painted porcelain, cook-top, or grates, as acids react with paint and gloss. Clean egg spills immediately once the cook-top has cooled.
Leveling the Range:
The range must be level for proper operation. Adjust the four screw-type leveling legs at the bottom corners by turning them clockwise to raise or counter-clockwise to lower the range. Use a level on surface units to check.
Anti-Tip Bracket Installation:
To reduce the risk of tipping, the anti-tip device must be properly installed.
- Place the anti-tip bracket on the floor as shown in the figure (can be installed on either right or left side).
- Mark the locations of the two holes of the anti-tip bracket on the floor.
- Use a 5/16" masonry drill bit and insert plastic anchors.
- Secure the bracket to the floor using the supplied screws.
- Slide the appliance into position.
If the range is relocated, the bracket must be removed and reinstalled in the new location.
Troubleshooting
The manual includes a troubleshooting guide for common issues:
- Area surface burners will not ignite or do not ignite uniformly:
- Surface control knob not fully rotated to HI position.
- Gas valve not open.
- Burners clogged (clean with wire, toothbrush, or needle).
- Low gas level in tank (refill or replace).
- Moisture on the burner (dry thoroughly).
- Debris in gas line (let burner run to clear).
- Surface burner flame is yellow or orange instead of blue:
- Humid air in the home (can be caused by humidifiers).
The GREYSTONE appliance comes with a one-year limited warranty from the original purchase date. GREYSTONE will cover costs for repairing or replacing defective parts due to materials or workmanship, provided the appliance is installed, used, and maintained according to instructions.
Exclusions from Warranty:
- Products with altered or removed serial numbers.
- Products transferred to another owner or removed from the USA or Canada.
- Rust on the interior or exterior.
- Secondhand products.
- Commercial use.
- Service calls not involving malfunction or defects, or for appliances not used in ordinary household settings or not according to instructions.
- Service calls to correct installation or instruct on usage.
- Expenses for making the appliance accessible for servicing (e.g., removal of trim, cupboards, shelves).
- Service calls to repair knobs, buttons, handles, or other cosmetic parts.
- Surcharges for after-hour, weekend, or holiday service calls, tolls, ferry trip charges, or mileage expenses for remote areas (including Alaska).
- Damage to the finish or home incurred during installation (floors, cabinets, walls, etc.).
- Damage caused by unauthorized service, non-genuine GREYSTONE parts, or external causes (abuse, misuse, inadequate power supply, accidents, fires, acts of God).
The customer's sole remedy is product repair or replacement. Implied warranties are limited to one year or the shortest period allowed by law, but not less than one year. GREYSTONE is not liable for consequential or incidental damages. Proof of purchase is required for warranty purposes. Product features and specifications are subject to change without notice.