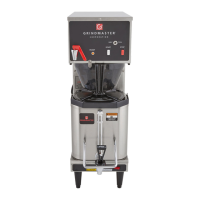
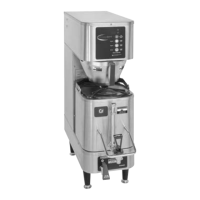
P200E Shuttle & RAPS200E
Airpot/Shuttle Brewer Series
Operation and Instruction Manual
Installation
WARNING: ELECTRIC SHOCK HAZARD!
INSTALLATION OF THIS APPLIANCE SHOULD BE PERFORMED BY
QUALIFIED SERVICE PERSONNEL ONLY. IMPROPER
INSTALLATION COULD RESULT IN ELECTROCUTION.
See rough-in drawings in this manual for dimensions and locations of
electric and water input.
Set-Up/Position
1) Remove the brewer from the packing material and attach its legs.
2) Position the brewer on a strong, stable table or counter. Check
the level front to back and side to side. Adjust the legs to the
correct level.
IMPORTANT:
THE PERSON INSTALLING THIS APPLIANCE IS RESPONSIBLE
FOR ENSURING THAT ELECTRIC AND WATER CONNECTIONS
MEET THE REQUIREMENTS OF THE NATIONAL ELECTRIC
CODE, NATIONAL PLUMBING CODE, AND ANY LOCAL
ORDINANCES.
Water Hook-up
1) Water inlet (supply) fitting is located at rear of unit.
2) Use 1/4" copper or flexible water line to prevent strain. Do not use low temperature plastic tubing. The connection
is 1/4" flare.
3) Water line pressure must be from 30 to 70 psi.
4) Hot (up to 160F) or cold water may be used. Hot water offers faster recovery between brews, (Use cold water only
if in-line water filters are implemented before the brewer).
5) Install a shut-off valve near the brewer.
6) Installing a filtering system can improve the taste of brewed coffee and extend the life of the brewer. If your water
has high calcium (lime), chlorine, or iron content, this is especially important. The filter should be the lime inhibiting
type if cold water is used. Contact our Customer Service Department to select the filter for your conditions.
© Grindmaster Corporation, 1996
Printed in the U.S.A.
1004 FORM # AM-308-06
Part # A090-085
Prior authorization must be obtained from
Grindmaster for all warranty claims.
Table of Contents
Installation and Start-up ......................................1-2
Operation ............................................................3
Adjustments ..........................................................4-5
Cleaning ..........................................................5-6
Service ............................................................7
Troubleshooting
Filling Problems .................................... 8
Heating Problems ................................. 9
Brewing Problems ................................ 10
Exploded View for P200-E ....................................11
Exploded View for P200 (G version)......................12
Exploded View for RAPS200-E..............................13
Exploded View for RAPS200 (G version) ..............14
Rough-In Drawing for P200-E................................15
Rough-In Drawing for RAPS200-E ........................
16
Wiring Diagram for P200E/RAPS200-E ..........17
Grindmaster Corporation™
4003 Collins Lane
Louisville, KY 40245 USA
(502) 425-4776 (800) 695-4500
(800) 568-5715 (Technical Service Only)
FAX (502) 425-4664
www.grindmaster.com
!