Chassis TYGRUNDIG Service
1 - 48
Chassis TYGRUNDIG Service
1 - 48
ENGLISH
48
OPERATION USING EXTERNAL DEVICES
-----------------------------
Device operation
You can decide whether external devices should
react to your television's remote control.
1 Press »
«, use »
V
«, »
Λ
«, »
<
« or »
>
« to
select the preset »HDMI1« to »HDMI3« and
press
»OK«
to confirm.
2 Open the menu with »MENU«.
3 Select the menu item »SOURCE SETUP« with
»
V
« or »
Λ
« and press
»OK«
to confirm.
– The »SOURCE SETUP« menu appears.
4 Select the line »Remote Control« with »
V
«
or »
Λ
«.
5 Select the type of operation (»RC
P
assthrough«, »Deck« or »Tuner« with »
<
« or
»
>
«.
Notes:
7
»RC Passthrough« can be used for all devices.
»Deck« and »Tuner« can be selected in ac-
cordance with the external device which
has been connected.
7
Try out which type of remote control opera-
tion the external device reacts to the best.
7
Read about the scope of functions of the
DIGILINK-compatible device in the respec-
tive operating manual.
6 Press »EXIT« to end the setting.
Switching the device to standby
This option switches the external device to
standby.
1 Press »
«, use »
V
«, »
Λ
«, »
<
« or »
>
« to
select the preset »HDMI1« to »HDMI3« and
press
»OK«
to confirm.
2 Open the menu with »MENU«.
3 Select the menu item »SOURCE SETUP« with
»
V
« or »
Λ
« and press
»OK«
to confirm.
– The »SOURCE SETUP« menu appears.
4 Select »Device Standby« with »
V
« or »
Λ
«
and press
»OK«
to confirm.
– The external device switches itself off.
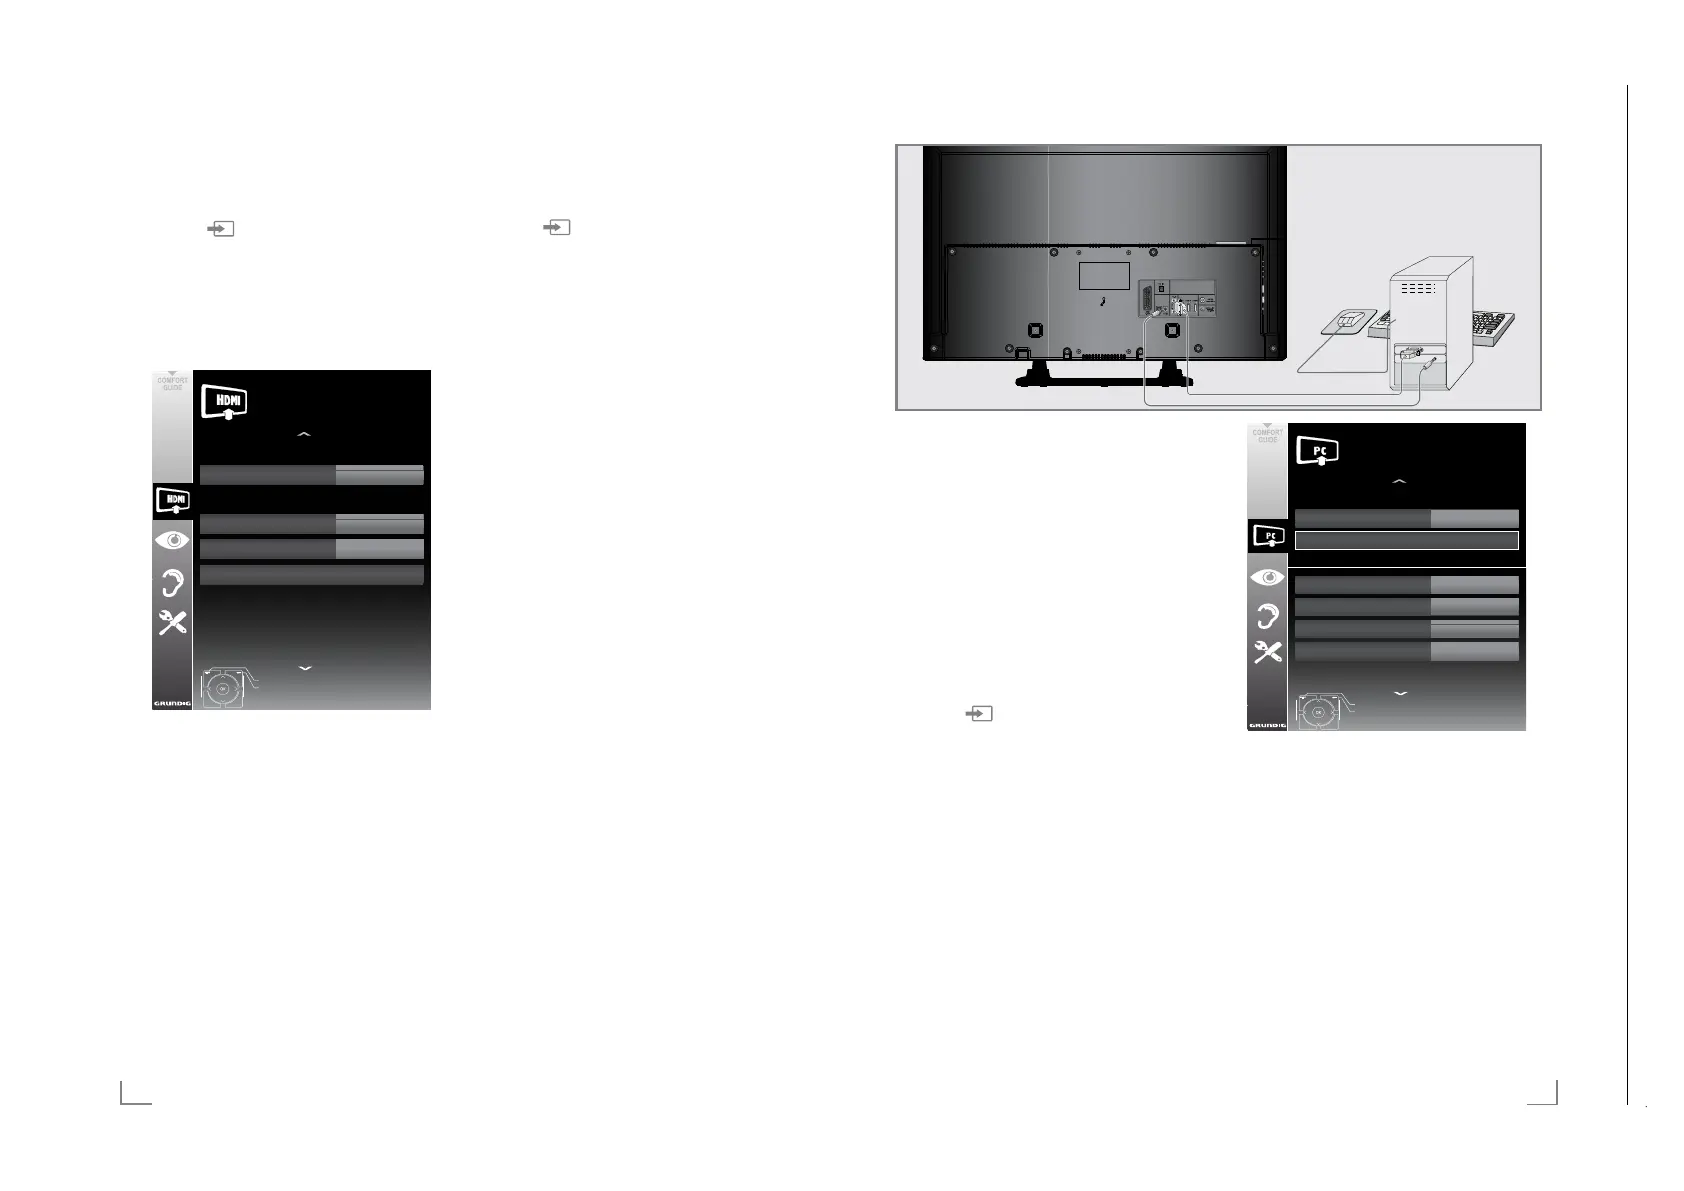
Source
HDMI1
Device Selection
GRUNDIG DVD
Remote Control
RC Passthrough
Device Standby
Exit
Back
SOURCE SETUP
DIGILINK
20.09.2010
15:46
53
ENGLISH
Connecting a PC
1 Connect the »PC-IN« socket on the television
to the corresponding socket on the PC using
a VGA cable (video signal).
2 Connect the »Audio« socket on the televi-
sion to t
he corresponding socket on the PC
using a suitable cable (audio signal).
Note:
7
Adjust your PC to the monitor (for example,
picture resolution 1280 x 768, picture fre-
quency 60 Hz).
Selecting presets for the PC
1 Press » « and use »
V
«, »
Λ
«, »
<
« or »
>
«
to select the preset »PC« and press
»OK«
to
confirm.
Settings for PC mode
1 Open the menu with »MENU«.
2 Select the line »SOURCE SETUP« item with
»
V
« or »
Λ
« and press
»OK«
to confirm.
– The »SOURCE SETUP« menu appears.
3 Select the function or setting with »
V
« or
»
Λ
«, and then use »
V
«, »
Λ
« or »
<
«, »
>
« to
implement it.
OPERATION AS A PC MONITOR
----------------------------------------------------------
Options:
–
»Auto Ajust« for automatic PC configura-
tion.
– »Auto
Ajust
Mode«, select the option
»On« if the configuration should be imple-
mented automatically in PC mode.
– »Position« to configure the horizontal and
vertical picture position.
– »Size« to set the cycle frequency.
– »Phase« to eliminate flicker, unfocused
pictures or horizontal interference.
4 Press »EXIT« to end the setting.
Source
PC
Position
Auto Ajust
Auto
Ajust
Mode
On
Size
Phase
0
30
Exit
Back
SOURCE SETUP
Extended settings
50H - 50V
20.09.2010
15:46
 Loading...