3200 RDS … 3301 RDS Allgemeiner Teil / General Section
GRUNDIG Service 1 - 3
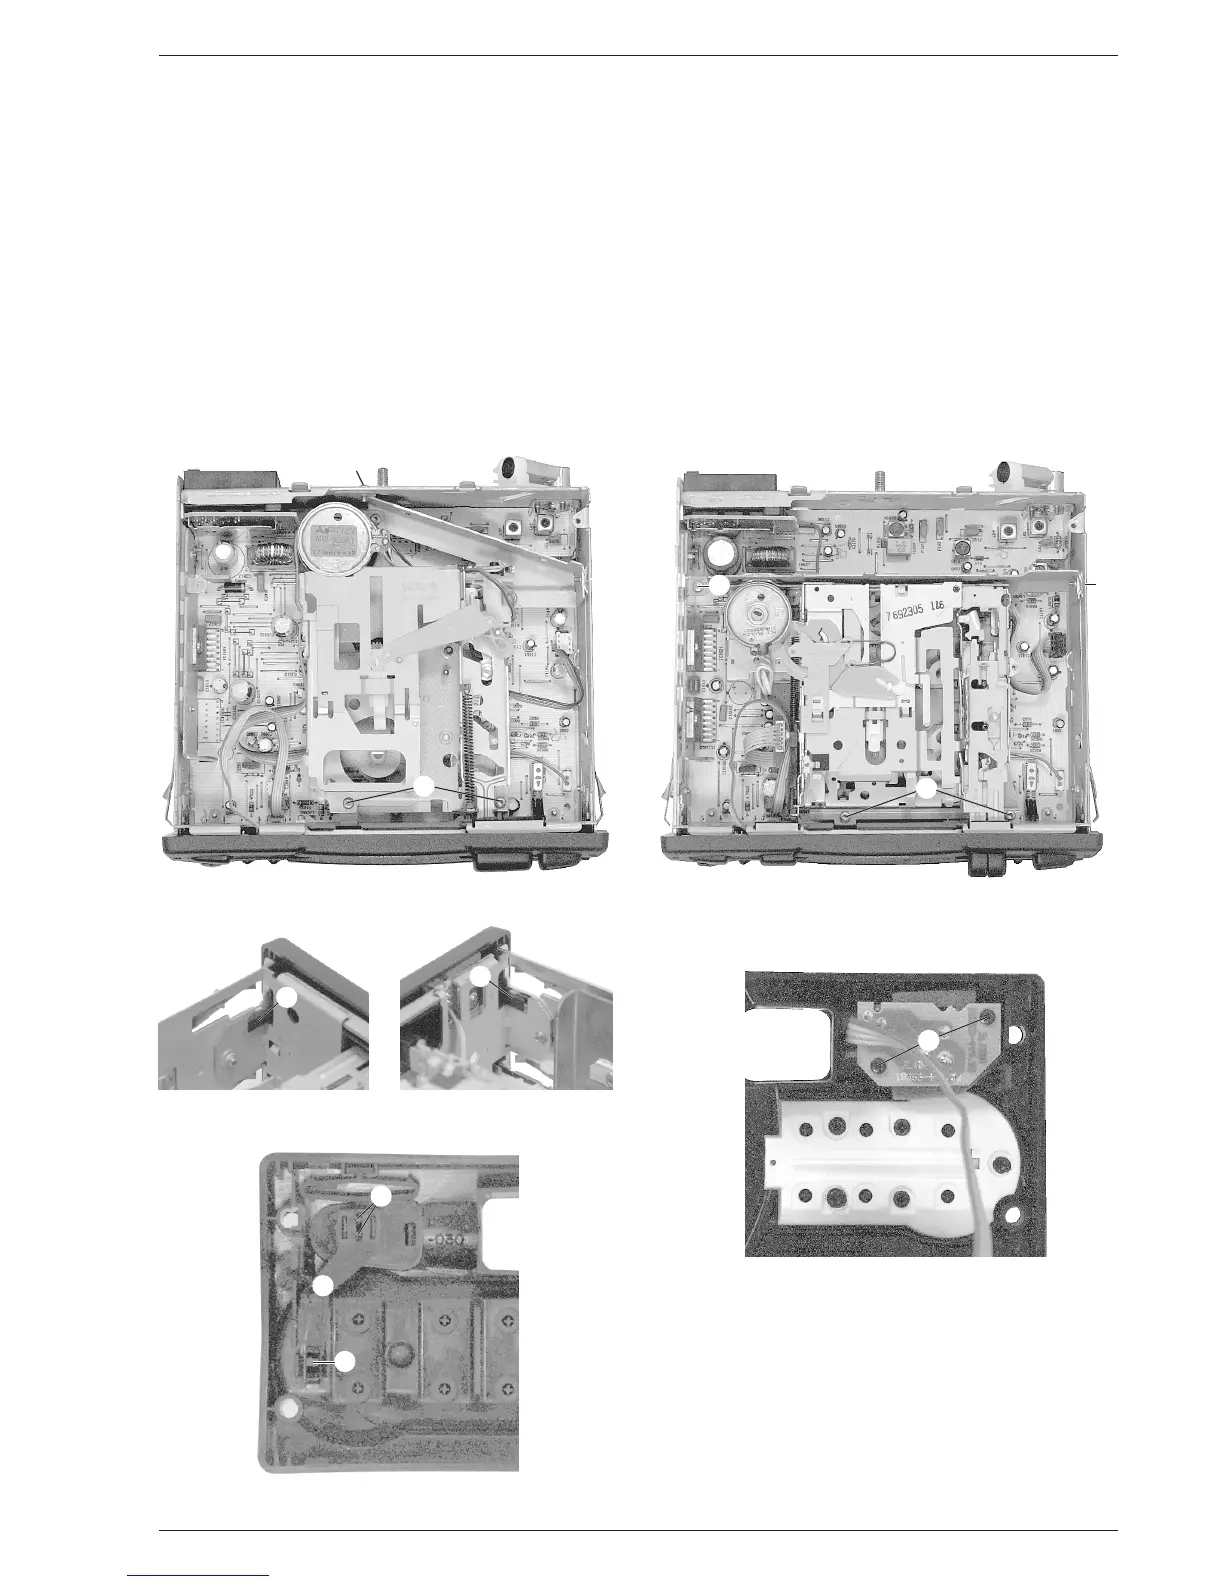
Ausbauhinweise
1. Laufwerk ausbauen
- 3200 / 3201:
- 4 Schrauben A herausdrehen (Fig. 1).
- Laufwerk herausheben, bei Bedarf Stecker abziehen.
- 3300 / 3301:
- 4 Schrauben A herausdrehen (Fig. 2).
- Laufwerk herausheben, bei Bedarf Stecker abziehen.
2. Frontblende ausbauen
- Rastnasen B und C ausrasten (Fig. 3 und 4). Frontblende nach
vorne abziehen.
3. Frontblende zerlegen
- 2 Schrauben D herausschrauben und die I/O-Platte abnehmen
(Fig. 5).
- Rastnasen E vorsichtig auseinanderbiegen und den Hebel F aus
der Führung heben. Dann die Rastnasen G zusammendrücken und
den Hebel ganz herausnehmen (Fig. 6)
Disassembly Instructions
1. Removing the Tape Drive
- 3200 / 3201:
- Undo 4 screws A (Fig. 1).
- Lift Tape Drive, open connectors if necessary.
- 3300 / 3301:
- Undo 4 screws A (Fig. 2).
- Lift Tape Drive, open connectors if necessary.
2. Removing the Front
- Unhook the catches B and C (Fig. 3 and 4). Pull off the Front.
3. Disassembling the Front
- Undo 2 screws D and remove the I/O Board (Fig. 5).
- Gently spread the catches E apart and pull out the lever F from the
guides. Then press the catches G together and take out the lever
completely (Fig. 6).
Fig. 5
Fig. 2
Fig. 1
Fig. 6
Fig. 3 Fig. 4
A
A
A
A
A
A
B
C
D
E
F
G




 To Next Page