Do you have a question about the Gryphon Gryphette and is the answer not in the manual?
Always use eye and body protection when using power tools like this grinder.
Remove jewelry or loose clothing that could get caught in the grinding head.
Ensure the power switch is set to off before plugging in the grinder.
Use a grounded 110V/60Hz outlet; extension cords are not recommended.
Place grinder away from water; route cord to prevent water reaching outlets.
Turn off the grinder when it is not in use.
Do not leave the hex wrench or other tools on the grinder when it is in use.
Never grind without water.
Most brands of standard grinding bits will fit this grinder.
Loosen the set screw with the hex wrench to remove the old bit.
Apply lubricant, like petroleum jelly, to the shaft for easier future bit changes.
Place the grinder in an area with good ventilation and lighting.
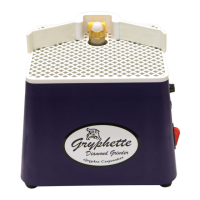
Attach flexible wings as shown in the illustration on the previous page.
Plug the grinder into a grounded three-prong socket.
Add water to the tray; ensure it remains full during operation.
Place sponge in hole, ensuring it absorbs water and touches the grinding bit.
Turn on the grinder using the switch or an approved foot switch.
Press material against the head with moderate pressure using smooth strokes.
Use a grinding pin, bringing glass to contact at a 45° angle to start.
Turn off, clean the grinder, and rinse the sponge regularly after use.
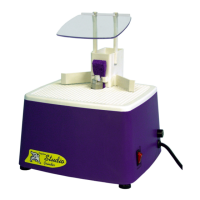
Place Face Shield Extensions into slots on the Wing Bracket.
Snap the Face Shield into the top of the Extensions.
Insert rubber wings into slots on either side of the Wing Bracket.
Press the assembly with wings and face shield into slots on the platform.