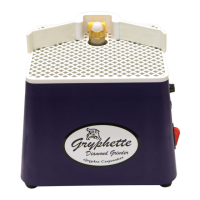
Safety Precautions
1. Always use eye and body protection when using power tools such as this grinder.
2. Remove any jewelry or loose clothing which could become entangled in the grinding head.
3. Set power switch to off before plugging in the grinder.
4. Use only a properly grounded three prong 110 volt 60 cycle outlet. Extension cords are not recommended.
5. Place grinder in an area where water will not reach electrical outlet and route cord to avoid water dripping down
the cord to the outlet.
6. Turn off grinder when not in use.
7. Do not leave hex wrench or other tools on grinder when in use.
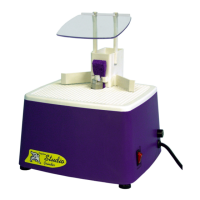
Assembly and Preparations
1. Leave grinder unplugged until ready to use.
2. Place face shield extensions into slots on cooling tower with the open end of the “C” bracket facing forward.
3. Snap face shield into top of extensions.
4. InsertspongeintongersatfrontofCoolingTower.Thespongeshouldhangapproximately1/2”belowtheCooling
Tower. New sponges may be cut from common kitchen sponges.
5. Place Cooling Tower on Work Surface by aligning pins on tower with square holes in Work Surface and press into
place. Sponge should touch grinding head.
6. Insert rubber wings into slots on either side of cooling tower (refer to illustration)
7. Gentlypulldraintubefromsideofcaseuntilitextends3/4”fromcase(hoseshouldbeangledslightlydownward).
Do not pull further as you may dislodge other end.
8. Place a suitable container under the drain hose to catch drain water, or if you prefer, attach the provided hose
extensiontothedrainhoseanddrainintoabucketontheoor.
9. Fill Cooling Tower with water. Add grinder coolant if you prefer.
10. Make sure sponge is moist. If not, moisten with additional water.
11. If you are using a small grinding head (such as a grinding pin), you may fold the sponge over so that it reaches the
grinding surface of the head. Always make sure that water can reach the head, otherwise damage to the diamond
head may result.
Changing Grinding Heads
1. Remove Work Surface by pulling straight up. If Work Surface is tight, insert a small screwdriver near one corner and
rotate, repeating this process on all remaining corners until work surface is loose.
2. Use the supplied hex wrench to loosen the set screw in the base of the grinding head.
3. Pull the Gryphon grinding head straight up to remove.
4. It is recommended to place a little lubricant, such as petroleum jelly, on the shaft to aid in future grinding head
changes.
5. Place new Gryphon grinding head on shaft, and tighten set screw. Put hex wrench in safe place for next time.
Operating Instructions
1. Place grinder in area with good ventilation and lighting. Make sure that water will drain into appropriate receptacle.
2. Plug grinder into grounded three-prong socket.
3. Insure that coolant tower remains full of water and that sponge is moist. If you prefer grinding without the coolant
 Loading...