Fig. 1
Fig. 1
7. Assembling
Assembling and Cleaning
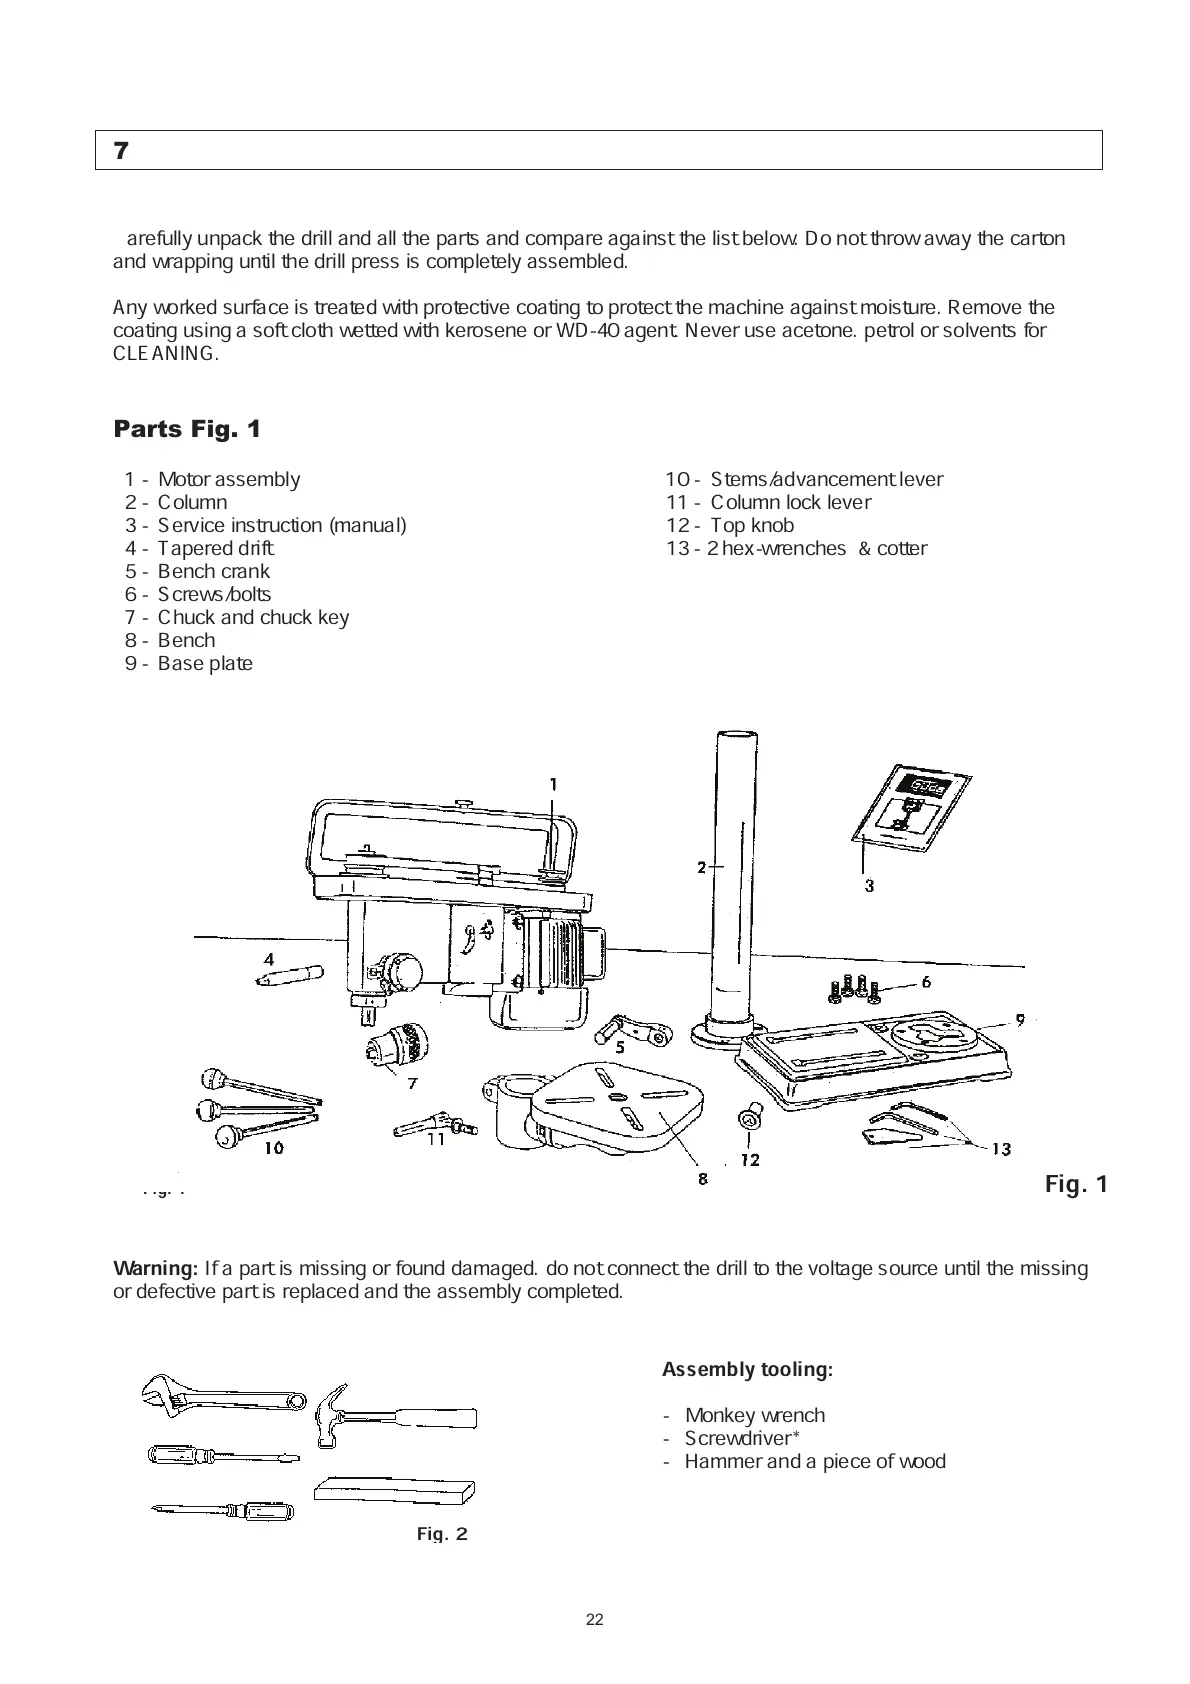
Carefully unpack the drill and all the parts and compare against the list below. Do not throw away the carton
and wrapping until the drill press is completely assembled.
Any worked surface is treated with protective coating to protect the machine against moisture. Remove the
coating using a soft cloth wetted with kerosene or WD-40 agent. Never use acetone. petrol or solvents for
CLEANING.
Parts Fig. 1
1 - Motor assembly 10 - Stems/advancement lever
2 - Column 11 - Column lock lever
3 - Service instruction (manual) 12 - Top knob
4 - Tapered drift 13 - 2 hex-wrenches & cotter
5 - Bench crank
6 - Screws/bolts
7 - Chuck and chuck key
8 - Bench
9 - Base plate
Warning:
If a part is missing or found damaged. do not connect the drill to the voltage source until the missing
or defective part is replaced and the assembly completed.
Assembly tooling:
- Monkey wrench
- Screwdriver*
- Hammer and a piece of wood
Fi
 Loading...