4
Do not operate this charger with a two bladed adapter plug or extension cord. Doing so
can result in serious personal injury.
CAUTION: To reduce the risk of shock, connect only to a properly grounded outlet.
3. INSTALLING THE CHARGER
Choosing Charging Location
The charger should have at least eight inches of unobstructed area on all sides of the
unit for effective cooling. The case of this charger will become warm during
operation. Do not install the charger on carpeted, upholstered, or varnished surfaces.
Keep the AC power cord connection as short as possible especially when using an
extension cord.
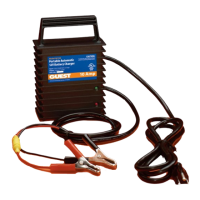
Making DC Connections
1. Check polarity of the battery posts. The POSITIVE (POS., P, +) battery post
usually has a larger diameter than the NEGATIVE (NEG., N, -) post.
2. Attach the red POSITIVE terminal (identified by the red POSITIVE label on the
red or white output wire) from the charger to the POSITIVE post of the battery.
Attach the black NEGATIVE terminal (black output wire) from the charger to the
NEGATIVE post of the battery.
3. When disconnecting the battery charger, first disconnect the AC power cord, then
remove the black (NEGATIVE) terminal from the battery terminal and then remove
the red (POSITIVE) terminal from battery terminal.
Making AC Power Connections
After securing the battery connections, plug the AC line cord into an available AC
outlet that is protected by a Ground Fault Circuit Interrupter (GFCI) breaker. Keep the
AC power cord connection as short as possible especially when using an extension
cord.
Grounding Precautions
DANGER