EasyManua.ls Logo

GUIDESMAN 272-1778 - User Manual

Default Icon
2 pages
Print Icon
To Next Page IconTo Next Page
Loading...
SETUP & TAKE DOWN INSTRUCTIONS
THANK YOU FOR PURCHASING A GUIDESMAN INSTANT CANOPY!
Please carefully review the following instructions and familiarize yourself with
parts included and how to operate your canopy. Reference parts list for names
of each part noted in instructions.
Parts Included: Fully Assembled Frame (1) Canopy Top (1) Carry Bag (1) Stakes (4)
1
2
SECURING THE CANOPY TOP TO THE FRAME
Place the canopy frame in the desired location (Fig. 1A).
With partner, stand opposite side of the frame and hold the outer legs.
While holding the legs li slightly off the ground taking a few steps backwards
to extend frame at full arm’s length as shown (Fig. 2A)
Unfold the canopy top and place it over the open frame (Fig. 3A). Secure each corner by attaching the corner
of the canopy top to the black fastening strip (Fig. 3B). Pull all 4 corners down until completely
over black fastening strip. Your canopy top is now secure to the frame.ī
3
1
2
3
SETUP
Place the canopy in the desired location for shade. With partner standing on the opposite side of the canopy,
hold the outer legs and li slightly off the ground stepping backwards (Fig. 1A).
With partner hold the top and bottom of the middle of the eaves where it makes a diamond shape as
pictured in (Fig. 2A) liing slightly off the ground walking backward to extend the frame.
Be careful not to pinch your fingers as the frame opens!
At the top of the leg, place one hand on the top corner pushing down and with the other hand just below the
latch slider liing up until it locks into position as pictured in (Fig. 3A). Repeat on other 3 legs.
With partner standing on the same side, li outer leg to slide out inner leg until the chrome
button clicks into place at desired height as shown (Fig. 4A). Repeat on opposite legs.ī
4
1AFig. 3AFig. 3BFig. 2AFig.
1AFig. 3AFig. 4AFig. 2AFig.
]Ïī½ËīÕī ½°°½å¡·ī:½°ÏĊī#272-1778, #272-1779, #272-1780
Question and Answer IconNeed help?

Do you have a question about the GUIDESMAN 272-1778 and is the answer not in the manual?

Summary

Securing the Canopy Top to the Frame

Step 1: Place Canopy Frame

Place the canopy frame in the desired location. With partner, stand opposite side of the frame and hold the outer legs.

Step 2: Extend Frame

While holding the legs lift slightly off the ground taking a few steps backwards to extend frame at full arm's length.

Step 3: Secure Canopy Top

Unfold the canopy top and place it over the open frame. Secure each corner by attaching the corner of the canopy top to the black fastening strip.

Setup

Step 1: Position and Extend Frame

Place the canopy in the desired location for shade. With partner standing on the opposite side, hold outer legs and lift slightly off the ground stepping backwards.

Step 2: Lift Eaves

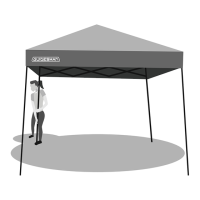
With partner hold the top and bottom of the middle of the eaves where it makes a diamond shape, lifting slightly off the ground walking backward.

Step 3: Lock Legs

At the top of the leg, place one hand on the top corner pushing down and with the other hand just below the latch slider lifting up until it locks.

Step 4: Extend Inner Legs

With partner standing on the same side, lift outer leg to slide out inner leg until the chrome button clicks into place at desired height.

Take Down

Step 1: Unlock and Retract Inner Legs

Stand on the same side as your partner. In tandem slightly lift leg and depress the chrome button to unlock the inner leg. Push inner leg into outer leg.

Step 2: Unlock Ceiling Assembly

At each leg push the red button to unlock the ceiling assembly. Be careful not to pinch your fingers; ensure all latch sliders are unlocked.

Step 3: Partially Close Frame

Standing opposite from your partner, hold top of the eaves and slightly lift, walking slowly towards each other until about 1/2 way closed.

Step 4: Fully Close Frame

With partner hold outer legs and walk slowly towards each other until fully closed. Store canopy in carry bag.

Carry Bag Instructions

Step 1: Close Canopy

Close your instant canopy completely as shown in the diagram.

Step 2: Place Bag Over Canopy

Unzip the carry bag at end and place open end of carry bag over the top of the canopy.

Step 3: Secure Bag

Slide carry bag down until the canopy is completely covered. Flip the bag on opposite end to close bag and zipper shut.

Overview

This document provides comprehensive instructions for the setup and take-down of a Guidesman Instant Canopy, specifically for models #272-1778, #272-1779, and #272-1780. It also includes details on securing the canopy top to the frame, general setup procedures, take-down steps, and instructions for packing the canopy into its carry bag. The manual emphasizes safety precautions, particularly regarding pinching fingers during frame operation, and includes a warning about the fabric top's flammability and the presence of certain flame retardant chemicals.

Function Description:

The Guidesman Instant Canopy is designed to provide quick and easy shade. It features a fully assembled frame, a canopy top, a carry bag, and stakes for securing it to the ground. The instant canopy is intended for outdoor use, offering protection from the sun and other elements. Its "instant" nature suggests a design focused on rapid deployment and collapse, making it suitable for events, camping, or backyard use where temporary shade is desired. The design allows for a single user to initiate setup, though a partner is recommended for optimal ease and speed, especially during the initial frame extension and final height adjustments.

Important Technical Specifications:

While specific dimensions or material types are not explicitly listed, the manual implies a robust construction capable of being extended and collapsed multiple times. The frame is described as "fully assembled," indicating a pre-integrated structure that unfolds rather than requiring individual component assembly. The canopy top is designed to attach securely to the frame using black fastening strips at each corner. The product includes four stakes for ground anchoring, and additional anchor bags are available for purchase from the Customer Support Center for enhanced stability, especially on surfaces where stakes may not be effective.

A critical safety specification is the fabric top's flammability. The manual states that the fabric top meets the flammability requirements of CPAI-84, a standard for tent fabrics. However, it explicitly warns that the fabric will burn if left in continuous contact with any flame source. Furthermore, it cautions that applying any foreign substance to the fabric top may render its flame-resistant properties ineffective. The product also contains TDCPP and/or TCEP, flame retardant chemicals known to the State of California to cause cancer, which is an important health and safety disclosure.

Usage Features:

Setup:

  1. Placement and Initial Extension (Fig. 1A, 2A): The process begins by placing the canopy frame in the desired location. With a partner, stand on opposite sides of the frame, hold the outer legs, lift slightly off the ground, and take a few steps backward to extend the frame to full arm's length.
  2. Canopy Top Attachment (Fig. 3A, 3B): Unfold the canopy top and place it over the open frame. Secure each corner by attaching the corner of the canopy top to the black fastening strip. Pull all four corners down until completely over the black fastening strip to ensure the canopy top is secure to the frame.
  3. Frame Extension and Locking (Fig. 2A, 3A): With a partner, hold the top and bottom of the middle of the eaves (where it forms a diamond shape) and lift slightly off the ground, walking backward to extend the frame. Users are cautioned to avoid pinching fingers as the frame opens. At the top of each leg, one hand should push down on the top corner while the other hand lifts up just below the latch slider until it locks into position. This step must be repeated for all four legs.
  4. Height Adjustment (Fig. 4A): With a partner, lift an outer leg to slide out the inner leg until the chrome button clicks into place at the desired height. This step is repeated for the opposite legs.

Securing the Canopy:

To anchor the canopy, insert the included metal stakes into each foot corner. For enhanced stability, especially in windy conditions or on surfaces where stakes are not ideal, anchor bags can be purchased from the Customer Support Center. These bags are custom-designed to secure quickly to each leg, adding additional weight.

Take Down:

  1. Inner Leg Retraction (Fig. 1A): Stand on the same side as a partner. Slightly lift a leg and depress the chrome button to unlock the inner leg. Push the inner leg into the outer leg. Repeat for opposite legs.
  2. Ceiling Assembly Unlocking (Fig. 2A): At each leg, push the red button to unlock the ceiling assembly. A crucial warning is provided: "As the ceiling unlocks be careful not to pinch your fingers." Users must ensure all latch sliders are unlocked before attempting to close the frame, as closing the frame with any locked latch sliders will cause damage.
  3. Frame Collapse (Fig. 3A, 3B): Standing opposite from a partner, hold the top of the eaves and slightly lift, walking slowly towards each other until the frame is about halfway closed. Again, a warning is given to "Be careful not to pinch your fingers as the frame closes!" Continue holding the outer legs and walking slowly towards each other until the frame is fully closed.

Carry Bag Instructions:

  1. Canopy Closure (Fig. 1A): Ensure the instant canopy is completely closed.
  2. Bag Placement (Fig. 2A): Unzip the carry bag at one end and place the open end of the carry bag over the top of the canopy.
  3. Bagging and Zipping (Fig. 3A): Slide the carry bag down until the canopy is completely covered. Flip the bag to the opposite end to close the bag and zipper shut.

Maintenance Features:

The manual does not explicitly detail maintenance features beyond the warning about the fabric top's flammability and the potential for foreign substances to compromise its flame resistance. However, the design for easy setup and take-down implies that proper storage in the carry bag is a key aspect of maintenance, protecting the frame and fabric from damage during transport and storage. Regular inspection for any damage to the frame, latch sliders, or fabric would be implied for continued safe operation, though not explicitly stated as a maintenance step. The emphasis on not forcing the frame if latch sliders are locked suggests that careful handling is essential to prevent damage and prolong the product's lifespan.

GUIDESMAN 272-1778 Specifications

General IconGeneral
BrandGUIDESMAN
Model272-1778
CategoryTent
LanguageEnglish

Related product manuals