© Guldmann GB/US-941/01/18 • # 944122
© Guldmann GB/US-941/01/18 • # 944122
6
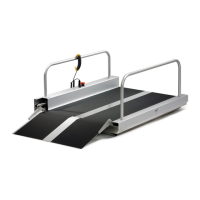
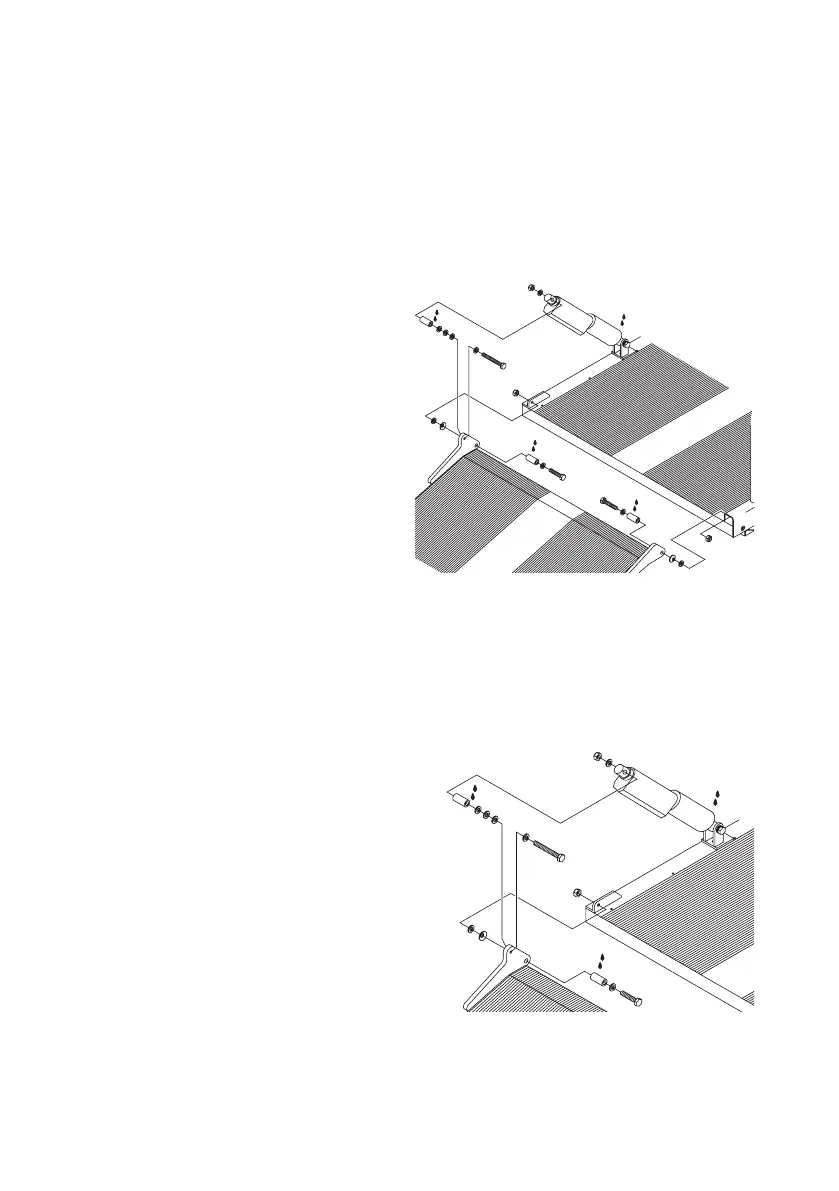
Access ramp, xing to the lifting platform
1. Take off all screws, washers, bushings, and nuts which are mounted on the
hinges of the access ramp.
2. Place a washer and a lubricated bushing on the screw and place it in the left
hinge.
3. Place the disc washer on the bushing, note: it must not join rmly.
4. Place washer no. two on the screw and mount it through the hole of the side
edge.
5. Mount the nut and tighten it – but not completely.
6. Place a washer and a lubri-
cated bushing on the screw
and place it on the right
hinge.
7. Place the disc plate on the
bushing, note: it must not
join rmly.
8. Place washer no. two on
the screw and mount the
screw in the angle prole.
9. Mount the nut and tighten it
completely.
10. Now tighten completely
the nut in the safety edge
described in point 5
Access ramp, mounting of the actuator:
Note: components are mounted in correct order on delivery
1. Lubricate the bushing and place it in the actuator.
2. Place the washer on the screw and mount it, from the middle of the platform,
through the top hole of the
access ramp.
3. Place the three washers on the
screw.
4. Lift up the access ramp to a
position allowing the screw to
be pressed through
the bushing of the actuator.
5. Place a washer on the screw.
6. Screw the nut on and tighten it
completely.
7. Oil or lubricate the space bet-
ween the bottom of the actuator
and the hinge.
Oil
Oil
Oil
Oil
Oil
Oil
Oil