This document provides installation and removal instructions for a protective case designed for a laptop or similar device, referred to as a "keyboard" or "device" throughout the guide. The case, branded "Gumdrop" and "BumpTech," appears to be a two-piece hard shell, offering protection to both the top and bottom surfaces of the device.
Function Description:
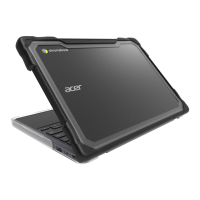
The primary function of this Gumdrop case is to provide robust protection for a laptop or similar portable electronic device. It encases both the keyboard/base unit and the screen, safeguarding against impacts, scratches, and general wear and tear. The design suggests a focus on durability, likely for environments where devices are frequently handled, transported, or exposed to potential damage. The two-piece design allows for comprehensive coverage while maintaining the device's functionality, including the ability to open and close the screen.
Usage Features (Installation):
The installation process is detailed in seven sequential steps, ensuring a secure and proper fit:
-
Bottom Case Installation (Keyboard):
- Step 1: The device's keyboard (the base unit) is first slid under the left-side clip of the bottom case. This initiates the securement of the device within the bottom shell.
- Step 2: The opposite side of the keyboard is then pressed down to snap securely into the right-side clip of the bottom case. This action firmly attaches the keyboard portion of the device to the bottom protective shell.
- Step 3: The keyboard is then slid forward until it is flush with the front edge of the bottom case. This ensures proper alignment and full coverage of the device's base.
-
Top Case Installation (Screen):
- Step 4: With the bottom case attached, the device screen is closed. The rear corner clips of the top case are then carefully pressed to snap onto the keyboard (the base unit). This step begins the attachment of the screen protector.
- Step 5: The top edge of the device (the screen) is aligned with the upper side clips of the top case. The top case is then slid down until the device is flush with its top edge. This ensures the screen is properly seated and aligned within the top shell.
- Step 6: The lower side clips of the top case are pressed over the device, applying pressure from both sides, to snap them securely into place. This action locks the screen into the top protective shell.
- Step 7: Finally, the case is closed (meaning the laptop is closed), and the rear clips along the back edge of the top case are pressed. It's crucial to ensure all clips are securely attached. A note indicates that the "Case may have a 3rd clip at the center," suggesting a variation in design for some models, providing additional security.
The installation process emphasizes a snug fit, with multiple clips and sliding actions designed to hold the device firmly within the case, preventing accidental dislodgement and maximizing protection.
Usage Features (Removal):
The removal process is also detailed in five sequential steps, with a critical warning about the order of operations to prevent device damage:
CRITICAL! FOLLOW STEPS 1 - 3 IN ORDER. Failure to do so may result in damage to the device.
-
Top Case Removal (Screen - Initial Release):
- Step 1: The rear clips along the back edge of the top case are unhooked. Similar to installation, a note mentions that the "Case may have a 3rd clip at the center," indicating that this central clip, if present, also needs to be unhooked. This is the first step in releasing the top shell.
- Step 2: The lower left and right side clips of the top case are pushed outward. This action releases the bottom portion of the top case from the device, allowing it to begin separating from the screen.
- Step 3: The top case is then gently slid up and off the device to release it from the upper side clips. This completes the removal of the top protective shell from the device's screen.
-
Bottom Case Removal (Keyboard - Initial Release):
- Step 4: The rear clips of the bottom case are gently pushed down to unhook them from the device. A helpful tip suggests that "Closing device partially may help with this step," indicating that partially closing the laptop might provide better access or leverage for releasing these clips. This starts the process of detaching the bottom shell.
- Step 5: The left and right side clips of the bottom case are pushed down past the device, one side at a time, to release the bottom case entirely. This final action frees the device's base from the protective bottom shell.
The removal instructions highlight the importance of careful, sequential actions to avoid stressing or damaging the device, particularly when detaching the clips.
Maintenance Features:
- Recyclability: The document explicitly states, "The PC case is recyclable if the feet and EDP (Energy Displacement Protection) are removed!" This indicates that the case itself is made from a recyclable plastic material (likely polycarbonate, given the "PC case" reference). It also implies that certain components, specifically the feet and any "Energy Displacement Protection" elements, need to be separated before recycling to ensure proper material sorting. This feature promotes environmental responsibility by allowing users to recycle the case at the end of its lifespan.
Important Technical Specifications (Inferred):
While explicit technical specifications like material type, dimensions, or weight are not provided, several aspects can be inferred:
- Material: The mention of "PC case" strongly suggests the primary material is polycarbonate, a durable and impact-resistant plastic commonly used for protective electronics cases.
- Design: The two-piece, snap-on design indicates a custom fit for specific device models, ensuring that all ports, vents, and features remain accessible. The presence of multiple clips (rear, side, corner, and potentially a central clip) points to a secure, form-fitting design that aims to prevent the case from accidentally detaching.
- Protection: The entire installation and removal process, along with the "Gumdrop" and "BumpTech" branding, implies a focus on impact protection, scratch resistance, and overall ruggedness. The "Energy Displacement Protection" (EDP) mentioned in the recycling note further supports the idea that the case incorporates features to absorb and dissipate shock from drops or impacts.
- Compatibility: The instructions are generic enough to apply to a range of laptop-like devices, but the precise fit implies that specific case models are designed for particular laptop makes and models.
In summary, this Gumdrop case is a protective accessory designed for laptops, featuring a two-piece, snap-on polycarbonate construction for comprehensive coverage. Its installation and removal processes are detailed to ensure a secure fit and prevent device damage, while its recyclability highlights a commitment to environmental considerations. The design prioritizes durability and impact protection, making it suitable for users who require enhanced safeguarding for their portable electronic devices.