EasyManua.ls Logo

Habitat JENSON 935/7709 - User Manual

Habitat JENSON 935/7709
28 pages
Print Icon
To Next Page IconTo Next Page
Loading...
Spare Parts
Visit: www.argos-support.co.uk
Email: Help@ClickSpares.co.uk
Call: 0330 016 1114
Customer Support
Call: 0345 640 2020
Issue 1 - 15/09/20
JENSON
Gloss
935/7709 914/8664
Question and Answer IconNeed help?

Do you have a question about the Habitat JENSON 935/7709 and is the answer not in the manual?

Summary

Safety and Care

General Safety Precautions

Important warnings for safe assembly, handling, and product use.

Preventing Unit Overturning

Critical advice on wall securing and placement of heavy items to prevent toppling hazards.

Assembly and Maintenance Tips

Guidance on checking parts, assembly environment, cleaning, and tool usage.

Main Unit Assembly

Fitting Ball Bearing Runners

Step 1: Attaching ball bearing runners to cabinet panels.

Connecting Base and Side Panels

Steps 2-3: Connecting base and side panels using dowels and connectors.

Building the Shelving Structure

Steps 4-15: Assembling the main frame and internal shelving units.

Attaching Back Panels

Steps 23-24: Securing the back panels to the unit structure.

Final Unit Assembly and Positioning

Steps 27-30: Assembling the unit vertically and positioning it.

Wall Mounting Guide

Wall Mounting and Fixings

Guide on selecting correct wall plugs and screws for secure unit installation.

Drawer Assembly

Assembling Drawer Boxes

Steps 32-39: Constructing the drawer boxes using specified panels and fittings.

Fitting Drawer Runners

Step 40: Attaching ball bearing runners to the assembled drawers.

Overview

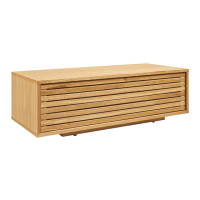
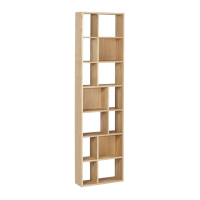
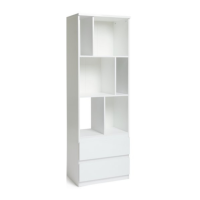
This document is an assembly and safety manual for the JENSON Gloss unit, identified by model numbers 935/7709 and 914/8664. It details the construction of a tall, multi-shelf cabinet with two integrated drawers at the bottom. The unit appears to be a storage or display cabinet, suitable for various household items.

Technical Specifications:

The unit weighs approximately 40 kg, indicating a substantial and sturdy piece of furniture. The main cabinet panels (1 and 2) are 177.8 x 36.9 cm, forming the vertical sides. Various shelves and internal dividers are provided, with dimensions such as 59.6 x 39 cm (panel 3), 40.8 x 35.3 cm (panel 4, x3), 56.2 x 6 cm (panel 5, x4), 56.2 x 35.4 cm (panels 6, 7, 8). The back panels (9, 10, 11) measure 57.2 x 47.8 cm, 42.1 x 29.2 cm, and 42 x 42 cm (x2) respectively. The drawers consist of panels with dimensions including 58.8 x 18.9 cm (panel 12, x2), 35 x 14 cm (panels 13 and 14, x2 each), 52.95 x 14 cm (panel 15, x2), and a drawer base of 54.5 x 34.7 cm (panel 16, x2).

Fittings are categorized into "Bag 1" and "Bag 2." Bag 1 includes:

  • A (F901): 30 units, likely cam dowels.
  • B (F900): 30 units, likely cam locks.
  • C (F22): 36 units, cylindrical dowels.
  • D (F65): 6 units, long screws.
  • E (F73): 8 units, small screws.
  • F (F277): 16 units, nails.
  • G (F276): 6 units, corner brackets.
  • H (F639): 12 units, small screws.
  • I (F137): 4 units, small rectangular pads.
  • J (F646): 4 units, cylindrical supports.

Bag 2 includes:

  • A (F901): 4 units, cam dowels.
  • H (F639): 8 units, small screws.
  • K (F907): 4 units, cam locks.
  • L (F74): 4 units, small screws.
  • M (F171GY): 8 units, long threaded dowels.

Additional fittings for the ball bearing runners include:

  • N (F474): 2 units, brackets.
  • O (F450): 4 units, ball bearing runners.

Usage Features:

The JENSON Gloss unit is designed as a versatile storage solution with multiple open shelves and two enclosed drawers. The open shelves are suitable for displaying decorative items, books, or frequently accessed objects, while the drawers provide concealed storage for other items. The "Gloss" designation suggests a smooth, reflective finish, contributing to a modern aesthetic. The unit is intended for indoor use and should be assembled in its final room to minimize movement after construction.

Safety Features and Warnings:

The manual emphasizes several critical safety aspects:

  • Weight: The unit weighs approximately 40 kg, requiring careful lifting, preferably by two people.
  • Assembly: Assembly should be performed by a competent adult, keeping children away due to potential injury risks.
  • Wall Fixing: A crucial safety feature is the requirement to secure the unit to a wall using the two supplied overbalance protector kits (N and O). This prevents the unit from toppling, which can cause serious or fatal injury.
  • Weight Distribution: Heavy items should be placed on the lower shelves to improve stability. No heavy objects should be placed on top of the unit.
  • Child Safety: Children should never be allowed to climb or hang on drawers, doors, or shelves.
  • Installation: The unit must be installed strictly according to the manufacturer's instructions to avoid safety risks.
  • Component Check: Do not use the item if any components are missing or damaged.
  • Fastening Checks: All fastenings should be regularly checked and tightened to ensure ongoing stability.
  • Drilling Precautions: When drilling into walls for wall fixing, users are warned to check for hidden wires or pipes and to consult an expert if in doubt. Specific guidance is provided on selecting appropriate wall plugs for different wall types (general purpose, plasterboard, cavity fixing, heavy-duty cavity fixing, shield anchor for heavy loads).

Maintenance Features:

  • Cleaning: The unit should only be cleaned with a damp cloth.
  • Fastening Checks: Regular checks of all fastenings are recommended to ensure they remain properly tightened.
  • Wall Fixing Checks: Periodically check the wall fixings (wall plugs or screws) to ensure they do not become loose, maintaining the unit's stability and safety.
  • Protective Film: Users are instructed to remove any blue protective film from panel edges and clear protective film from panel surfaces after assembly is complete, likely to reveal the "Gloss" finish.

Assembly Process Overview:

The manual provides step-by-step instructions with detailed illustrations for assembly, including QR codes for assembly videos. Key steps include:

  1. Fitting Ball Bearing Runners (Steps 1-2): Attaching the drawer runners to the side panels.
  2. Cabinet Frame Assembly (Steps 3-15): Constructing the main cabinet structure by joining various panels using cam dowels, cam locks, and screws. This involves building the internal shelf compartments.
  3. Back Panel Installation (Steps 16-24): Attaching the back panels to the cabinet, with specific instructions to ensure they are flush with the back rail.
  4. Top Panel and Final Cabinet Assembly (Steps 25-28): Securing the top panel and completing the main cabinet structure.
  5. Wall Attachment (Steps 29-31): Turning the unit around and securing it to the wall using the provided wall attachment devices, following detailed instructions on drilling and fixing.
  6. Drawer Assembly (Steps 32-39): Constructing the two drawers using the designated drawer panels and fittings.
  7. Drawer Installation (Step 40): Sliding the assembled drawers into the cabinet, aligning them with the ball bearing runners, and securing them with screws.

The manual emphasizes using hand screwdrivers over power drill/drivers for inserting screws to prevent damage to the unit. It also advises assembling the unit on a soft, level surface using the opened-out unit carton to protect the floor and the unit itself.

Habitat JENSON 935/7709 Specifications

General IconGeneral
BrandHabitat
ModelJENSON 935/7709
CategoryIndoor Furnishing
LanguageEnglish

Related product manuals