9
Configuration or programming phase
Num. How to...
11
To link a main
switch clock to
one or more
switch slave
clocks.
Solutions
2
8
Configuration or programming phase
Num. How to...
9
To store states of a
scenario controlled
by a time switch or
a dimmer switch.
Solutions
10
To set up the time
to lower a rolling
shutter or a blind.
2
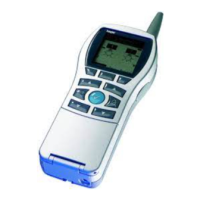
Since push-buttons on front face of these products do not simulate a long press, it is
necessary to use the input simulation mode of TX100 (see §17 page 27 of User’s
Instructions TX100) to store the training.
Note: Press given the push-button must last at least 5 seconds.
- Take a measurement of total shutter lowering time.
- Press the key of TX100 to access menu.
- Select ''Product Management”.
- Select ‘‘ Product Information”.
- Select the product concerned.
Note: if the installation includes several drivers, the LEDs signalling
the state ofproduct channels selected from the drop-down list
switch on. Pressing push-button on modular product front face
makes it also possible to identify it in the drop-down list. For
flush-mounted products, press the key push-button on modular
product front face makes it also possible to identify it in the
drop-down list. For flush-mounted products, press the key
of TX100 to activate the channeldesired.
- Press right-hand side screen key ‘‘PARAM’‘.
- Choose the channel concerned.
- Select the total lowering time from drop-down menu based on the measurement
taken previously.
- Perform a forced remote loading of the product (see §6 page 21 of User’s
Instructions TX100).
- Set the configurer in mode ' prog' and select the filter "+ Info" (see note of §3.2
page 11 of TX100 User’s Instructions).
Note: The special functions are at end of list: their numbers start from
512 and are decremented.
- Link each input to each output .
For instance: for 3 time switches, 9 links are necessary.
- Select the Master from time switches by pressing simultaneously keys + or - until
the message '' Slave OFF'' appears on the screen of this time switch.
- Check the synchronization of slave times switches of the master time switch.
- Return to mode ' auto'.

 Loading...