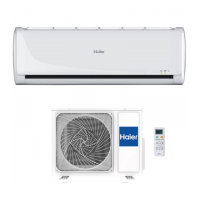
This document outlines the operation, installation, and maintenance of a Haier Split Type Room Air Conditioner. The manual covers various models, including AS25TAAHRA, AS35TAAHRA, AS50TDAHRA, AS68TEAHRA, AS25TABHRA, AS35TABHRA, AS50TDBHRA, AS68TEBHRA, AS35TACHRA, AS20TADHRA, AS25TADHRA, AS35TADHRA, AS50TDDHRA, AS68TEDHRA, AS25THMHRA, AS35TAMHRA, AS50TDMHRA, AS68TEMHRA, AS25TABHRA-TCS, AS35TACHRA-TCS, AS50TDBHRA-TCS, AS25TEDHRA(M), AS35TEDHRA(M), AS20TADHRA-1, AS25TADHRA-1, and AS35TADHRA-1. The appliance is filled with R32 refrigerant.
Function Description
The air conditioner provides cooling, heating, dehumidification (DRY mode), and fan-only operation. It features various modes and functions to enhance user comfort and energy efficiency.
Operation Modes:
- AUTO Mode: The air conditioner automatically selects cooling or heating based on room temperature. Fan speed is also automatically adjusted.
- COOL Mode: Provides cooling.
- HEAT Mode: Provides heating. Warm air is blown out after a short period due to cold-draft prevention.
- DRY Mode: Dehumidifies the room. The unit runs intermittently at low speed when the room temperature is lower than the set temperature plus 2°C.
- FAN Mode: Operates only the fan without cooling or heating. Temperature setting is disabled in this mode.
Special Functions:
- Sleep Operation: Adjusts temperature settings over time to ensure comfortable sleep. In COOL/DRY mode, the temperature increases by 1°C after 1 hour, then by another 1°C after another hour, running for 6 hours before stopping. In HEAT mode, the temperature decreases by 2°C after 1 hour, then by another 2°C after another hour, then increases by 1°C after 3 hours, running for 3 hours before stopping. Fan speed may also be adjusted to low during sleep.
- POWER Operation: Provides rapid heating or cooling.
- QUIET Operation: Reduces noise for a quieter environment.
- HEALTH Operation: Activates an anion generator to balance air ions, kill bacteria, and clean the air by sedimenting dust.
- Timer On/Off: Allows users to set specific times for the unit to turn on, turn off, or both. Settings can be adjusted in 0.5-hour increments for the first 12 hours, then 1-hour increments up to 24 hours.
- Healthy Airflow: Adjusts the vertical louvers to direct airflow upwards or downwards for optimal comfort. In heating, the downward mode is recommended, while in cooling, the upward mode is recommended.
Air Flow Direction Adjustment:
- Vertical Flap: Can be adjusted to various positions (Pos.1 to Pos.5) or set to autoswing.
- Horizontal Flap (Vertical Blade): Manually adjustable by a knob on the air conditioner to control left and right airflow.
Emergency Operation:
In case of remote controller malfunction or loss, the unit can be operated via an emergency switch. The unit will run automatically in either COOL (26°C, AUTO fan) if the room temperature is above 23°C, or HEAT (23°C, AUTO fan) if below 23°C.
Test Operation:
For testing purposes, especially when room temperature is below 16°C, the test operation switch can be pressed for more than 5 seconds to initiate cooling at high fan speed.
Important Technical Specifications
- Refrigerant: R32 (fluorinated greenhouse gas, GWP value: 675).
- Power Supply: 230V, T1 Climate.
- Wiring: H07RN-F type connecting wire. All cables must have European authentication. Grounding wire must be the last to break off during disconnection.
- Breaker: An all-pole switch explosion-proof breaker with a minimum 3mm contact distance must be incorporated into the wiring.
- Floor Area: The appliance must be installed, operated, and stored in a room with a floor area larger than 3 m².
- Wireless Connectivity (WIFI): Maximum transmit power 20dBm, operating frequency range 2400-2483.5MHz.
- Installation Clearances:
- More than 15cm above the indoor unit.
- More than 10cm to the left and right of the indoor unit.
- More than 10cm below the indoor unit.
- Minimum 2m distance between the indoor unit and the floor.
- Pipe Hole Diameter: 60mm for wall penetration.
- Flare Tooling Die Dimensions:
- Clutch-type: 0-0.5mm
- Conventional flare tool (clutch-type/rigid-type): 1.0-1.5mm
- Conventional flare tool (wing-nut type/imperial-type): 1.5-2.0mm
Usage Features
- Remote Controller: Used to select modes, adjust temperature, fan speed, and access special functions. Features an LCD display and various buttons for control.
- Display Board (Indoor Unit): Shows signal reception, set temperature, operation mode, and WIFI status.
- Battery Loading: Uses 2 R-03 batteries. Ensure correct polarity (+/-). Remove batteries if not in use for a long period.
- Signal Transmission: Remote controller signal transmission range is within 7m without obstacles. Interference from fluorescent lamps or wireless telephones may reduce this distance.
- Power Cord: Must be properly inserted into an exclusive branch circuit. Do not use extended or bundled cords.
- Installation Place: Choose a robust location free from vibration, away from heat/steam sources, with good drainage, and sufficient space for airflow. Avoid direct sunlight during cooling.
- Drainage: The drain hose must be installed with a downward slope to ensure proper drainage. Heat insulation should be applied if the drain hose is inside the room.
- Error Codes: The manual provides a list of error codes (E1, E2, E4, E7, E14) and their corresponding troubleshooting steps, such as sensor failures, EEPROM errors, communication faults, and indoor fan motor malfunctions.
Maintenance Features
- Air Filter Cleaning:
- Open the inlet grille by pulling it upward.
- Remove the filter by pushing its center tab and pulling it downward.
- Clean the filter using a vacuum cleaner or water. Dry completely in the shade.
- Attach the filter correctly, ensuring the "FRONT" indication faces forward.
- Close the inlet grille.
- Recommended cleaning frequency: Every two weeks.
- Air Purifying Filter Replacement:
- Open the inlet grille using the grille-support device.
- Detach the standard air filter.
- Put air purifying filter appliances into the right and left filter frames.
- Attach the standard air filter.
- Close the inlet grille.
- Photocatalyst Air Purifying Filter: Should be solarized every 6 months.
- Bacteria-killing Medium Air Purifying Filter: No replacement needed, but dust should be removed frequently by vacuuming or flapping. Store in cool, dry conditions away from direct sunlight when not in use.
- Indoor Body Cleaning: Wipe with a soft, dry cloth. For serious stains, use a neutral detergent diluted with water, wring out the cloth, and wipe off the detergent completely. Avoid hot water (over 40°C) as it may cause discoloration or deformation.
- Remote Controller Cleaning: Wipe with a dry cloth. Do not use water, glass cleaner, or chemical cloths.
- Long-Term Storage: If the unit is not used for a long time, turn off the main power supply switch. Remove batteries from the remote controller.
- General Cautions:
- Do not obstruct or cover ventilation grilles.
- Do not insert fingers or objects into the inlet/outlet.
- Do not attempt self-repair or reconstruction.
- Ensure proper grounding.
- Do not operate switches with wet hands.
- Do not pour water onto the unit for cleaning.
- Do not place animals, plants, or objects in the direct path of airflow.
- Do not place flower vases or water containers on top of the unit.
- Ensure good condition of the installation stand.
- Call sales/service for installation and any abnormalities.