32
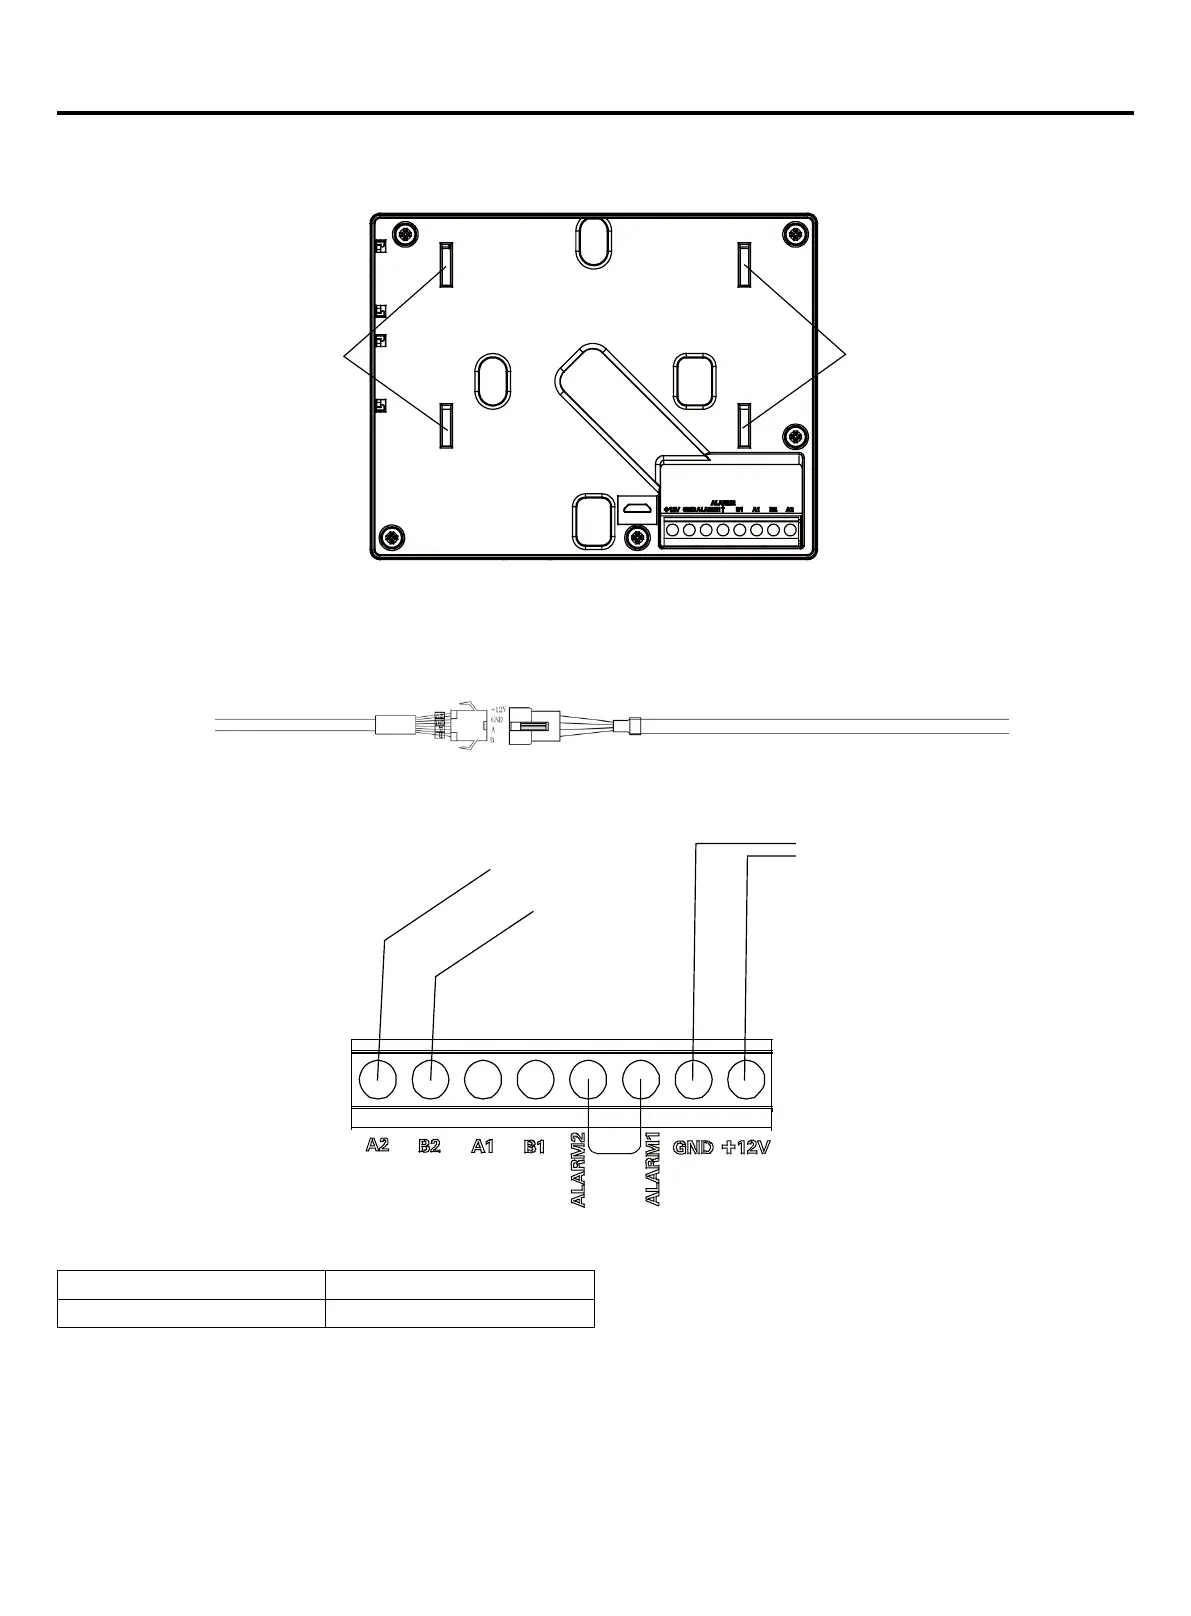
The hanging plate is placed in the direction of the illustration, where A/B is the location of the 86 cassette screws, and the
C/D is the position of the 120 cassette screws. The pendant is xed to the hole of the pendant, please pay attention to the
UP direction.
The black terminal of the controller communication line is connected with the black harness terminal at the lower outgoing
line port of the unit. The other end of the controller communication line is pressed on the wiring base of the controller, and
the corresponding relationship is red~+12V, black~GND, green~A2 and white~B2.
All of the power supply and communication 485 cables between each module and terminal module to the controller are
double core shielded twisted-pair cable. Specic wiring as the table below:
Connection terminal between controller communication line and IDU:
Hanger hole
Hanger hole
The Split IDU
Controller
The communication line is connected with the controller
The length of signal line Wiring dimension
≤100m 0.75mm
2
×4
Fix the screw through the bracket on the 86 cassettes and connect the connection. The red connects to the +12V and
black to GND, the green connects to A2, and the white connects to B2. Please pay attention to the line order. Then the
controller is xed down.
Operation instructions for controller
Controller
(HW-WA101DBT)
12V- black
12V+ red
485+ green
485- white


 To Next Page