Do you have a question about the Haier HOR54B5MCW1 and is the answer not in the manual?
Check the troubleshooting section for solutions before contacting service.
Ensures safe installation, handling of hot components, and precautions during operation.
Details on preventing gas leaks, fire, electrical hazards, and outlines usage restrictions.
Specifies requirements for installation, clearances, and surfaces.
Guidance on placing the cooker on a stable surface and leveling it.
Details on connecting the appliance to the gas supply safely and correctly.
Procedure for adapting the cooker to different gas types, including nozzle exchange.
Guidance on safe electrical connection by qualified personnel.
Parameters for roasting different types of meat, including temperature and time.
Steps to take in an emergency, including switching off, unplugging, and calling service.
This document serves as a comprehensive user manual for a Haier free-standing cooker, providing detailed instructions on its operation, maintenance, and safety. It emphasizes the importance of proper installation and adherence to safety guidelines to ensure years of hassle-free use.
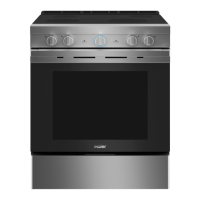
The Haier free-standing cooker is designed for household cooking, featuring a gas hob with multiple burners and a gas oven. The hob includes auxiliary, semi-rapid, and wok burners, each with varying heat outputs to accommodate different cooking needs. The oven is equipped with a temperature regulator and anti-outflow protection, allowing for precise temperature control for baking and roasting. A top oven/grill compartment offers additional cooking flexibility, enabling grilling and smaller oven tasks. The cooker is designed to be efficient and easy to use, with clear controls and indicators for all functions.
To use the surface burners, users must first press and turn the corresponding knob to the "large flame" position. For models with a safety valve, the knob must be held down for 10 seconds after ignition to activate the safety device. The flame size can be adjusted continuously between "large flame" and "economical flame" positions. It's crucial to use appropriate cookware, ensuring the pan base is always larger than the burner flame crown and the pan is covered. Recommended pan diameters are provided for each burner type. The manual also details how to ignite burners without an ignitor using a match.
The main oven features a gas valve with temperature regulation. To ignite, the oven knob must be pressed down and turned to the desired temperature position. It should be held for approximately 3 seconds to warm the sensor and activate the protection function. If the flame goes out, the ignition process should be repeated after a short interval to allow for oven ventilation. The oven temperature can be controlled with the door closed. Baking and roasting guidelines are provided, including recommended temperatures, cooking times, and oven rack levels for various dishes and meat types. For roasting meat, it's advised to use heatproof ovenware, turn the meat at least once, and baste it with its juices.
The top oven/grill compartment can be used for both grilling and smaller oven tasks. When used as a grill, the door remains slightly tilted, directing any spillage away from the user. To activate the grill, the control knob is turned to the maximum temperature position and allowed to preheat for about 5 minutes. An indicator light confirms the grill is on. When used as an oven, the top oven control knob is rotated clockwise to select the desired temperature. An amber indicator light glows until the pre-set temperature is reached, then cycles on and off to maintain it. Users are cautioned not to touch hot heating elements and to allow steam and hot air to escape when opening the door.
The manual provides several tips for saving energy, such as using proper pans (never smaller than the burner crown), ensuring clean burners and grates, avoiding frequent uncovering of pans, and only using the oven for larger dishes. It also suggests switching off the oven 10 minutes before the end of cooking time for longer cooking durations and ensuring the oven door is properly closed to prevent heat leakage.
Before any cleaning, the cooker must be switched off and allowed to cool completely. For the frontal part of the cooker, usual cleaning agents are recommended, while aggressive agents or sharp objects should be avoided. Knobs and handles should be cleaned with a soft cloth and liquid cleaners suitable for smooth enamel surfaces.
The gas grid, cooking area, and burner components should be cleaned with warm water and mild detergent. Thermal elements and ignition devices require a soft brush. It's crucial to keep gas outlet nozzles free of dirt. After cleaning, all components should be thoroughly dried and replaced in their respective slots to prevent troubled ignition. The manual notes that discoloration of crown caps due to high temperatures is normal and does not affect burner operation.
The oven should be cleaned after every use. The lighting can be switched on for better visibility. The oven chamber should only be washed with warm water and a small amount of washing-up liquid, then wiped dry. Abrasive materials should not be used on the glass front panel. The rod shelves can be removed for washing in the sink using a fine steel wool soap pad. Care should be taken not to damage the thermostat sensor located in the top right-hand side of the oven.
For easier access to the oven chamber for cleaning, the door can be removed. This involves tilting the safety catch of the hinge upwards, closing the door lightly, and then lifting and pulling it out. When refitting, ensure the hinge notch is correctly placed on the protrusion of the hinge holder, and the safety catch is carefully lowered.
The internal glass panel can be removed by unscrewing and unfastening a plastic latch in the top corner of the door, then taking out the glass from the second blocking mechanism. After cleaning, the panel is reinserted and secured.
Before replacing the oven light bulb, the appliance must be disconnected from the power supply and allowed to cool. The protective cover is unscrewed, the old bulb (220-240V, 50Hz, 25W, G9 fitting, suitable for 300°C) is carefully removed, and a new one is inserted. The protective cover is then refitted. Users are advised not to use screwdrivers or other utensils to remove the light cover and to handle the new bulb with a clean cloth or gloves to prevent premature failure.
Beyond routine cleaning, periodic inspections of control elements and cooking units are recommended. After the guarantee expires, a technical inspection by a service center at least every two years is advised. Any operational faults should be fixed, and periodical maintenance of cooking units should be carried out by an appropriately authorized fitter.
| Energy Rating | A |
|---|---|
| Control Type | Mechanical |
| Color | White |
| Appliance Placement | Freestanding |
| Product Colour | White |
| Control Position | Front |
| Number of Burners/Cooking Zones | 4 |
| Number of Ovens | 1 |
| Oven Interior Light | Yes |
| Width | 50 cm |
| Depth | 60 cm |
| Product Type | Freestanding Cooker |
| Voltage | 220-240V |
| Type | Cooker |
| Number of Gas Burners | 0 |
| Features | Easy to clean enamel |