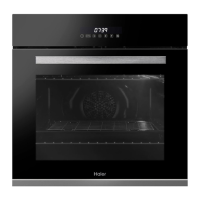
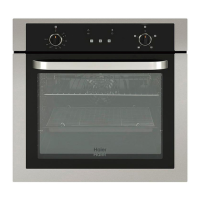
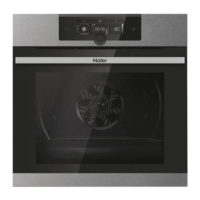
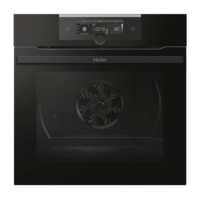
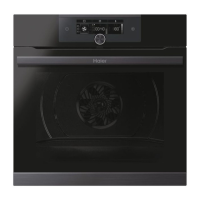
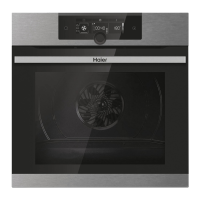
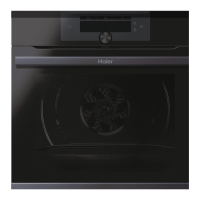
This document provides user instructions for Haier ovens, specifically models HWO60S14EPB4 and HWO60S14EPX4. It covers safety warnings, general instructions, product description, control panel operation, cleaning and maintenance, pyrolysis, troubleshooting, and installation.
Safety and Warnings:
The oven is designed for safe operation during normal cooking. Users are advised to turn off the oven at the wall before replacing the lamp or performing maintenance to avoid electrical shock. A fire hazard warning advises against placing aluminum foil, dishes, trays, water, or ice on the oven floor, as this can damage the enamel or cause fire. The appliance should not be used for room warming. Flammable materials should not be stored in or near the oven. A cut hazard warning advises caution during installation due to sharp edges. A hot surface hazard warning indicates that accessible parts become hot during use, and users should avoid touching them, especially children. Oven mitts or other protection should be used when handling hot surfaces. Care should be taken when opening the oven door to allow hot air or steam to escape. Heating elements and interior surfaces can be hot even if dark in color.
Important safety instructions include reading all instructions before use, using the oven only for its intended purpose, and ensuring proper installation and earthing by a qualified technician. An isolating switch providing omnipolar disconnection from the power supply is required, compliant with overvoltage category III requirements, bearing the maximum connected load, and in line with current legislation. The switch must be incorporated into the fixed wiring. The yellow-green earth cable should not be interrupted and must be easily accessible. Household appliances are not intended to be played with by children, who should not be left alone or unattended. Children under 8 years old must be continuously supervised. The appliance can be used by children aged 8 and above, and persons with reduced physical, sensory or mental capabilities or lack of experience and knowledge, if supervised and instructed on safe use and understanding hazards. Cleaning and user maintenance should not be done by unsupervised children.
Other warnings include:
- Do not place heavy objects on the oven door.
- Wear proper apparel; loose-fitting or hanging garments can ignite or melt.
- User servicing should only be done as specifically recommended in the manual; otherwise, refer to a qualified technician.
- Do not use water on grease fires; smother with a dry chemical or foam extinguisher.
- Use only dry oven mitts or potholders to avoid steam burns or fire.
- Do not heat unopened food containers, as pressure buildup can cause bursting and injury.
- Practice safe food handling: leave food in the oven for the shortest possible time before and after cooking to avoid contamination.
- Keep oven vents unobstructed.
- Do not operate the appliance with an external timer or separate remote-control system.
- Hot air can blow from the vent at the top of the oven as part of the cooling system.
- Position oven shelves while the oven is cool.
- When placing a shelf, ensure the stop is directed upwards and to the back of the cavity, and the shelf is fully inserted.
- Do not clean the oven seal or use oven-cleaning products on it.
- Do not use oven cleaners, harsh/abrasive cleaning agents, waxes, polishes, commercial oven liners, or protective coatings.
- Do not use harsh/abrasive cleaners, scourers, or sharp metal scrapers on the oven door glass.
- Clean only the parts listed in the manual.
- Do not use a steam cleaner.
- Do not store items children might want above the oven.
- Do not install or operate a damaged or improperly working appliance; contact the dealer or installer immediately.
- Use only bakeware approved for oven use.
- No additional operation/setting is required for rated frequencies.
- If the power cable is damaged, it should be substituted by a suitably qualified professional with type H05V2V2-F. The earth conductor must be approximately 10 mm longer than others.
- The oven must be switched off before removing removable parts.
- Never remove the oven door seal.
- When inserting the grid tray, ensure the anti-slide edge is positioned rearwards and upwards.
- The appliance must not be installed behind a decorative door to avoid overheating.
- Ensure good ventilation in the oven space during installation.
- Fix the oven to the furniture with provided screws.
- Remove excess spilled material before a self-clean cycle.
- Before a self-clean cycle, remove all accessories and wipe up large food spills; do not use detergent.
- Do not place towels on the oven during the cleaning cycle.
- Move pet birds to a well-ventilated room during a self-clean cycle, as fumes can be harmful.
- During a self-clean cycle, surfaces get hotter than usual; keep children at a safe distance.
- For ovens with a meat probe, close the hole with the provided nut before a cleaning cycle and when the probe is not in use.
- Only use the temperature probe recommended for this oven.
- If a hob is fitted above the oven, do not use it during a self-clean cycle to prevent overheating.
General Instructions:
Users are advised to read the manual carefully and retain it for future reference. The serial number should be noted for customer service. Upon unpacking, check for transport damage. Keep packaging materials away from children. Initial use may produce smoke from insulation glue; wait for it to dissipate before cooking. The manufacturer is not responsible for damages due to non-observance of instructions. Oven functions, properties, and accessories may vary by model.
Electrical Safety:
Electrical connections must be made by a qualified electrician and conform to local laws. The manufacturer is not responsible for damages from non-observance. The oven must be earthed. The power supply should be 220-240 Vac. Check power voltage and disconnector setting. The grounding wire must be connected to the earth terminal of the power supply. A qualified electrician should check the continuity of the power supply's earth terminal before connection. The manufacturer is not responsible for accidents due to faulty earthing. An additional wall socket is advisable for maintenance. The power cable should only be replaced by technical service staff or equivalent.
Recommendations:
Clean the oven after each use. Do not line oven walls with aluminum foil or single-use protection, as it can melt and damage the enamel. Avoid very high temperatures to prevent excessive soiling and smoky smells; extend cooking time and lower temperature instead. Use dishes and baking molds resistant to high temperatures.
Waste Management and Environmental Protection:
The appliance is marked according to European Directive 2012/19/EU (WEEE). It contains polluting substances and reusable elements. WEEE should undergo specific treatments for pollutant removal and material recovery. It should not be treated as domestic waste but taken to dedicated collection areas. Old appliances can be returned to the vendor when purchasing a new equivalent appliance.
Saving and Respecting the Environment:
Avoid pre-heating the oven and always try to fill it. Open the oven door infrequently. Switch off the oven 5-10 minutes before the planned end of cooking time to use residual heat. Keep seals clean. Use the "delayed cooking" program with hourly tariffs to save energy.
First Use - Preliminary Cleaning:
Clean the oven before first use. Wipe external surfaces with a damp soft cloth. Wash all accessories and wipe the oven interior with hot water and washing-up liquid. Set the empty oven to maximum temperature for about 1 hour to remove newness smells.
Product Description - Overview:
- Control Panel
- Side racks
- Wire Shelves (x2)
- Roasting Dish
- Air Fry Tray
- Oven Door
- Serial Number
Accessories:
- Roasting dish: For roasting and grilling, placed on a lower shelf to collect drips.
- Wire Shelves: Hold baking trays and plates.
- Lateral wire grids: Located on both sides of the oven cavity, hold wire shelves and dishes.
- Air Fry Tray: Used for air frying with the air fry function.
- Telescopic guides: Two guide rails facilitating easy extraction and repositioning of trays and grids.
- Softclose: Hinges ensuring automatic soft and smooth door closing.
- Turnspit: No pre-heating required for rotisserie cooking with the door closed. Instructions for use: unscrew hooks, insert spit into meat, secure meat with hooks, tighten screws, insert spindle into motor hole, remove handle after cooking to avoid burns.
Control Panel:
The control panel features:
- On/off button: Turns the oven on and off. Used to set the time during first use.
- Functions button: Accesses manual functions, food cooking categories, Tailor Bake, Gentle Cooking, WiFi menu, and cleaning options. Hold for 5 seconds to save a favorite function.
- Time button: Accesses settings for cooking time, kitchen timer, and start delay. Press normally for Minute Minder, hold for 3 seconds to set the time of day.
- Temperature button: Accesses temperature setting, preheating, and fast preheating options. Hold for 5 seconds to activate/deactivate screen lock. Displays door lock feedback during pyrolysis.
- Navigation Buttons: Used for setting functions and parameters.
- Start/Pause button: Starts/pauses cooking or confirms functions.
Display Areas:
The display is divided into three areas:
- Functions Area: Shows manual functions (a), food cooking categories (b), cleaning functions (c), function symbols (a1), Master Bake (a2), Low Temperature (a3), Pyrolysis Eco (d1), Pyrolysis + (d2), Hydroeasyclean (d3), Meat (b1), Seafood (b2), Baking (b3), Vegetables (b4).
- Time Area: Shows duration (d), kitchen timer (e), delay start (f), set time of day (g), time value, and time indicator.
- Temperature Area: Shows Key Lock (h), Preheating (i), Fast Preheating (l), Door Lock, Preheat and cool down feedback (j), temperature value, and temperature indicator.
Main Menu - Functions Area (2):
- Manual functions (a): Choose cooking functions, temperature, and duration.
- Food categories (b): Access 4 integrated food cooking categories.
- Cleaning functions (c): Choose available cleaning systems.
Main Menu - Time Area (3):
- Duration (d): Set cooking duration using navigation keys.
- Kitchen timer (e): Set kitchen timer using navigation keys (press twice).
- Delay start (f): Set delay start using navigation keys (press three times).
- Set time of day (g): Set time of day (press and hold for 3 seconds when oven is on standby).
Main Menu - Temperature Area (4):
- Preheating (I): Set preheating temperature using navigation keys.
- Fast preheating (l): Set fast temperature (press twice).
Manual Functions (a1) - Cooking Modes:
- Bake (150-200°C): Top and bottom elements, preheat 10 mins. Ideal for traditional roasting/baking, searing red meats, roast beef, lamb, game, bread, foil-wrapped food, flaky pastry. Mid-position shelf.
- Fan Bake (180-200°C): Fan with top and bottom elements. Better heat distribution. Ideal for bread, pizza, focaccia.
- Fan Forced (150-230°C): Rear element with fan. Recommended for poultry, pastries, fish, vegetables. Even heat penetration, reduced cooking/preheating times. Can cook different foods simultaneously. Fan pulses.
- Grill L3 (power) (5th level for thin food, 3rd/4th level for thick food): Grill element, preheat 5 mins. White meats at a distance from grill. Use wire shelf with roasting dish underneath. Turn food 2/3 way through. Use with door closed.
- Air Fry (200°C): Grill element with fan for hot air circulation. Use with air fry tray for chips, hash browns, chicken pieces without turning. Roasting tray beneath. Use with door closed.
- Traditional Bake (160-180°C): Bottom bake element only. Suitable for crème caramel, puddings, bain marie on one level.
- Pastry Plus (170-210°C): Bottom heating element with fan. Ideal for fruit flans, tarts, quiches, pizza. Prevents top from drying. Bottom shelf position.
- Maxi Grill L3 (power) (4th/5th level): Both upper elements, preheat 5 mins. Place food on wire shelf with roasting dish underneath. Turn food 2/3 way through. Use with door closed. L5 power without preheating for toasts.
- Fan Bake+ (150-200°C): Upper and lower elements initially, fan pulses after temperature reached. For cakes and bread on a single level.
- Rotisserie + Grill L5 power: Top grill element with turnspit. Recommended for chicken breast, quails, fish fillets. Baking tray underneath. Use with door closed.
- Rotisserie + Fan Grill (200°C): Top grill element with fan and turnspit. Recommended for large items like chicken or turkey. Baking tray underneath. Use with door closed.
- Rotisserie + Bake (200-240°C): Top and bottom elements with turnspit. Recommended for beef or pork roasts. Baking tray underneath.
Special Functions:
- Master bake (180-200°C): Top heating element with pulsing fan to keep food soft inside and crunchy outside.
- Low Temperature (90°C): Ensures food remains tender and succulent with minimal surface browning. Uses upper and lower bake elements.
Food Cooking Categories:
Pre-set parameters for guaranteed cooking results. Default values for 4 servings.
- Meat (b1): Pre-heat (Y), Cooking position (2-3), Heat Feel temperatures (58-62-65°C for beef). For roasts and cuts of beef, veal, and pork.
- Seafood (b2): Pre-heat (Y), Cooking position (2-3), Heat Feel temperatures (65°C). For whole fish and fillets.
- Baking (b3): Pre-heat (Y), Cooking position (1-2), Heat Feel temperatures (95°C for bread and pasta baked). For breads, lasagne, and pastries.
- Vegetables (b4): Pre-heat (Y), Cooking position (3-4), Heat Feel temperatures (70°C). For roasted vegetables and potatoes.
Additional Functions:
- Key lock (h): Locks the screen to prevent unwanted use. Activate/deactivate by pressing and holding Temperature (4) for 5 seconds.
- Favourite function: Save a favorite function to display it first when the oven is turned on (hold Functions (2) for 5 seconds).
Cleaning Functions:
- Pyrolitic Self Clean Eco (d1): Regular cleaning, 90 minutes, door locked.
- Pyrolitic Self Clean (d2): Heavy cleaning, 120 minutes, door locked.
- Hydroeasyclean (d3): Simple, efficient cleaning using steam.
Oven Cleaning and Maintenance:
- General notes: Clean regularly when cool. Avoid abrasive detergents, steel wool, or sharp objects. Use water, soap, or bleach-based detergents.
- Glass parts: Clean with absorbent kitchen towel after each use. For stubborn stains, use a detergent-soaked sponge.
- Oven window seal: Clean with a slightly damp sponge.
- Accessories: Clean with a wet, soapy sponge; avoid abrasive detergents.
- Roasting dish: Remove hot fat, wash with hot water and washing-up liquid. Immerse in water and detergent for greasy residues. Can be washed in a dishwasher or with commercial oven detergent.
- Side racks: Remove by pulling in the direction of arrows. Clean in dishwasher or with wet sponge. Reinstall in reverse order.
- Changing the bulb: Disconnect oven from mains. Undo glass cover, unscrew bulb, replace with new bulb of same type. Replace glass cover. Product contains light sources of energy efficiency class G (Lamp)/F (10Led).
- Removal and cleaning of the glass door: Open door 90°, pull hinge fixing tabs. Put door at 45°, pull forwards and upwards to release. Place on cushioned surface. Unscrew two screws, pull upper door cover. Carefully remove glass panels. Clean with soft cloth and appropriate cleaning product. Reassemble in reverse order. Ensure "Low-E" indication is legible and on the left side of the door. Push top cover forward, tighten screws. Insert hinge male parts into holes at 45° until they click, then bring door to 90° and lock fixing tabs.
Hydro Easy Clean:
Uses steam to remove fat and food particles.
- Pour 300 ml of water into the container at the bottom of the oven.
- Select dedicated function (d1).
- Allow program to operate.
- After cycle, allow oven to cool.
- Clean inner surfaces with a cloth when cool.
Warning: Ensure oven is cool before touching. Use distilled or drinkable water.
Pyrolysis:
Destroys food residues at high temperature. Operation is automatic. Fumes are rendered "clean" by a pyrolyser. Oven door locks automatically due to high temperatures. Can be stopped anytime. Door remains locked until safety lock display disappears.
Note: Do not use gas burners or electric hot-plates of a hob fitted above the oven during pyrolysis to prevent overheating.
Two pre-set cycles:
- Pyrolitic Self Clean Eco: For moderately stained ovens, 90 minutes.
- Pyrolitic Self Clean: For heavily stained ovens, 120 minutes.
Do not use commercial cleaning products.
Tip: Perform pyrolysis immediately after cooking to use residual heat and save energy.
Before executing:
- Remove all accessories (grids, side racks, telescopic guides) as they cannot tolerate high temperatures.
- Remove large spillages or stains.
- Close the oven door.
- Clean the oven door.
- Remove coarse food residues with a damp sponge; do not use detergents.
- Do not place tea towels.
Using the cycle:
- Select cleaning functions (d) and choose pyrolitic cycle.
- Defer start time via programmer if desired.
- Door locks automatically after a few minutes. Can be stopped by pushing On/Off.
- Pyrolysis switches off automatically when finished.
Troubleshooting:
- Oven does not heat up:
- Possible cause: Clock not set. Solution: Set the clock.
- Possible cause: Cooking function and temperature not set. Solution: Ensure settings are correct.
- No reaction of the touch user interface:
- Possible cause: Steam and condensation on the user interface panel. Solution: Clean with a microfiber cloth to remove condensation.
Manufacturer's Warranty:
Two-year Manufacturer's Warranty covering parts and labor. Requires warranty card and proof of purchase.
The manufacturer undertakes to repair or replace defective parts within two years from purchase.
Warranty DOES NOT cover:
- Service calls not related to product defect (e.g., instruction on use, installation correction, fuse replacement, user-caused faults, normal noise/vibration, water on floor, blocked pumps, pest damage, corrosion, power outages/surges).
- Defects from non-normal domestic use or not in accordance with the User Guide.
- Defects caused by accident, neglect, misuse, or 'Act of God'.
- Cost of repairs by non-authorized repairers.
- Normal recommended maintenance.
- Repairs when appliance dismantled/serviced by non-authorized personnel.
- Pick up and delivery.
- Transportation/traveling costs outside authorized service area.
Product designed for normal domestic use, not commercial. Service by Authorized Service Repairer during normal business hours. Warranty is an extra benefit and applies to products purchased in New Zealand and Australia.
For Australian customers: Goods come with guarantees under Australian Consumer Law. Entitled to replacement/refund for major failure and compensation for foreseeable loss/damage. Entitled to repair/replacement if goods fail to be of acceptable quality and failure is not major.
Installation:
Mounting Under Cooktop:
Cabinetry dimensions: 560 mm width, 570 mm depth, 600 mm height. An opening of 560 mm x 45 mm is required at the bottom for cool air entry. An air exit of 5 mm gap is needed. The oven is fixed to the furniture with screws (2x3.5x25). Consult cooktop manufacturer's guide for clearances.
Standalone Installation:
If no cooktop, cabinet depth and height can be reduced. An opening of 460 mm x 45 mm is needed at the top for hot air exit. An opening of 560 mm x 45 mm is needed at the bottom for cool air entry if the base is sealed.
Electrical Connections:
- Connection by a competent person only.
- Mains lead must not be clamped, bent, trapped, or contact hot parts.
- Oven must be earthed.
- Before connecting, check domestic wiring system suitability and voltage correspondence to rating plate.
- Terminal connections: Live (Brown), Neutral (Blue), Earth (Green/Yellow).
- HWO60S14EPB4: Max Power 2400 W, Frequency 50/60 Hz, Voltage 220-240~, Amps 10-10.9.
- HWO60S14EPX4: Max Power 2400 W, Frequency 50/60 Hz, Voltage 220-240~, Amps 10-10.9.