halo2cloud, llc
148 eastern boulevard, glastonbury, ct 06033 usa 860-633-0882 halo2cloud.com
halo2cloud.com
A Cloud Company
POCKET POWER 2800
halo
Included items:
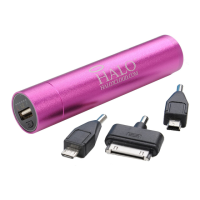
- 1 Halo Pocket Power™ 2800 charger
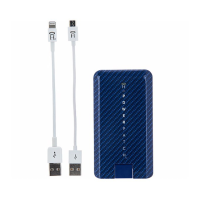
- 1 Halo Charge It Charge Me 2in1 USB Cable
- 3 charging adapter tips
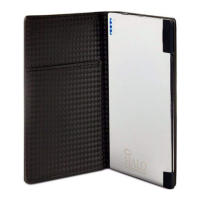
- Carrying pouch
- User guide
- Warranty card
Getting Started
Charge the HALO Pocket Power™ charger until the LED displays
solid Green (no lights should be ashing). This will take up to 6
hours and will uctuate depending on the charging powersource.
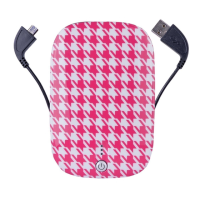
Figure 1: Halo Charge it Charge Me 2in1 USB Cable
Step 1: Charge the HALO Pocket Power™ charger
Using the supplied HALO Charge It Charge Me™ cable, plug one USB connector into the Halo charger and plug the
other USB connector to a computer or an AC power source with a USB 5V input.
Note: The charging cable works in either direction, see Figure 1. (i.e. A is connected to the power source and B is
connected to the Halo charger, or B is connected to the power source and A is connected to the Halo charger)
During charging of the HALO Pocket Power™ charger, the LED will ash the following color indicating charge level. Red
(1%-33%), Yellow (34-66%), Green (67-99%). When the charger is 100% fully charged the Green LED will become
illuminated and will no longer ash.
Step 2: Charge your Personal Electronic Device
Using the supplied HALO Charge It Charge Me™ cable, plug one USB connector into the HALO Pocket Power™ charger,
insert the provided appropriate tip into your device and the HALO Pocket Power will automatically begin charging. You
may also use your own USB cable that was supplied with your personal electronic device. The LED color will change
over time, indicating the remaining capacity as the HALO Pocket Power discharges. The Red LED will start ashing when
the HALO Pocket Power™ charger is out of power before shutting down.
NOTE: Using the supplied HALO Charge It Charge Me™ cable, you can charge both the HALO Pocket Power™ charger
and your electronic device at the same time. To do this you must rst plug either USB connector into a computer (or
another 5V input USB charging source), and then connect the Halo charger and your electronic device.
To Turn ON/OFF the HALO Pocket Power
The HALO Pocket Power is equipped with intelligent software to turn ON the Halo Pocket Power™ charger automatically
when a USB cable is inserted AND an electronic device is connected and drawing power within 15 seconds of inserting
the USB cable. If the electronic device is fully charged and no longer drawing power, the HALO Pocket Power will
automatically turn OFF to preserve battery.
NOTE: The unit may also manually be turned ON/OFF by depressing the power button for 3 seconds.
GUIDE
A.
B.
Figure 1