9
• Connect the unused plug on the USB cable to an
available USB port on your computer or another suitable
USB charger.Please refer to the operating instructions for
the USB charger used.
• The LED indicator of the USB charging plug is lit red
during charging. When the battery is fully charged, the
LED indicator goes out.
• Remove the connection cable from the battery bay (4) of
the drone.
• Connect the charged battery to the connection cable.
• Put the connected battery back into the battery bay (4)
and then close the battery compartment cover.
Warning –rechargeable battery
• Only use suitable charging devices with USB
connections for charging.
• As arule, do not use charging devices or USB
connections that aredefective and do not try to repair
them yourself.
• Do not overcharge the product or allow the battery to
completely discharge.
• Avoid storing, charging or using batteries in extreme
temperatures.
• When stored over along period of time, batteries
should be charged regularly (at least every three
months).
• After every ight and beforecharging, allow the
motors and the battery to completely cool!
• Continually monitor charging!
• Stop charging immediately if the battery becomes hot
and/or deformed!
• Use aheat-resistant, re-proof surface for charging!
Note –charging/battery capacity
• It takes approximately 1hours to fully charge the
battery.
• The battery comes partially charged. Initial charging
may thereforetake less time.
• After acharging time of 60 minutes, the ying time is
approximately 8-10 minutes.
• The actual ying time varies according to use of the
product, the settings and ambient conditions (for
example, temperatures below 5°C and above 25°C
reduce battery capacity).
7. Flight mode
7.1 Pairing the drone with the remote control
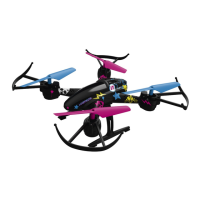
• Place the drone on alevel surface.
• Move the slide switch (7) on the drone to the ON
position. The LEDs (5) begin to ash.
• Press the on/off switch (12) to switch on the remote
control.
• Move the left control lever (2) all the way up.
• Then move the left control lever (2) all the way down.
• Twosignal tones areemitted to conrm the pairing. The
drone’sLED indicator (5) and that of the remote control
(12) arenow permanently lit.
7.2 Flight control
Note
• Control the drone only with minimal movements
of the control levers so as to ensuresmooth ight
behaviour.
• Avoid jerky movements. The drone could get out of
control.
• The direction specications assume that the drone
is in front of you and facing forward, or is in Actual
Direction mode (see Section 7.4)
 Loading...