4
7. Operation
Information -entry
Press and hold the UP or DOWN button to select the values morequickly.
7.1 Basic setting and manual setting
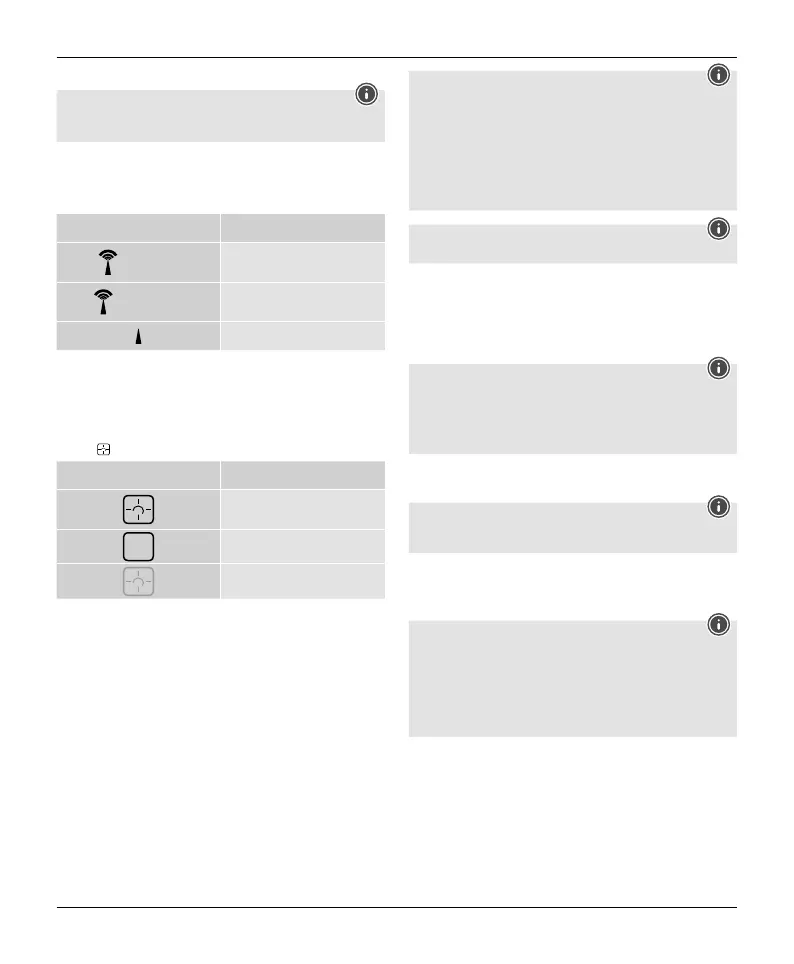
After inserting the batteries, the base station automatically searches for the DCF
signal and for the Meteotime weather signal. The radio symbol (2) ashes during
the search process.
Display Search for DCF signal
Flashing display
Active
Permanent display
Successful -the signal is being received
Inactive
• The time and date aredisplayed within afew minutes. However,receiving the very
large amounts of data with the forecast for all regions and days requires up to 24
hours from the initial start-up until all data is received.
• After successful reception of the time and date signal, the display shows FRM
(Frankfurt am Main) as the location for the info window.For information on
changing the country and location, see below.
• If the device has successfully received the Meteotime signal, the Meteotime
symbol is displayed next to the respective day of the week.
Display Meteotime status
Valid and updated data
Valid, but not updated data
Inactive
Note -faulty transmission of the measured values
• In some cases, interference caused by aWiFi network, computer,TV, etc., for
example, may cause the transmission of measured values between the base
station and the outdoor sensor to fail.
• If this happens, resynchronise the stations by brieyremoving the batteries
from both stations and reinserting them.
• If the measured values arenot transmitted again, replace the batteries with
new ones.
• If necessary,choose anew location for the base station to avoid the possible
interference signals in the future.
Note
Youcan use the TESTfunction to search for abetter location.
Take the device in your hand to nd asuitable location. Press the TESTbutton (D) to
check the quality of the Meteotime signal/DCF signal. The signal strength is displayed
as avalue from T-1 (very poor) to T-9(very good). The TESTtakes about one minute.
Youcan restart or stop the test at any time by pressing the TESTbutton (D).
If no signal is received on arepeated basis, press and hold the DOWN button (F) for
around 3seconds to start the manual search for the DCF signal. The radio signal (2)
starts to ash.
Note -setting the time
• The search process takes about 5minutes. If this fails, the search is terminated and
repeated at the top of the next hour.The radio symbol (2) disappears.
• Meanwhile, you can make amanual setting of the time and date.
• The clock automatically continues to search for the DCF signal daily.Once the signal
is received successfully,the manually set time and date areoverwritten.
Press and hold the DOWN button (F) again for around 3seconds to end the manual
search process.
Note -summertime
The time adjusts automatically to summertime. While summertime is active, DST(1)
appears on the display.
7.2 Connection to the outdoor sensor
• After the batteries areinserted, the base station automatically searches for a
connection to the outdoor sensor and carries out the initial setup routine.
Note
• Initial setup takes around 3minutes.
• During the connection attempt, the radio signal on the base station (22)
ashes.
• Avoid any operation of the buttons during this time! Otherwise, errors and
inaccuracies may occur in the values and their transmission.
• The process is nished as soon as the indoor and outdoor measurement data
(23/27/34/36) aredisplayed.
If no signal is received from the outdoor sensor on arepeated basis, press and hold
the CHANNEL button (B) for approx. 3seconds to start the manual search for the
signal.
 Loading...