32
G Operating instruction
1. Explanation of Warning Symbols and Notes
Warning
This symbol is used to indicatesafetyins truc tions or to draw your attention to sp ecic
hazardsand risks.
Note
This symbol is used to indicate additional information or important notes.
2. Package Contents
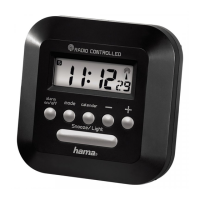
•“Retro” alarm clock
•1AA battery
•These operating instructions
3. Safety Instructions
•The product is intended for private, non-commercial use only.
•Protect the product from dirt, moistureand overheating, and only use it in adry environment.
•Donot drop the product and do not expose it to any major shocks.
•Donot attempt to service or repair the product yourself.Leave any and all service work to qualied
experts.
•Donot modify the product in any way.Doing so voids the warranty.
•Keep the packaging material out of the reach of children due to the risk of suffocation.
•Dispose of packaging material immediately according to locally applicable regulations.
•Use the product for its intended purpose only.
•Donot use the product in the immediate vicinity of heaters or other heat sources or in direct
sunlight.
Warning -Batteries
•When inserting batteries, note the correct polarity (+ and -markings) and insert the batteries
accordingly.Failure to do so could result in the batteries leaking or exploding.
•Only use batteries (or rechargeable batteries) that match the specied type.
•Beforeyou insert the batteries, clean the battery contacts and the polar contacts.
•Donot allow children to change batteries without supervision.
•Donot mix old and new batteries or batteries of adifferent type or make.
•Remove the batteries from products that arenot being used for an extended period (unless these
arebeing kept ready for an emergency).
•Donot short-circuit batteries.
•Donot charge batteries.
•Donot throw batteries in a re.
•Keep batteries out of the reach of children.
•Never open, damage or swallow batteries or allow them to enter the environment. They can
contain toxic, environmentally harmful heavy metals.
•Immediately remove and dispose of dead batteries from the product.
•Avoid storing, charging or using the device in extreme temperatures and extremely low
atmospheric pressure(for example, at high altitudes).
4. Getting Started
Remove the battery that was already inserted into the clock, remove the protective lm if necessary as
well as the contact interrupter and the re-insert the battery with the correct polarity.
5. Operation
5.1 Setting the time
•Use the setting wheel on the rear to set the time (hours/minutes).
•After setting the time, press the setting wheel back in.
•Toset the seconds, remove the battery to stop the seconds. Put the battery back in to start the
seconds hand again at the right second.
5.2 Setting the alarm
•Move the setting wheel on the back of the alarm clock to set the appropriate alarm time.
•Toactivate/deactivate the alarm, move the slide switch to the ON or OFF position.
6. Care and Maintenance
Only clean this product with aslightly moist, lint-free cloth, and do not use aggressive cleaning agents.
Make surethat water does not get into the product.
7. Warranty Disclaimer
Hama GmbH &CoKG assumes no liability and provides no warranty for damage resulting from
improper installation/mounting, improper use of the product or from failuretoobserve the operating
instructions and/or safety notes.
8. Technical Data
“Retro” alarm clock
a
Power supply 1.5 V
1xAA battery

 Loading...