p. 15 p. 16
[14] Seat recline
• To place the backrest of one of the seats to a more reclined position open the top roof entrance by opening the zippers.
• Roll the recline grip [14a] forward or backwards for a different position untill it reaches the next position and locks into place.
• There are 3 recline positions for each seat [14b, 14c and 14d].
[15] Front covers and shades
• The trailer has a mesh cover [15a] and an additional sun shade [15b]. The mesh cover closes with a zipper. The suncover slides up
and down.
• When not in use, these covers can be stored in the top pocket [15c]. Close the pocket using the velcro to prevent the covers from
falling out during a ride.
• When needed, cover the trailer with the rain cover [15d] that is stored in the rear mesh pocket [15f]. If the rain cover is moist, dry
it properly before stowing it away.
• Aach the front of the cover to the rain cover hooks [15e] underneath the frame at the front.
[16] Suspension adjustment
• Important! The suspension should be adjusted to the load in the trailer. The suspension adjuster should be all the way to the
rear when fully loaded.
• Open the suspension adjuster [16a] and slide to the appropriate seing and then close the suspension adjuster again.
• Regularly check if the suspension adjuster is still set to the appropriate seing.
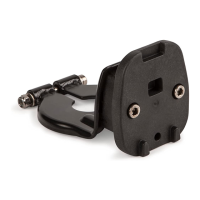
[17] Aaching the bicycle arm [17 a] to the trailer
• Slide the bicycle arm [17a] fully into the bicycle arm connection [17b] and pull the end of the bicycle arm upwards. The bicycle
arm connection buon [17c] slides forward automatically and fixes the bicycle arm.
• Pull on the bicycle arm to verify a good connection.
• Aach the safety strap [17d] to the D-ring in order to make a safe connection.
• The bicycle arm can be locked in the bicycle arm connection with the supplied key [17e].
[18] Removing the stroller wheel from the trailer
• Push the small buon [18a] and then pull the large nose buon [18b] upwards to unlock and pull the stroller wheel out of the
central connection point [18c].
• When cycling you can store the stroller wheel upside down in the central connection point. Make sure the wheel is located on
top of the central connection point and cannot rotate [18d, 18e].
[19] Aaching the trailer to the bicycle
• Place the bike and trailer on a horizontal surface before connecting the trailer to the bike.
• Pull the safety sleeve [19a] back, push the grey buon [19b] and push the bicycle arm all the way onto the hitch [19c] . Release
the buon and let the safety sleeve return.
• Verify that the bicycle arm is securely fixed by pulling on the bicycle arm.
• Wrap safety cable [19d] around bike frame and fasten the hook to the ring [19e].
• Make sure that you put the safety strap around the chain stay [19f] or seat stay [19g] of your bicycle frame.
• Important! Always adjust the pushbar to the position with the cycling logo [19h] visible when you go cycling.
• Important! Always use the safety flag when you go cycling.
• Connect the two pieces of the safety flag together and place the safety flag [19i] in the flag pocket [19j] next to the side
window. Place the safety flag on the side of the bicycle trailer that is most exposed to the road.
[20] Rear light
• Aach the red light [20a] on the pushbar. Pull the rubber elastic around the pushbar and aach it to the tracks on each side of
the light.
• Place the light on the side of the trailer that is most exposed to the road.
• About the light: Name: Presto 2; K-mark: K1180; Baeries: 2x AG13/LR44 1.5 V. (included).
• To change the baeries press each side and remove the front cover.
[21] Detaching the trailer from the bicycle
• To detach the trailer from the bicycle detach the safety strap [21a] first and then pull the safety sleeve [21b] and then press the
grey buon [21c] and pull the bicycle arm off the hitch [21d[. The safety strap can be pushed back into the bicycle arm.
• Insert the stroller wheel [21e] into the central connection point [21f]. Verify that the stroller wheel is securely fastened by
pulling the stroller wheel.
• To detach the bicycle arm from the trailer detach the safety strap [21g] first and then slide the bicycle arm connection buon
[21h] backwards. The end of the bicycle arm will drop down and then the bicycle arm can be pulled out.
• When using the stroller wheel, the bicycle arm should be stored in the pocket [21i] at the boom of the trailer.
[22] Folding the trailer
• Before folding, the bag and safety flag must be removed and the pushbar should be pushed in all the way.
• Take out the strap [22e] from the rear of the trailer to use as transportation lock or for unfolding the trailer.
• To unlock the folding mechanism: push the safety buon [22a] on both sides of the trailer and at the same time pull the fold
locks [22b] upwards.
[5] Mounting the stroller wheel (see point 18 to remove the stroller wheel)
• Insert the stroller wheel [5a] into the central connection point [5b]. Verify that the stroller wheel is securely fastened by pulling
the stroller wheel.
• The stroller wheel can be locked in forward direction. Make sure that the stroller wheel points straight ahead, and lock it in
position by pushing the buon [5c] downwards. To release it, push the buon up from underneath.
[6] Unfolding the trailer
• Leave the pushbar in it’s current position. Grab the strap [6a] at the rear and pull it upwards. The rear frame now unfolds and
the pushbar rises.
• When the rear frame unfolded fully [6b], Grab and rotate the pushbar [6c] firmly backwards into locked position. If needed help
the locking by keeping the end of the trailer steady.
• Make sure that the fold locks [6d] on both sides have locked automatically by trying to push the pushbar forwards. The locking
sleeve [6d] should be all the way down and the safety buon [6e] should be all the way out.
[7] Installing the cross bar
• Rotate the cross bar [7a] upwards, and fix it with two screws [1i].
[8] Aaching the hitch on your bicycle
• Remove quick-release or nut [8a] from the le side of your bicycle’s rear wheel axle. If your bicycle has a dropout [8d], place the
rotation-lock washer [8c] with the bend of the washer fiing inside the drop out [8d]. This helps keeping the hitch at the correct
angle, but the hitch can also be aached without it.
• Place hitch [8b] between quick-release or nut and frame. If rotation-lock washer [8c] was installed, match the ribs on the
washer, to the grooves on the hitch. Make sure the hitch orientation [8b] is simlar as shown.
• Tighten the quick-release or nut back on the axle according to the bicycle manufacturer’s instructions.
USE
[9] Using the parking brake
• To engage: Push the parking brake pedal [9a] downwards until it is locked. You may need to move the trailer slightly back and
forth for the brake to engage. Always be sure to check if the brake is engaged by pushing the trailer.
• To disengage: Pull the brake pedal [9a] upwards with the tip of your foot and the pedal [9a] rotates upwards.
[10] Adjusting the push bar height
• Adjust the pushbar height by pulling the pushbar height adjustment sleeves [10a] at both sides simultaneously and then pull or
push the pushbar to the desired height.
• Let the pushbar height adjustment sleeves go and continue to push or pull the pushbar untill both sides lock well into one of the
pushbar positions.
• Important! Adjust the pushbar to the position with the cycling logo [10b] visible when you go cycling.
[11] Hand brake
• When strolling or jogging, squeeze the central buon [11a] on the pushbar to reduce speed and aid control on inclined surfaces.
• The brake can be adjusted with the adjusters [11b] on both sides if the brake rubs against the wheel brake disc or if the brake
does not brake well or uneven.
[12] Luggage bag
• The detchable bag can hold up to max. 2 Kg when it is aached to the trailer.
• Note that stability of the trailer can be affected when overloading the bag.
• To aach the bag, hook the loops over the hooks [12a] at the back of the trailer.
• Then hook the boom bag hooks onto the strap loops [12b] at each side of the trailer and pull the straps to tighten the bag to
the trailer.
• To detach the bag, unhook all four hooks again.
TIP: When not aached to the trailer, the boom hooks of the bag can be neatly stored by hooking them to the strap loops next to
them.
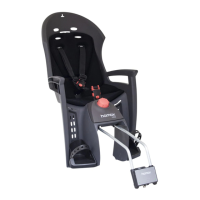
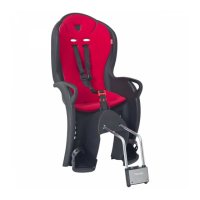
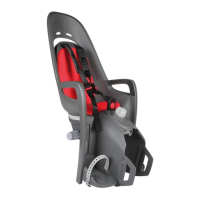
[13] 5-point safety harness
• Seat your child and guide the arms through the opening between the shoulder [13a] and waist belt [13b]. Check that the
shoulder straps are aligned with your child’s shoulders. Adjust the height by sliding the buckles [13e] above the shoulder straps
up or down.
• Connect the two shoulder strap buckles together and insert them into the buckle [13c] on the crotch strap [13d] until it locks.
Adjust the length of the crotch strap [13f] and the shoulder belts [13g] so that your child is securely tightened. Verify that the
safety harness is locked by pulling both shoulder belts.
H1603 User Manual Hamax Breeze and Cocoon, Rev. 005, 2022.02.28.indd 15-16H1603 User Manual Hamax Breeze and Cocoon, Rev. 005, 2022.02.28.indd 15-16 28/02/2022 17:25:3528/02/2022 17:25:35
 Loading...