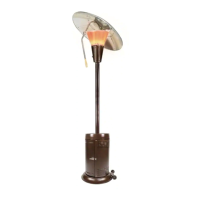
This document serves as a comprehensive Use and Care Guide for a Hampton Bay 38,200 BTU Bronze Heat-Focusing Propane Gas Patio Heater, identified by Item #882731 and Model #HD10. The manual provides detailed instructions for assembly, operation, maintenance, and safety, ensuring proper and safe use of the appliance.
The patio heater is designed for outdoor use only, providing warmth and ambiance in well-ventilated spaces. It operates on LP (liquefied propane) bottled gas and is intended to be used on a flat, level, non-flammable surface. The heat-focusing reflector directs warmth efficiently, making it suitable for various outdoor settings.
The manual begins with critical safety warnings and instructions to prevent property damage, injury, or death. Users are advised to read all installation, operating, and maintenance instructions thoroughly before using the equipment. Key safety points include:
- Gas Leaks: If a gas smell is detected, immediately shut off the gas supply, extinguish any open flames, and if the odor persists, contact the gas supplier or fire department.
- Flammable Materials: Do not store or use gasoline or other flammable vapors and liquids near the appliance. An LP-cylinder not connected for use should also not be stored in the vicinity of the heater.
- Outdoor Use Only: The heater is strictly for outdoor use and should never be operated indoors, in an enclosed area, or below ground level.
- Positioning: Maintain a minimum distance of 40 inches (1 meter) from any flammable structure or surface, including glass and PVC doors/windows, to prevent heat build-up and damage.
- Movement: Do not move the heater while it is in use. Always shut off the gas valve or regulator before moving the appliance.
- Modifications: Any modification to the appliance is dangerous and should be avoided.
- Operation: Never operate the heater with the top half (burner head, reflector, etc.) covered. Do not leave the product unattended when in use.
- Cylinder Handling: Always keep the LP cylinder level and vertical when positioning it inside the base. The cylinder must be constructed and marked in accordance with U.S. Department of Transportation (DOT) or Canadian standards, provided with a listed overfilling prevention device, and include a collar to protect the cylinder valve. It should never be filled beyond 80% full.
- Maintenance: Regularly check the regulator seal and hose for good condition and replace parts if necessary. Perform a leak test before each use, annually, or after storage, or if parts are replaced/serviced or the gas cylinder is removed/replaced.
- Children and Pets: Keep children and pets at a safe distance from the unit when in use, and ensure young children are carefully supervised when in the area of the heater.
- Windy Conditions: In high winds, particular attention must be taken. Store the unit away or ensure it is at a safe distance from other items in case it is blown over. The heat-focusing reflector should be in the full down position during rain, windy conditions, or when not in use.
- Ventilation: Ensure the appliance area is clear and free from combustible materials, gasoline, and other flammable vapors and liquids. Do not obstruct the flow of combustion and ventilation air, and keep the ventilation openings of the cylinder enclosure free from debris.
- Service: Installation and repair should be performed by a qualified service person. The heater should be inspected before use and at least annually. More frequent cleaning may be required to keep the control compartment, burners, and circulating air passageways clean.
- Flame Failure and Tilt Device: The appliance features a flame failure and tilt device that cuts off the gas supply if the flame blows out or the unit tips over. In such an event, set knobs to off and wait 5 minutes before re-lighting.
- California Proposition 65 Warning: Fuels used in liquefied propane gas appliances and their combustion products can expose users to chemicals including benzene, which is known to cause cancer and birth defects or other reproductive harm.
Pre-Assembly:
Before beginning assembly, users are instructed to check the contents of the box against the parts list and contact customer service if any parts are missing. It is recommended to cut open the carton and spread it on the floor to use as a protective surface during assembly. The assembly process requires two adjustable wrenches and a 1/4 inch spanner. Hardware, including various bolts, nuts, and washers, is provided.
Assembly Steps:
The assembly process is broken down into several steps:
- Assembling the Legs: Attach the cylinder chamber supports to the base using six bolts (CC), finger-tightening only at this stage.
- Attaching the Lower Support Pole: Secure the lower support pole to the cylinder chamber supports using six bolts (CC) and nuts (BB), again finger-tightening initially.
- Attaching the Cylinder Chamber Wall: Connect the cylinder chamber wall to the cylinder chamber supports using six bolts (AA) and nuts (BB), finger-tightening.
- Attaching the Cylinder Chamber Door: Hang the door on its hinges, ensuring correct alignment, then securely tighten all bolts.
- Attaching the Cylinder Chamber Top: Slide the cylinder chamber top over the lower support pole and secure it to the cylinder chamber supports using three bolts (AA) and three nuts (BB).
- Attaching the Upper Support Pole: Attach the upper support pole to the lower support pole using three bolts (CC), three washers (DD), and three spring washers (GG).
- Attaching the Lantern: Feed the hose through the support pole and secure the lantern to the support pole using four bolts (CC), washers (DD), and spring washers (GG).
- Attaching the Regulator and Propane Bottle: Connect the lantern and hose to the regulator and secure tightly with adjustable wrenches. Screw the regulator onto the gas cylinder (clockwise to tighten). Position the gas cylinder inside the cylinder chamber and secure it with the chain. Perform a leak test as described in the manual.
- Fitting the Reflector Handle: Secure the reflector handle to the bracket using the pre-fitted R-clip and pin.
- Assembling the Reflector: Loosely screw the side panels together using twelve bolts (AA) and nuts (BB), overlapping as shown. Attach the top panel to the assembled side panels using six bolts (AA) and nuts (BB), then fully tighten all bolts.
- Attaching the Reflector to the Lantern: Fit the reflector to the lantern using three bolts (FF) and washers (EE).
- Fitting the Battery: Unscrew the sparker button and insert the battery, positive side facing outwards.
Operation:
- Pre-Operation Checks: Ensure the gas bottle is level, gas supply is off at the regulator/cylinder valve before changing bottles, and the gas hose is free from twists, tension, cuts, cracks, or excessive wear.
- Connecting to the Cylinder: Confirm all control knobs are off, then connect the regulator to the gas bottle according to instructions.
- Lighting Instructions: Fit the battery to the sparker, turn on the gas supply at the cylinder, push and turn the dial to the position, then press the spark button to ignite. Hold the dial for at least 10 seconds to ensure it stays lit. If it doesn't light after 20 seconds, wait 5 minutes before trying again to avoid gas build-up. In windy conditions, shield from wind. Adjust the control dial to high or low flame as needed; correct operation is indicated by a predominantly blue, quiet flame with a red-hot burner mesh. If the sparker fails, a match can be used to light the heater through the gap below the burner mesh and wind guard.
- Turning Off: Push and turn the dial to the off position. Turn off the gas supply and disconnect at the cylinder when not in use. Remove the battery from the ignition unit during prolonged periods of non-use.
Leak Testing:
The heater is factory-checked for leaks. Users must perform a leak test annually and whenever the gas bottle is removed or replaced. This involves applying a 50% water and 50% dish soap solution over all gas system joints. If bubbles form, there is a leak. Turn off the gas, retighten joints, and retest. If leaks persist, do not use the heater and contact customer service. NEVER use an open flame to test for leaks.
Gas and Regulator:
The gas hose must be correctly installed within the patio heater pole and cylinder chamber to prevent trip hazards or damage. The appliance uses propane only, and the supplied propane regulator must be used. Gas bottles should never be stored on their side or indoors.
Maintenance:
- Flame Characteristic: The burner flame should be blue with a yellow tip, and the burner mesh should be red hot. If flames extend beyond the mesh, or if there is flame lift, light back, or a black spot, turn off the heater immediately and do not operate until serviced.
- Screw and Bolt Connections: All screws and bolts should be checked and tightened regularly.
- Storage: Do not expose the heater to outside weather or store in damp conditions. For long-term storage, the reflector can be removed, taking care not to damage its shape. If storing indoors, the gas bottle must be disconnected and left outside in a dry, well-ventilated area away from heat sources.
- Service: Servicing is recommended after every 100 hours of use or annually, whichever comes first. Contact an authorized agent for maintenance or replacement parts. This work must be carried out by a qualified gas technician.
- Care & Cleaning: Clean the patio heater regularly, especially after extended storage. Ensure the heater control is off, gas supply is shut off, and components are cool before cleaning. Never douse the hot heater with water.
The manual concludes with contact information for Hampton Bay Customer Service.