EasyManua.ls Logo

HAMPTON BAY HD41247 User Manual

HAMPTON BAY HD41247
2 pages
To Next Page IconTo Next Page
Page #1 background imageLoading...
Page #1 background image
Item #XXXX XXX XXX
Model #HD41247
Use and Care Guide
SOLAR STEP LIGHTS
PACKAGE CONTENTS
Assembly and Installation
1
Attaching and installing the light
2
Replacing the battery
Please read and save these instructions
q Using the 2X screws and 2X anchors supplied, install the unit (A).
Screws should be installed to match the 2 slots in the rear of the unit (A).
qRemove the 4 battery cover screws.
qRemove the battery cover.
qRemove the old battery and replace with 1 new AA NiMh
rechargeable battery of same or greater mAh. USE
RECHARGEABLE BATTERIES ONLY.
qBe sure to insert the battery in proper direction.
qReplace the battery cover.
qReplace the 4 screws.
A
B
C
A
Battery
Screws
Battery cover
A
NOTE: This operation should be done in the morning on a sunny day. This will allow
the light to receive a full 8 hours of sunlight so that the rechargeable battery can reach
maximum capacity.
Note : Clean the battery contacts and those of the device prior to battery installation.
Part Description Quantity
A
Solar Wall Lights
4
B
Screws
8
C
Anchors
8
CC
Wood
Concrete
A
NOTE: If the solar panel is covered by a protective lm, remove it before using the
product. Remove the pull-tab from the battery door. Place the solar light in a location
where it can receive a full 8 hours of sunlight to allow the rechargeable battery/batteries
to reach maximum capacity.
Question and Answer IconNeed help?

Do you have a question about the HAMPTON BAY HD41247 and is the answer not in the manual?

HAMPTON BAY HD41247 Specifications

General IconGeneral
BrandHampton Bay
ModelHD41247
CategoryLight Fixture
FinishBrushed Nickel
Voltage120 V
DimmableYes
MaterialMetal and Glass
Light Bulb TypeLED

Summary

Package Contents

Assembly and Installation

Attaching and Installing the Light

Secure the unit using screws and anchors, ensuring alignment with rear slots for proper installation.

Replacing the Battery

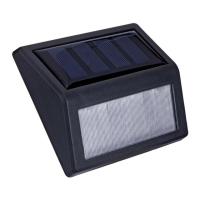
Replace battery in the morning on a sunny day to allow 8 hours of sunlight for maximum charge capacity.

Care and Cleaning

Troubleshooting

Troubleshooting: Light Not Turning On

Check solar panel location, ON/OFF switch position, and battery contact/polarity for proper operation.

Warranty Information

What is Covered by Warranty

Manufacturer warrants against defects in materials/workmanship for two years from purchase for original consumer.

What is Not Covered by Warranty

Warranty excludes products improperly installed, used against instructions, or damaged by misuse, accident, or neglect.

Related product manuals